
Xero Invoice Export
Exporting Invoices from TEQ to Xero
TEQ supports exporting invoices in Xero format, allowing you to seamlessly import them into your Xero account and keep your financial records aligned across systems.
Step 1: Set Up Export Configuration
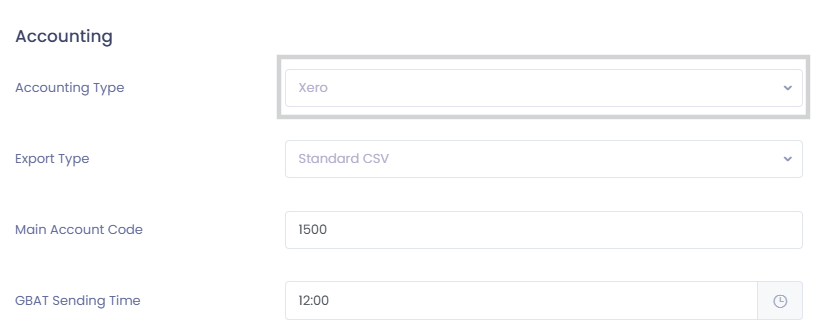
Before exporting invoices, you must select Xero as your accounting format.
- Go to Settings → Company Settings
- Scroll to the Accounting section
- From the Accounting Type dropdown, select Xero
- Click Save
💡 Tip: This setup is only required once per company.
Step 2: Match Product Account Numbers
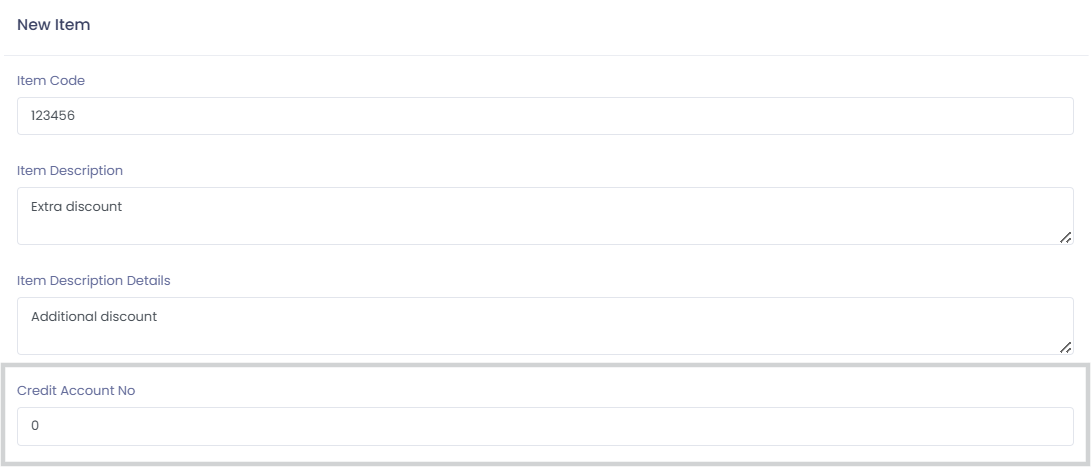
For invoices to export correctly, TEQ product accounts must match Xero account numbers.
- Go to Settings → Product and VAT
- Open the Items tab
- For each item:
- Update the Credit Account Number so it matches the corresponding Account Number in Xero
- Save your changes
⚠️ Important notes:
- VAT handling is managed entirely in Xero
- VAT codes configured in TEQ do not affect the Xero export
Step 3: Export Invoices from TEQ
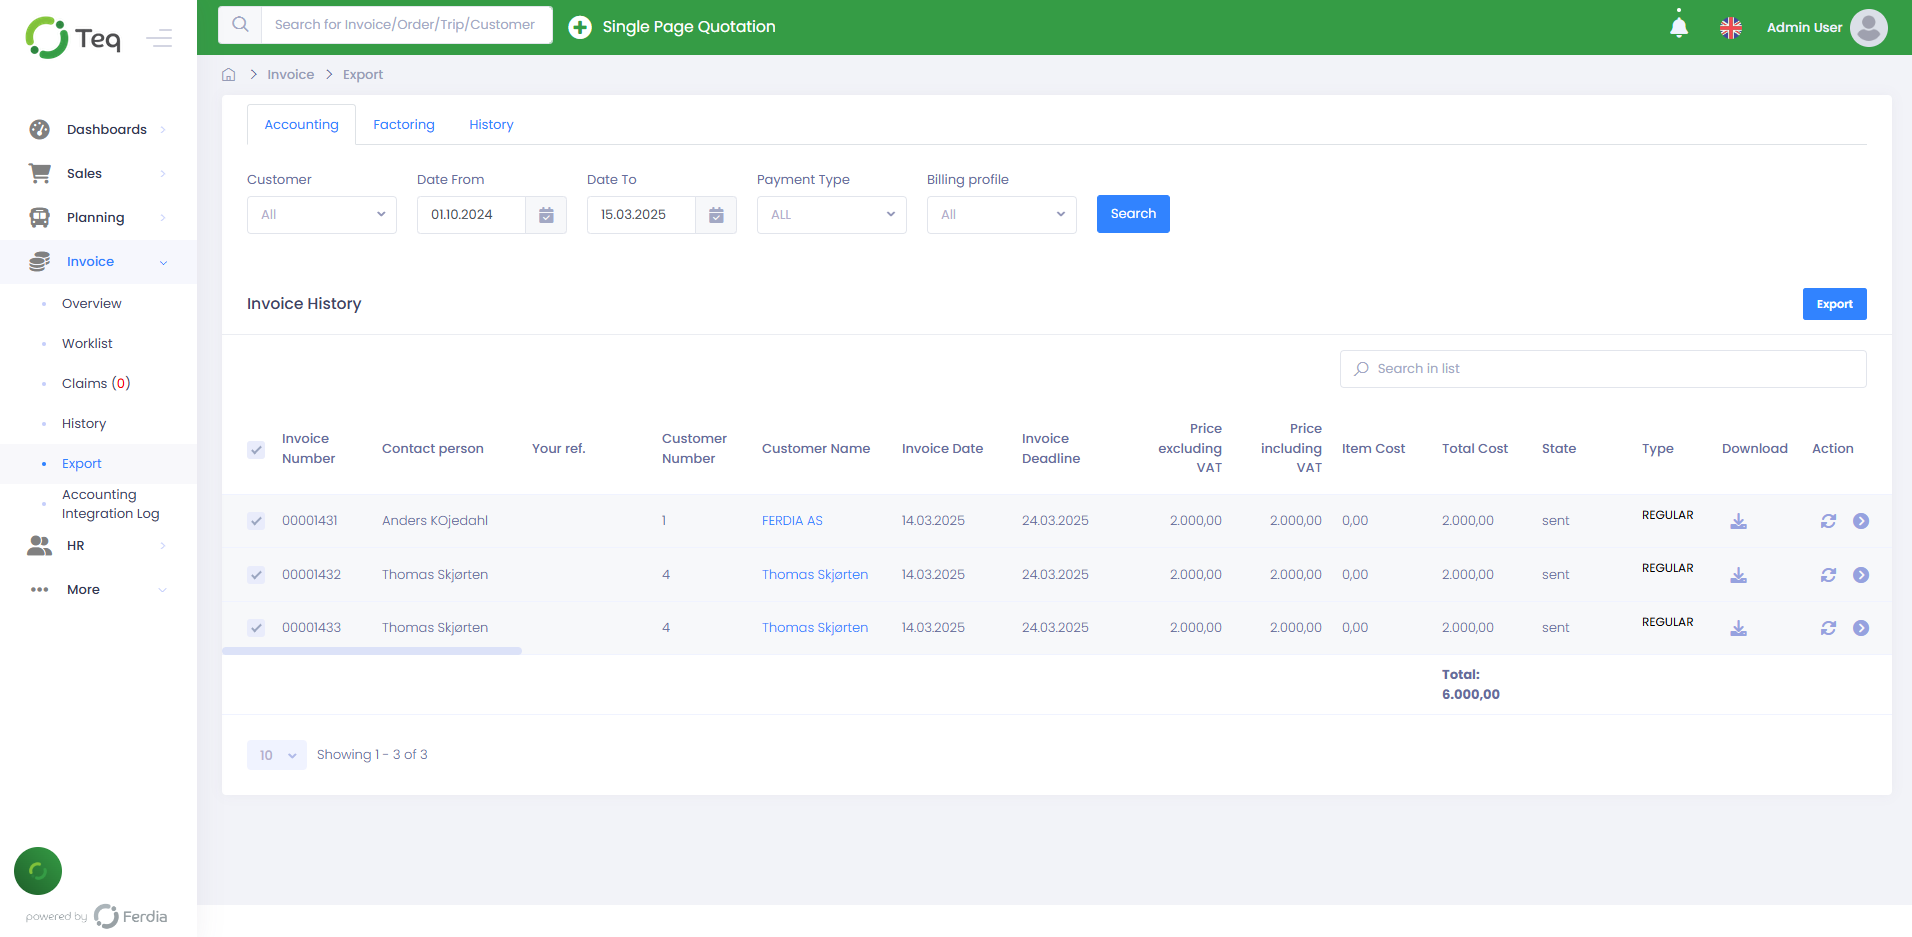
Once invoices are created and ready:
- Go to Invoice → Export
- Select the invoices you want to export
- Click Export
A file formatted for Xero will be generated and downloaded to your computer.
Step 4: Import Invoices into Xero
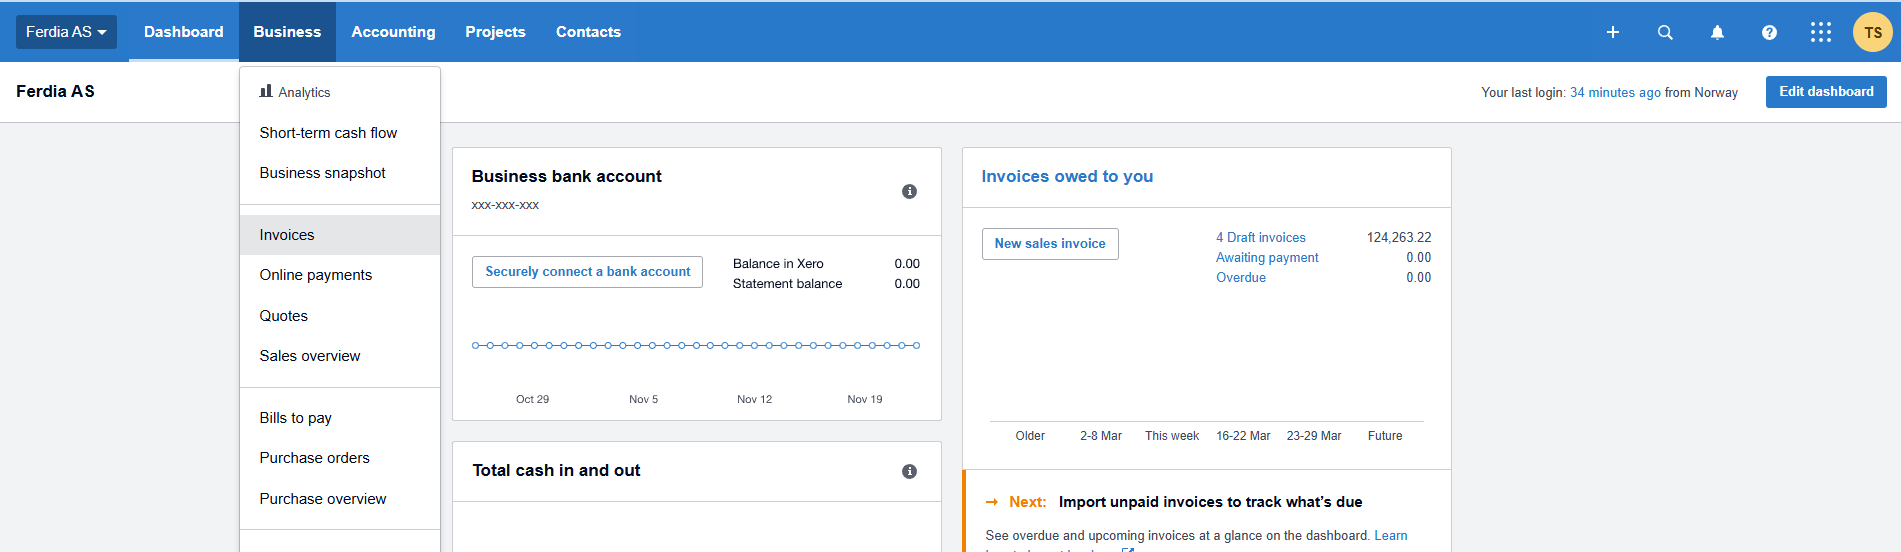
- Log in to Xero
- Navigate to Business → Invoices
- Click Import
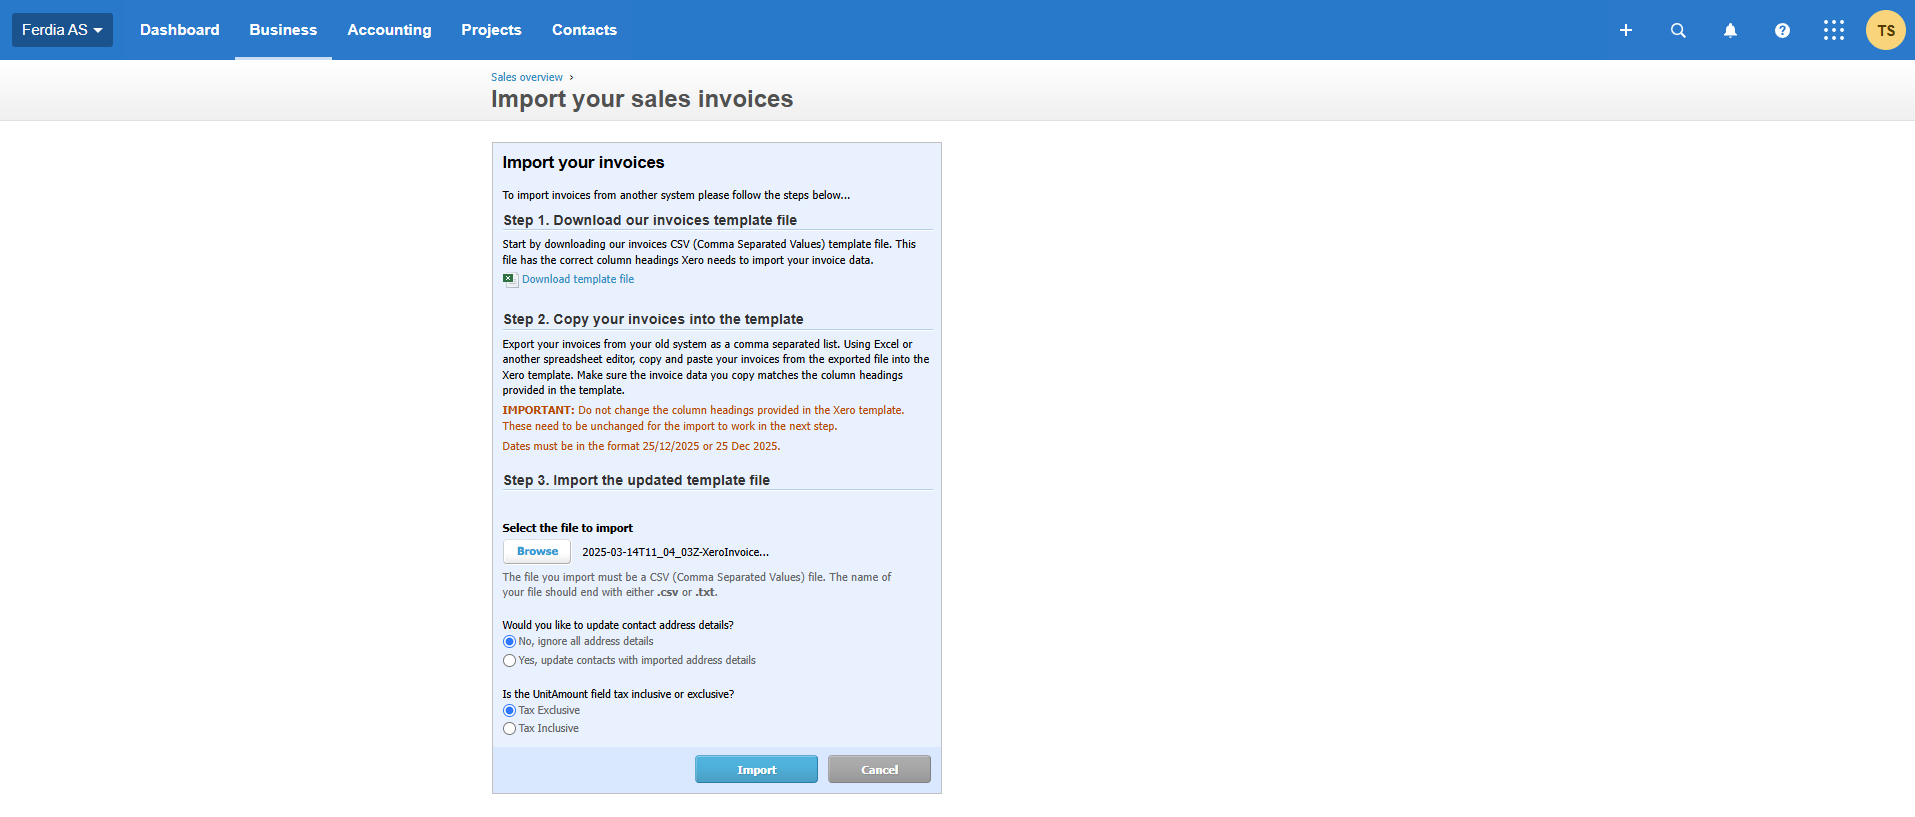
On the Import your sales invoices screen:
- Click Browse and select the file downloaded from TEQ
- Choose whether Xero should update contact address details
- ⚠️ Select Tax Exclusive (required, as TEQ exports amounts this way)
- Click Import

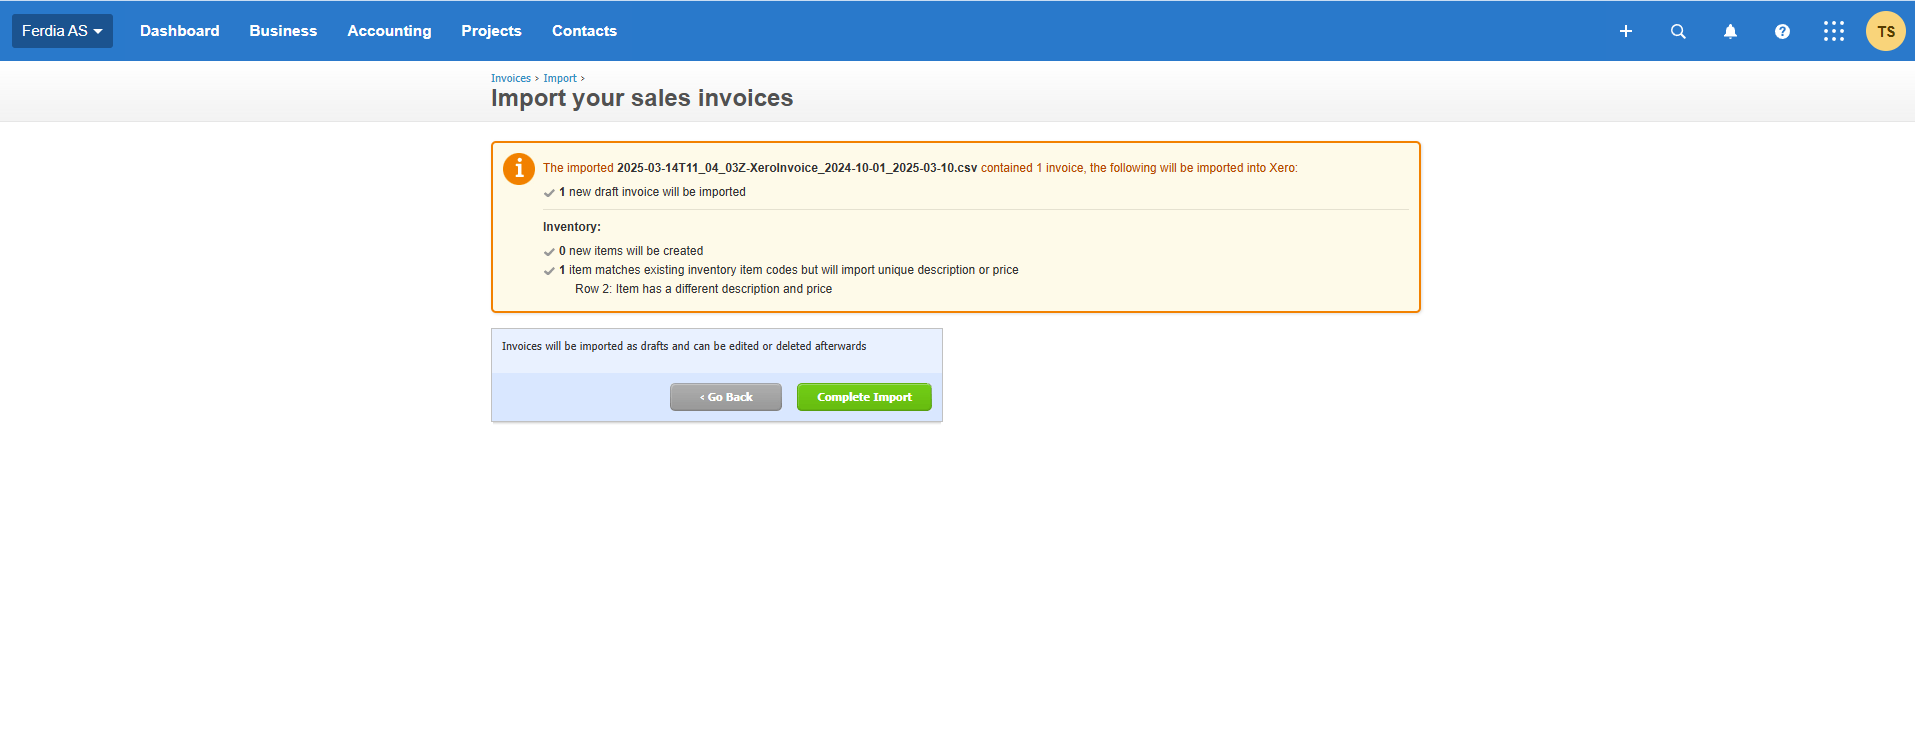
Step 5: Review and Complete Import
- Xero will show a summary of the imported invoices
- Review the data carefully
- Click Complete Import
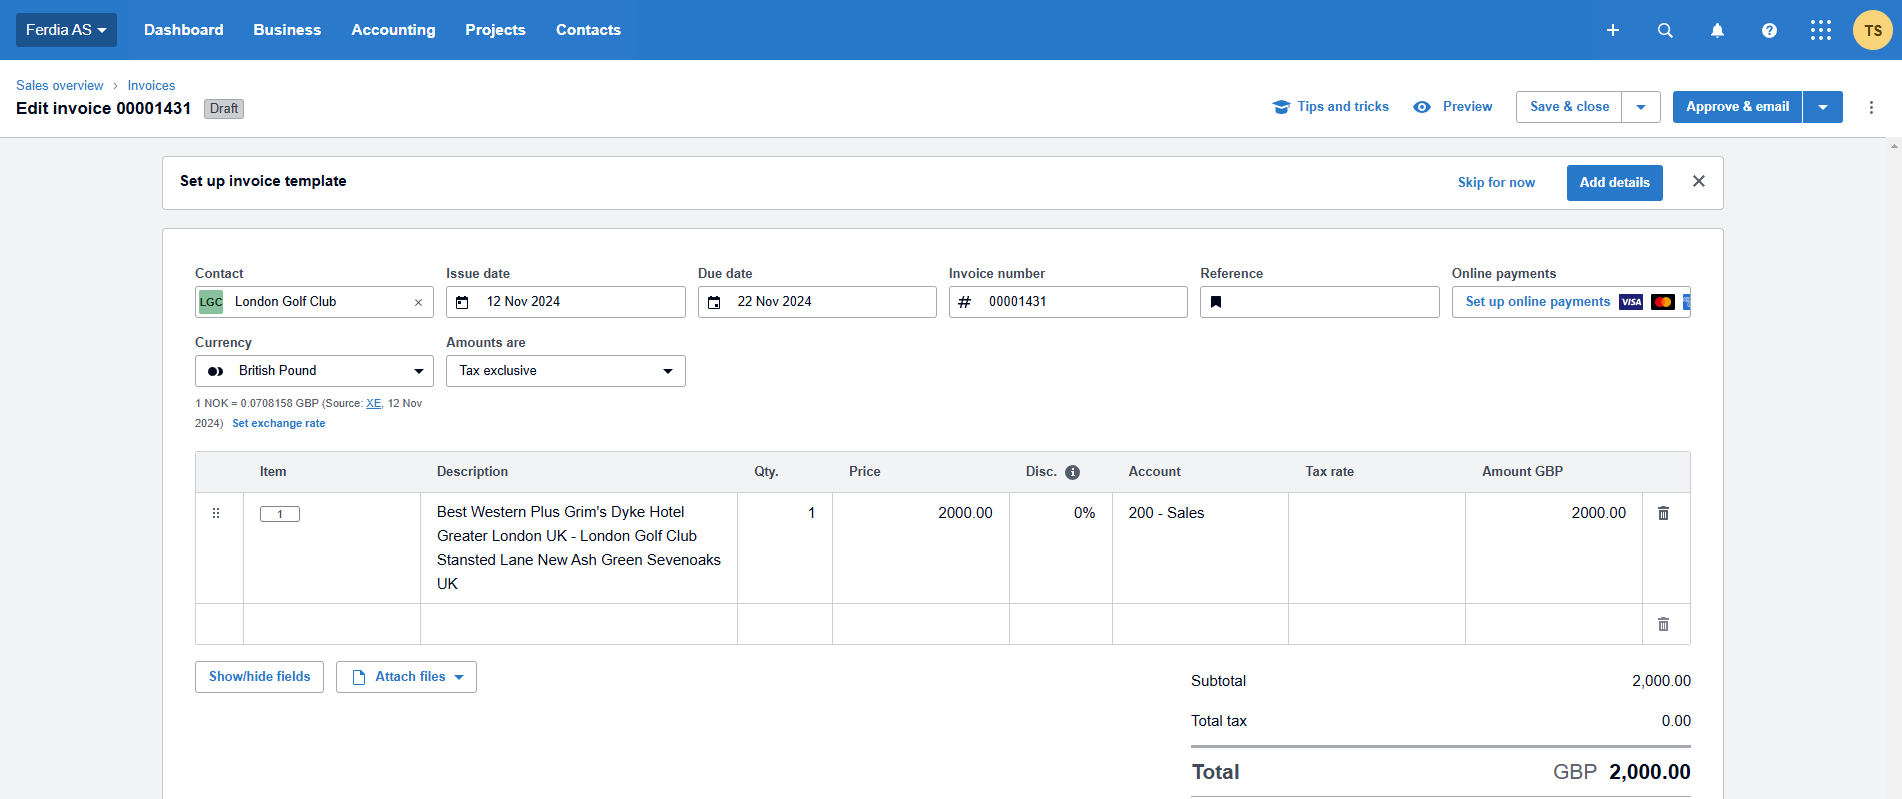
The invoices will now appear under Invoices → Draft in Xero.
Open any draft invoice to review details before approval.

🛠 Troubleshooting
Invoices fail to import into Xero
- Ensure Accounting Type is set to Xero in TEQ
- Confirm the export file was generated from Invoice → Export
Account mapping errors
- Verify that each item’s Credit Account Number in TEQ exactly matches the Account Number in Xero
VAT looks incorrect in Xero
- Check VAT settings directly in Xero (VAT is not controlled by TEQ during export)
Import option not available in Xero
- Confirm you have sufficient permissions in Xero to import sales invoices
Still having trouble?
- Contact TEQ Support with the export file name and a screenshot of the error message in Xero.