
User Groups
Managing User Groups in TEQ
User Groups provide a flexible way to manage access by combining multiple User Roles into a single group. This is ideal when employees need access to several areas of TEQ without creating new or duplicate roles.
For example:
- A Sales + Planning user group gives an employee access to both Sales and Planning features using existing roles.
This approach saves time, keeps permissions consistent, and simplifies access management.
Step 1: Access User Groups
- Go to Settings → Admin → User Groups.
- From here, you can view, edit, or create user groups.

Step 2: Create a New User Group
- Click ➕ New Group.
- Fill in the group details:
- 🏷️ Group name
- 📝 Description (optional, but recommended)
- 👤 User Roles → Select all roles this group should include
- Save the group.
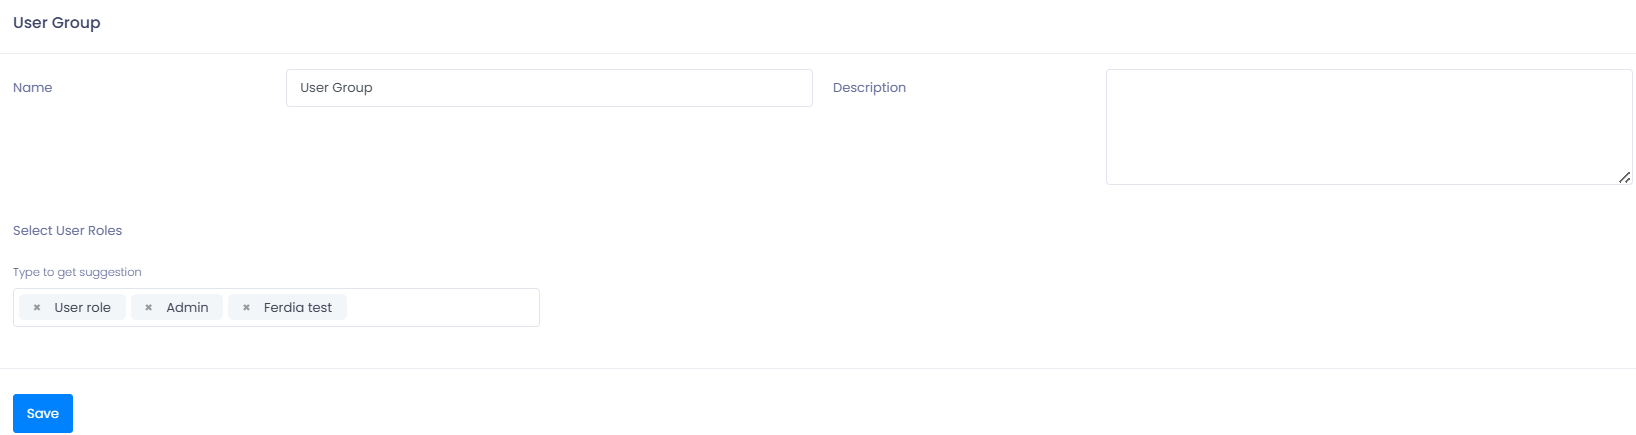
💡 Tip: Think of User Groups as role “bundles.” Combine roles logically based on employee responsibilities rather than creating new roles.
Step 3: Assign User Groups to Employees
- Go to Settings → HR → Employees.
- Find the employee and click the Details icon.
- On the employee card, click Edit Access (top right).
- Select the appropriate User Group.
- Save your changes.
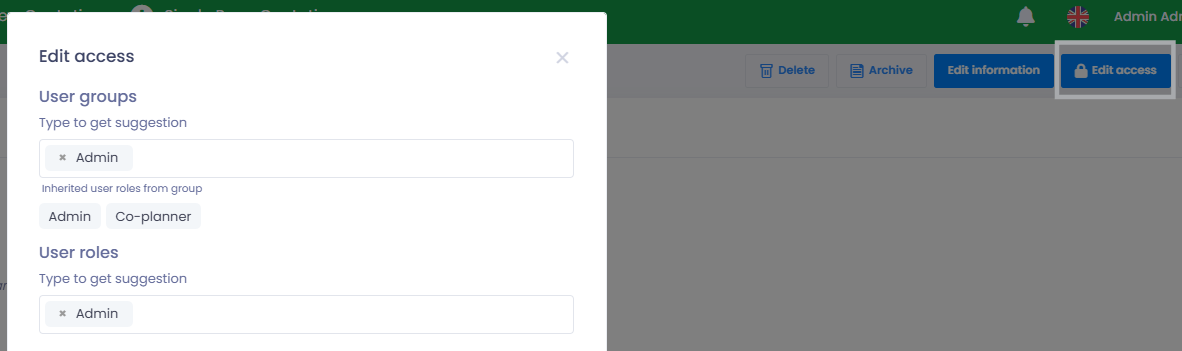
The employee will now inherit all permissions from the roles included in the group.
🛠 Troubleshooting
User Group not visible when assigning to employees
- Make sure the group was saved successfully.
- Refresh the page after creating the group.
Employee missing access even after assigning a group
- Verify the correct roles are included in the User Group.
- Log the employee out and back in to refresh permissions.
Conflicting access or too many permissions
- Review the roles included in the group and remove unnecessary ones.
- Avoid overlapping roles with conflicting permissions.
Changes not taking effect immediately
- Refresh the browser.
- Ask the user to re-login to TEQ.
Still having trouble?
- Contact TEQ Support with screenshots of the User Group configuration and the employee card.