
Creating a Quotation
Creating a Quotation in TEQ
Quotations allow you to build and send detailed trip offers directly to customers. Once sent, customers can accept or decline the quotation via email, and accepted quotations automatically move into the planning process.
Step 1: Start a New Quotation
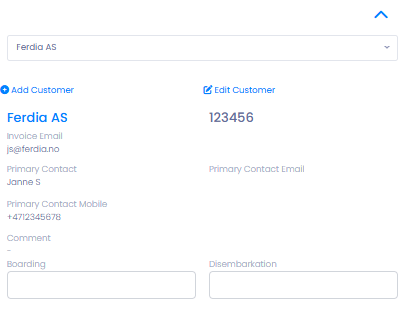
- Click New Quotation in the top menu.
- A new quotation form will open.
- Select an existing customer or click to create a new customer.
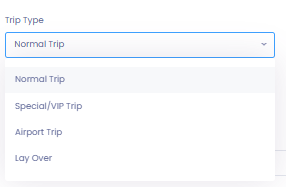
Step 2: Select Trip Type
Choose the Trip Type that best matches the nature of the booking. Trip types affect available fields, planning indicators, and workflow reminders.
Available trip types include:
- Normal Trip
A standard trip from one location to another.
Use this for regular transport without special conditions. - Airport Trip ✈️
Select this when the trip goes to or from an airport.
This enables: - Flight number input
- Easier communication with airports
- Airport-specific indicators during planning
- Layover Trip 🏨
Use this when the trip spans multiple days and the driver needs to stay overnight.
When selected: - A hotel icon appears in planning views
- Planners are reminded to book accommodation for the driver
You can edit the default trip types provided by TEQ or create your own custom trip types to better match your operations. Choosing the correct trip type is important, as it ensures the appropriate planning indicators and functionality are available later in the workflow.
Each trip type has its own customizable color, making it easy to recognize what type of trip you’re working with at first glance in the Trips List and planning views.
👉 For detailed setup instructions and best practices, see the related article: Trip Types
Step 3: Choose How to Create the Quotation
You can decide how the quotation should be generated:
- From Template
Select an existing template if the same trip details are used frequently (e.g. school routes, shuttle services, fixed customer trips).
Templates help: - Save time
- Ensure consistency
- Reduce manual input errors
- From Scratch
Start with a blank quotation and manually enter all trip details.
Best for one-off or highly customized trips.
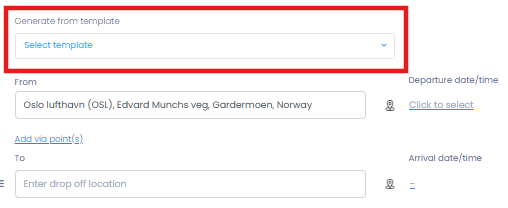
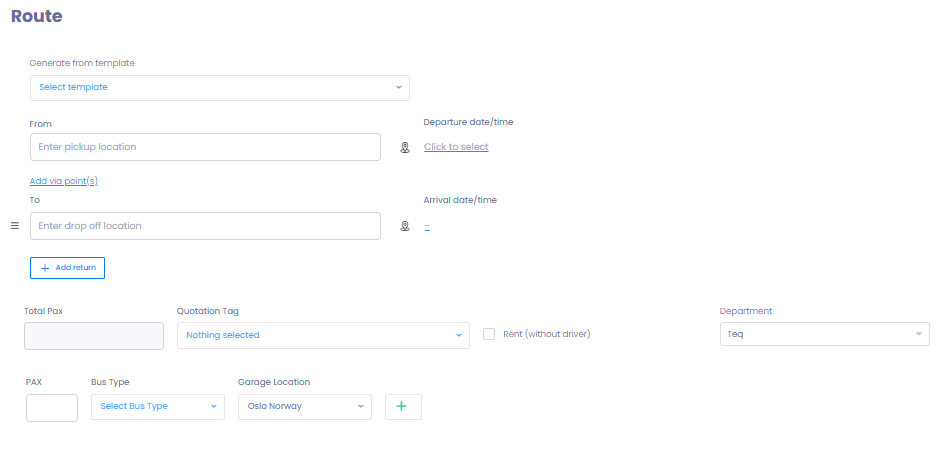
Step 4: Fill in Route Details
In the Route section, enter all required information:
- Departure date & time
- Via points (optional)
- Arrival date & time
- Radius for geofencing (optional)
- Garage location
- Bus type
- Number of passengers
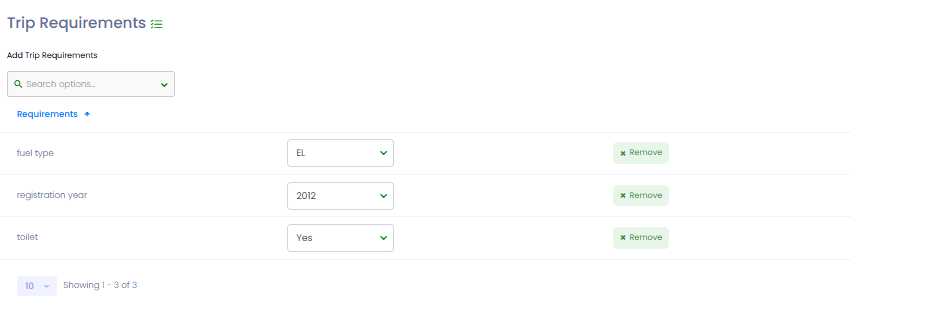
Step 5: Add Trip Requirements
You can define Trip Requirements to ensure only suitable vehicles are available during planning.
Examples include:
- 🌱 Emission standards
- 🪑 Onboard amenities
- 🚐 Vehicle age or registration year
These requirements:
- Filter available vehicles automatically
- Display visual indicators in Planning and Trip List
- Show non-blocking warnings if a non-compliant vehicle is selected
See the dedicated article Trip Requirements for full setup details and examples.
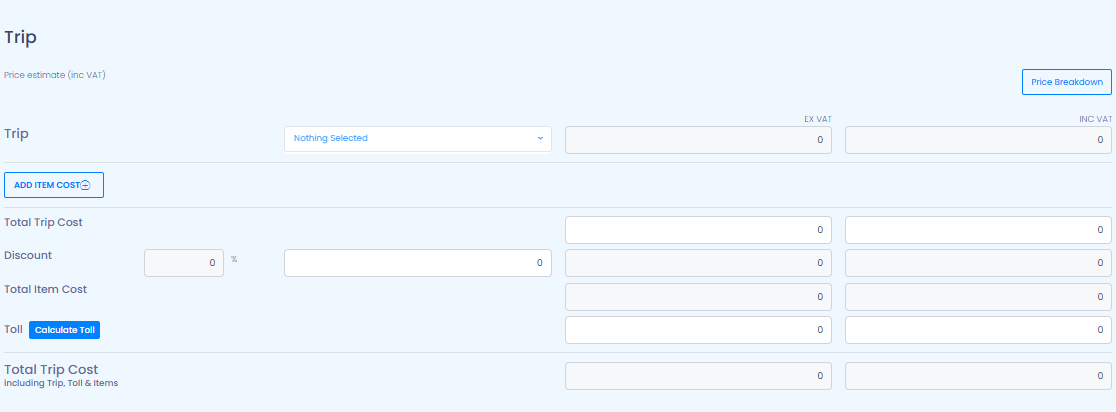
Step 6: Add Pricing
In the Price section, fill in all cost-related fields:
- Base price
- Additional costs (e.g., cleaning, waiting time, etc.)
- Tolls (if applicable)
- Discounts (optional)
💡 Tip: Always double-check pricing for accuracy before sending the quotation.
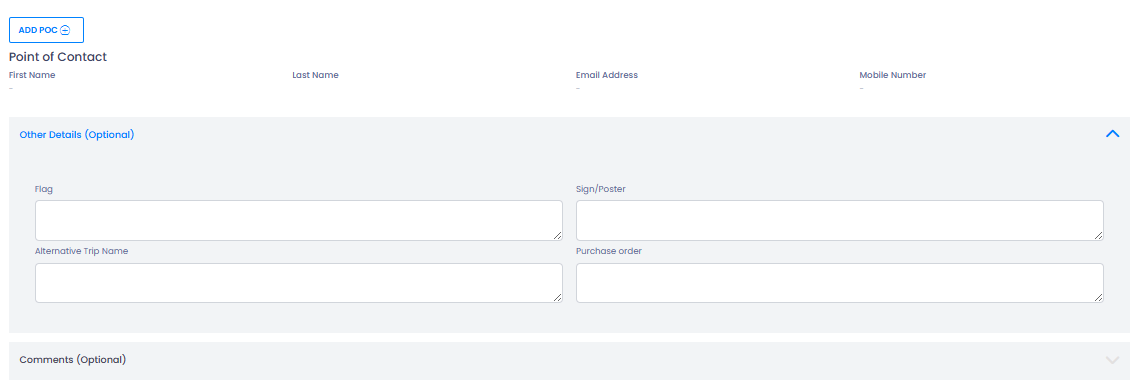
Step 7: Enter Contact Information
In the Info section, provide:
- Contact person details
- Additional comments or instructions
- Attachments (optional)
Step 8: Review and Send
- Go to the Summary section.
- Review all details entered in the quotation.
- Choose one of the following:
- 📤 Send quotation — Customer receives an email and can accept/decline.
- 💾 Save as Draft — Keep working on it later.
🛠 Troubleshooting
Quotation won’t send
- Ensure all required fields are completed.
- Check that the customer email is valid.
- Refresh the page and try again.
Customer didn’t receive the quotation
- Confirm the email is correct in the customer card.
- Ask the customer to check spam/junk folder.
- Resend from Sales → Quotations.
Pricing doesn’t appear correctly
- Verify item codes and VAT settings in Settings → Products & VAT.
- Make sure the correct vehicle and travel type are selected.
Unable to save as draft
- Confirm your user role has access to create quotations.
- Clear your browser cache if the save button is unresponsive.
Trip type options missing
- Check that trip types are enabled under Settings → Admin → Trip Types
- Verify your user role has access to Sales features
Templates not available
- Confirm templates exist under Sales → Templates
- Ensure the selected customer has access to the template
Vehicle requirements not applied
- Verify requirements were added before saving the quotation
- Check if default requirements are set on the customer card
Still need help?
- Contact your TEQ administrator or reach out to TEQ Support with the quotation ID for faster assistance.