
Working with Fixed Trips
The Fixed Trips functionality of TEQ provides a very flexible way of working with trips that repeat on a regular basis. This article describes different ways of working with Fixed Trips to solve various business requirements.
Shift Templates
At the base of the Fixed Trips functionality is Shift Templates. A Shift Template contains information about the different driving-legs of the shift (called sub-trips), information about the payable time (to the driver), the needed withdrawal- and delivery-time of the vehicle to perform the shift and optionally the price the charge the customer for performing a shift.
Creating a new Shift Template
To create a new Shift Template navigate to Sales -> Fixed Trips and choose the tab Manage Shift Template. From here press the button +Create Shift to define a new Shift Template.
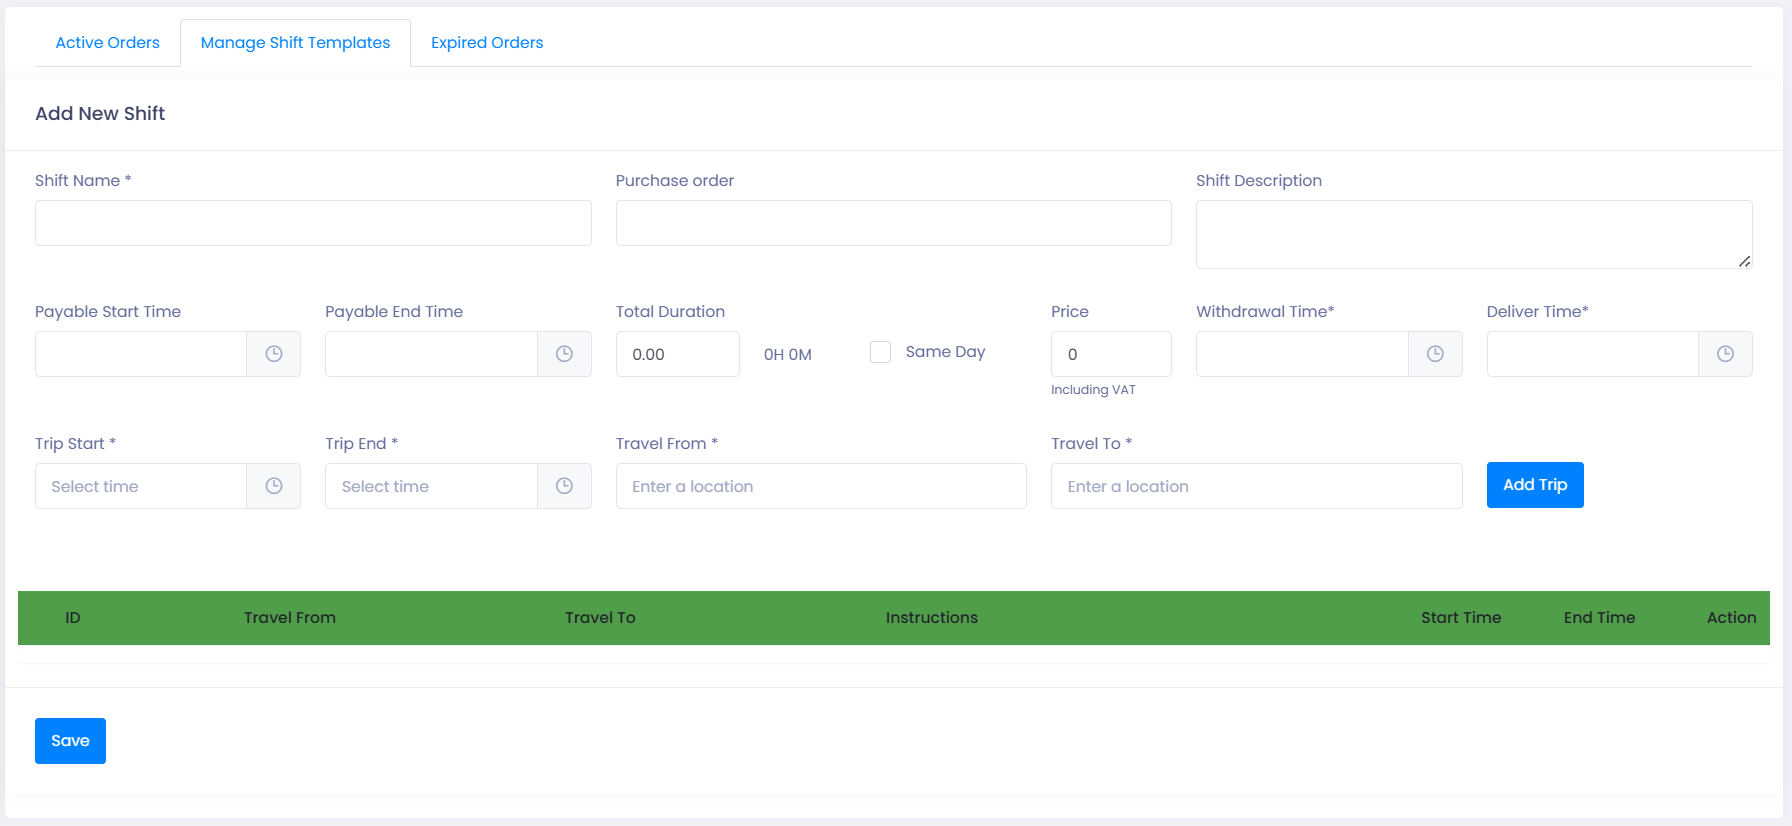
The top-part of the screen allows you to define general information about the shift.
Here you can input a name for the shift (required), a Purchase order and a description of the shift.
In the next section you define how this shift will be payable for the driver. You can define a Payable Start Time and Payable End Time for the shift. The Total Duration will be calculated based on these values, but can be overridden.
You can also provide information about the Price performing an instance of the shift should be charged to the customer.
You must also provide the Withdrawal Time and Deliver Time for the vehicle used to perform the shift.
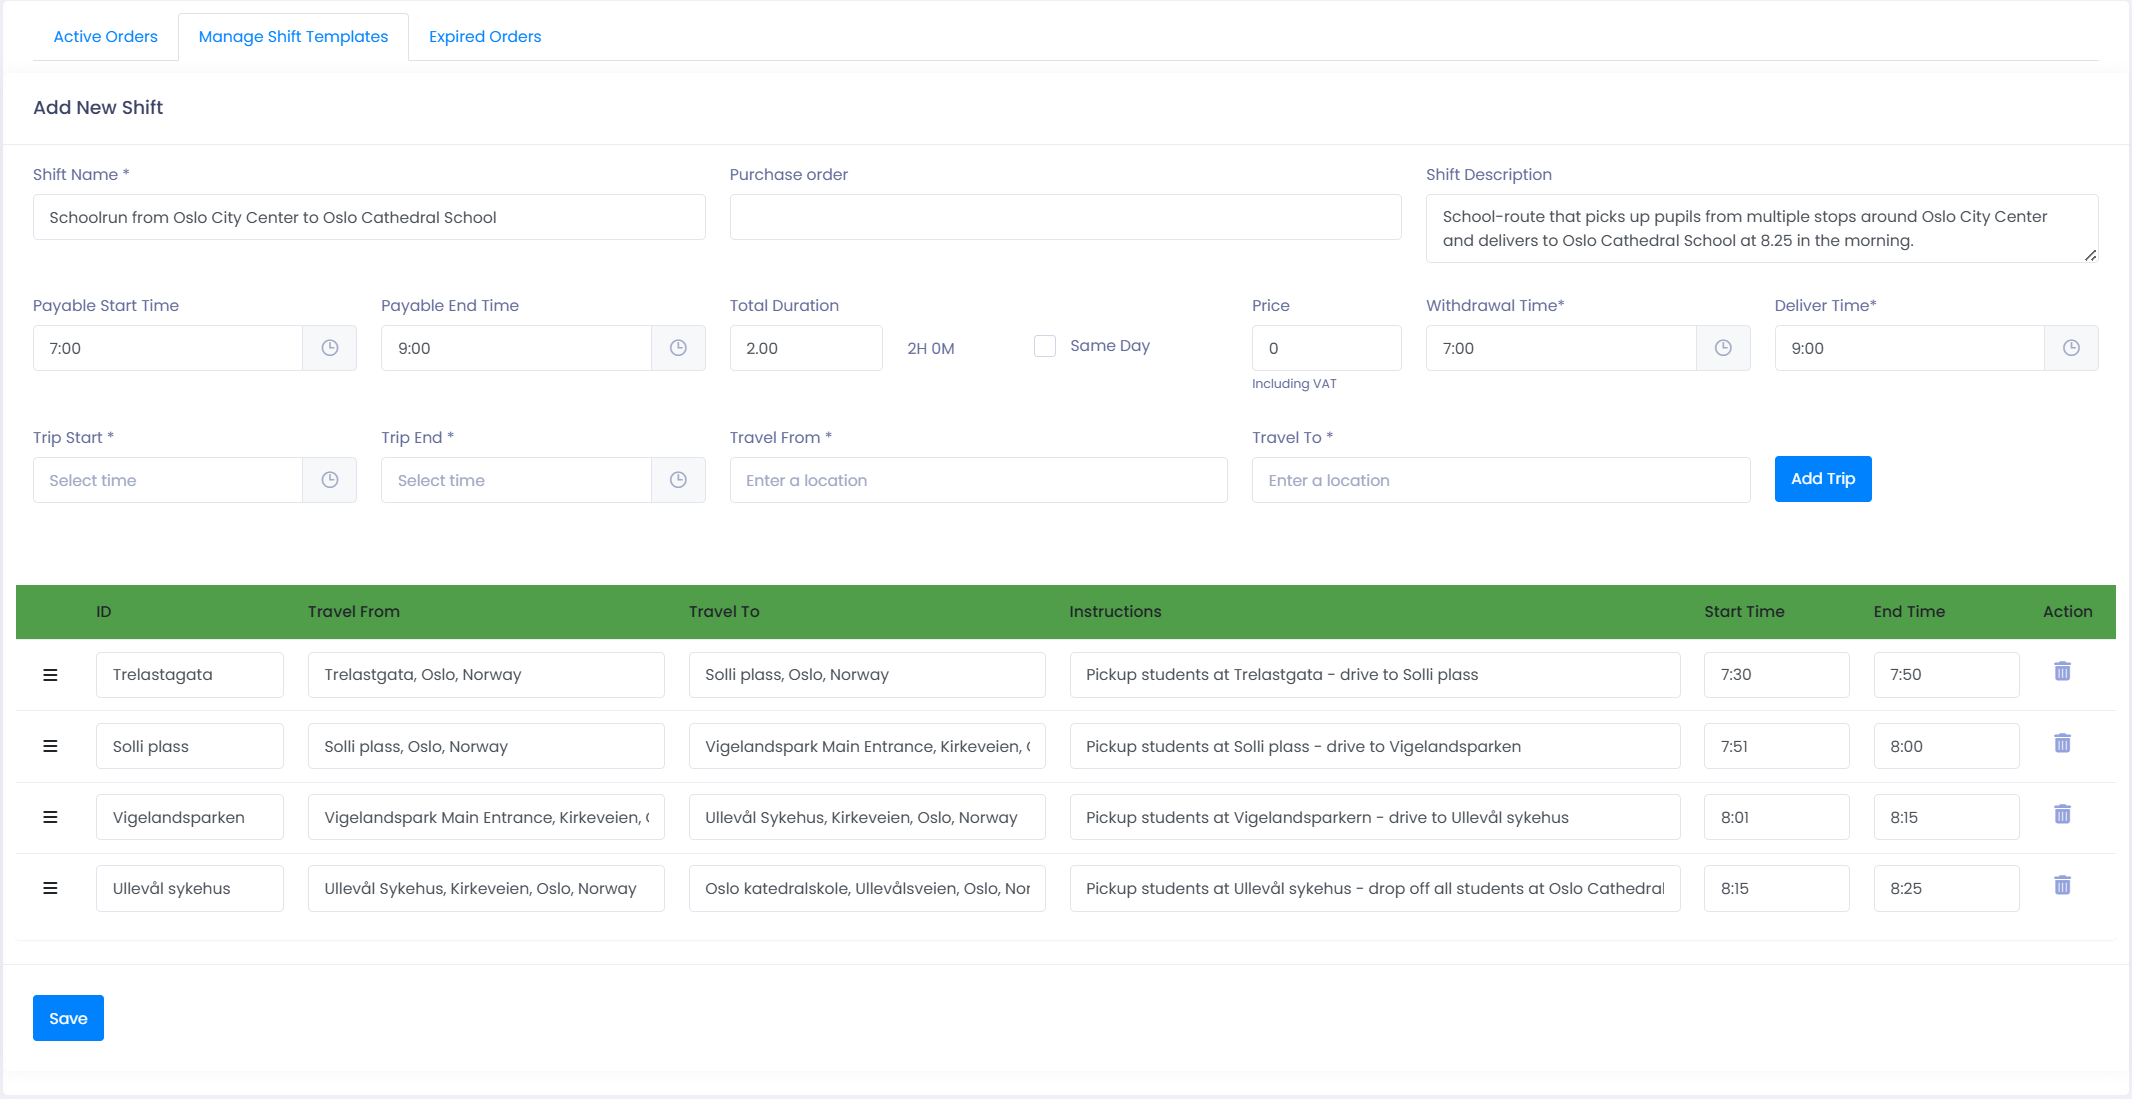
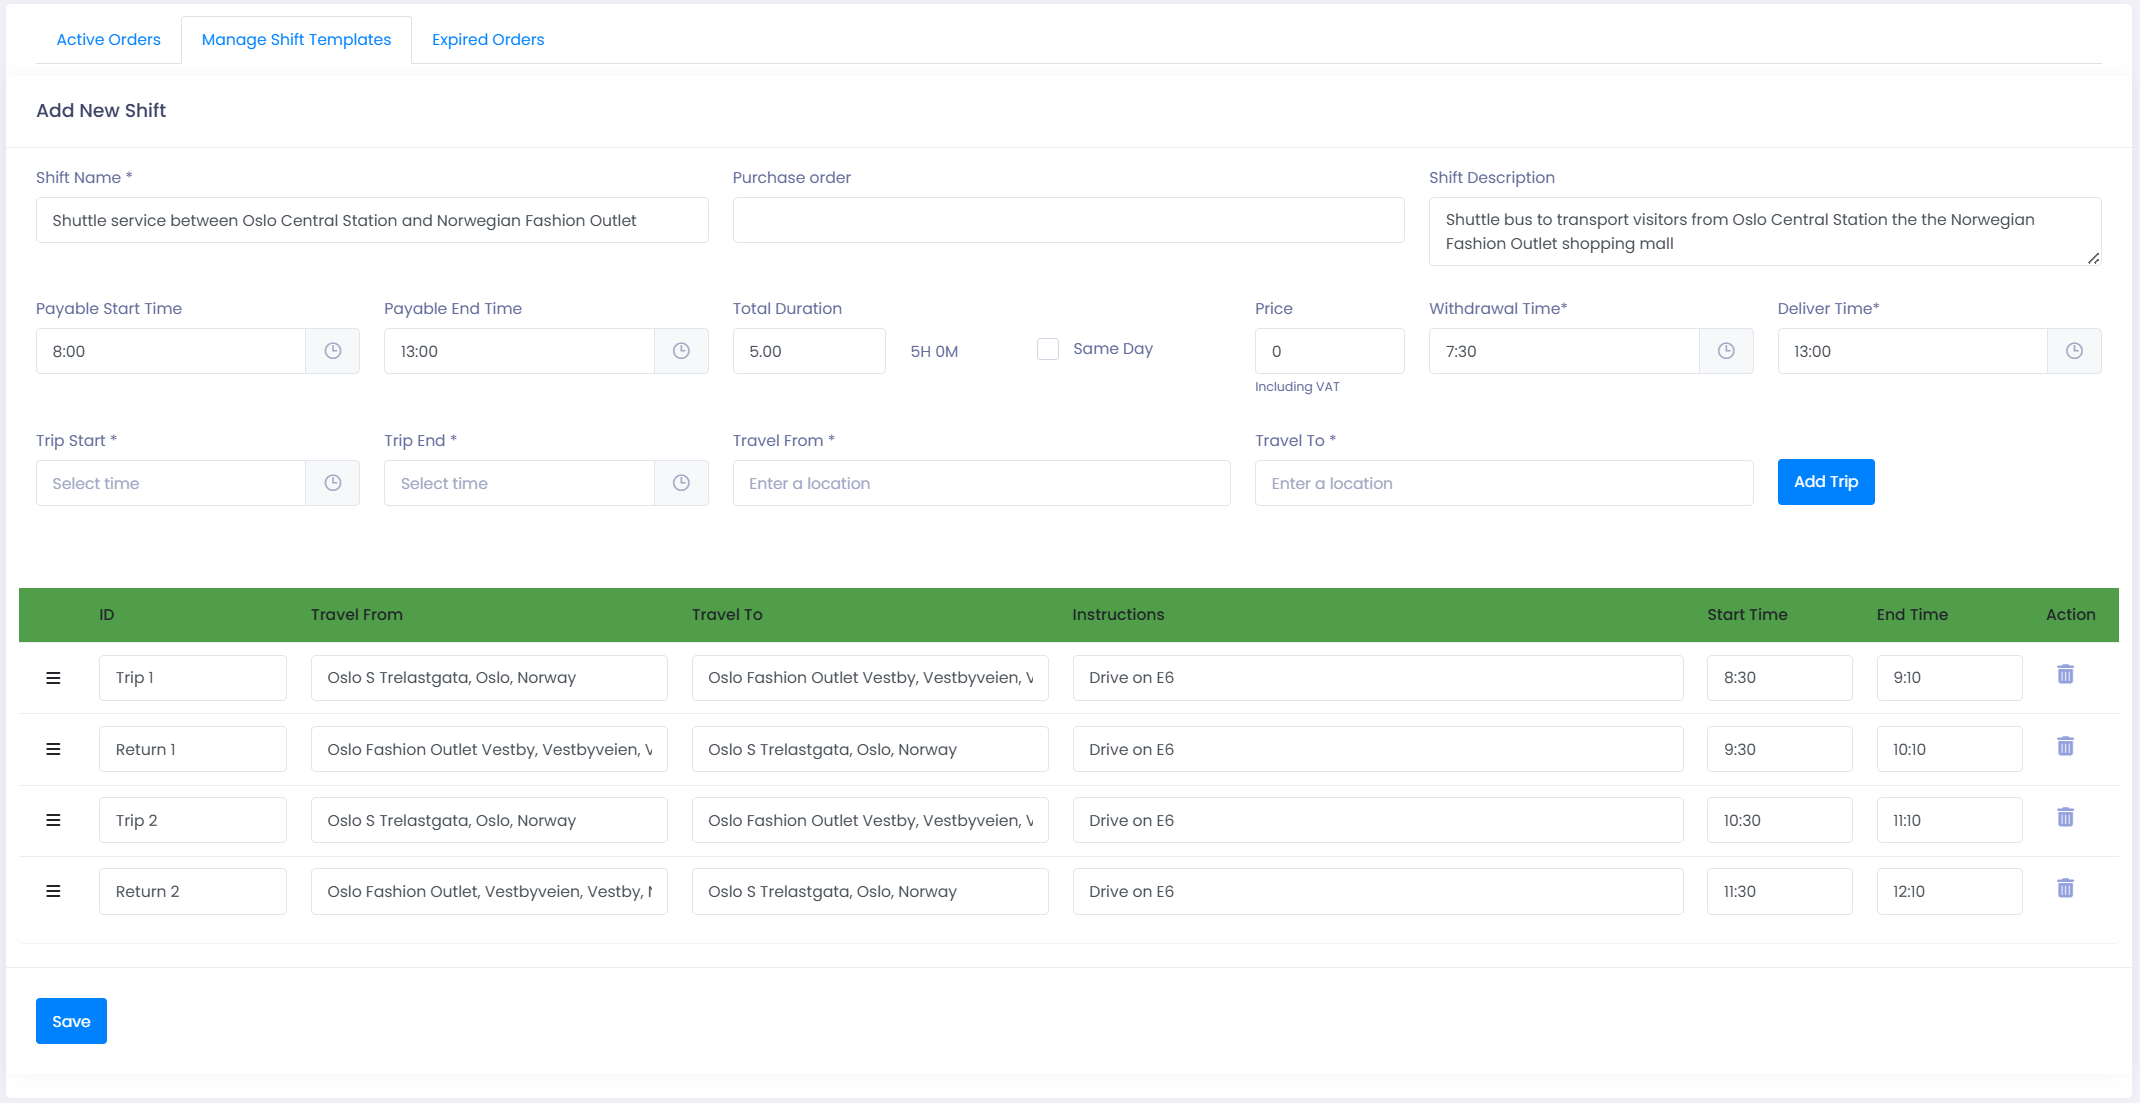
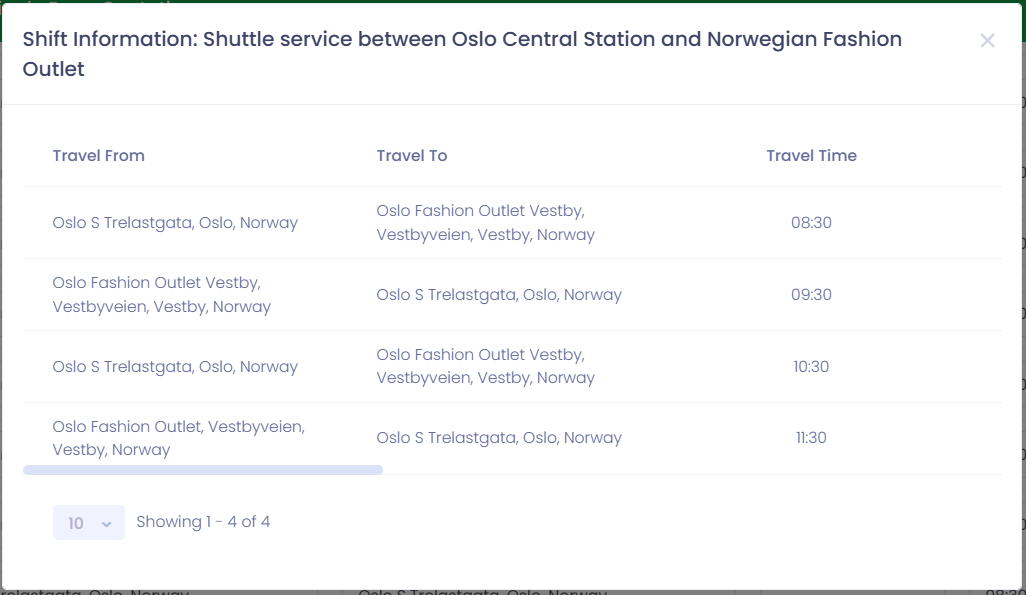
In the last section you define the different sub-trips of the shift, this flexible solution allows you to define the driving-contents of the shift. For example you can define a shift that drives back and forth between point A and B multiple times a day, or a route that stops at multiple points before arriving at its final destination.
Below you can see a couple of examples of Shift Templates.
Fixed Trip Orders
A Fixed Trip Order is an order that utilizes a Fixed Trip Template and sets up the actual trips to be performed within a specific time period. The Fixed Trip Order is connected to a given customer and defines how many times a Fixed Trip Template should be repeated and at what regularity. The order will generate a number of actual trips/shifts to be performed.
Creating a Fixed Trip Order
To create a new Shift Template navigate to Sales -> Fixed Trips and choose the tab Active Orders. From here press the button +Create Fixed Trip to define a new Fixed Trip Order.
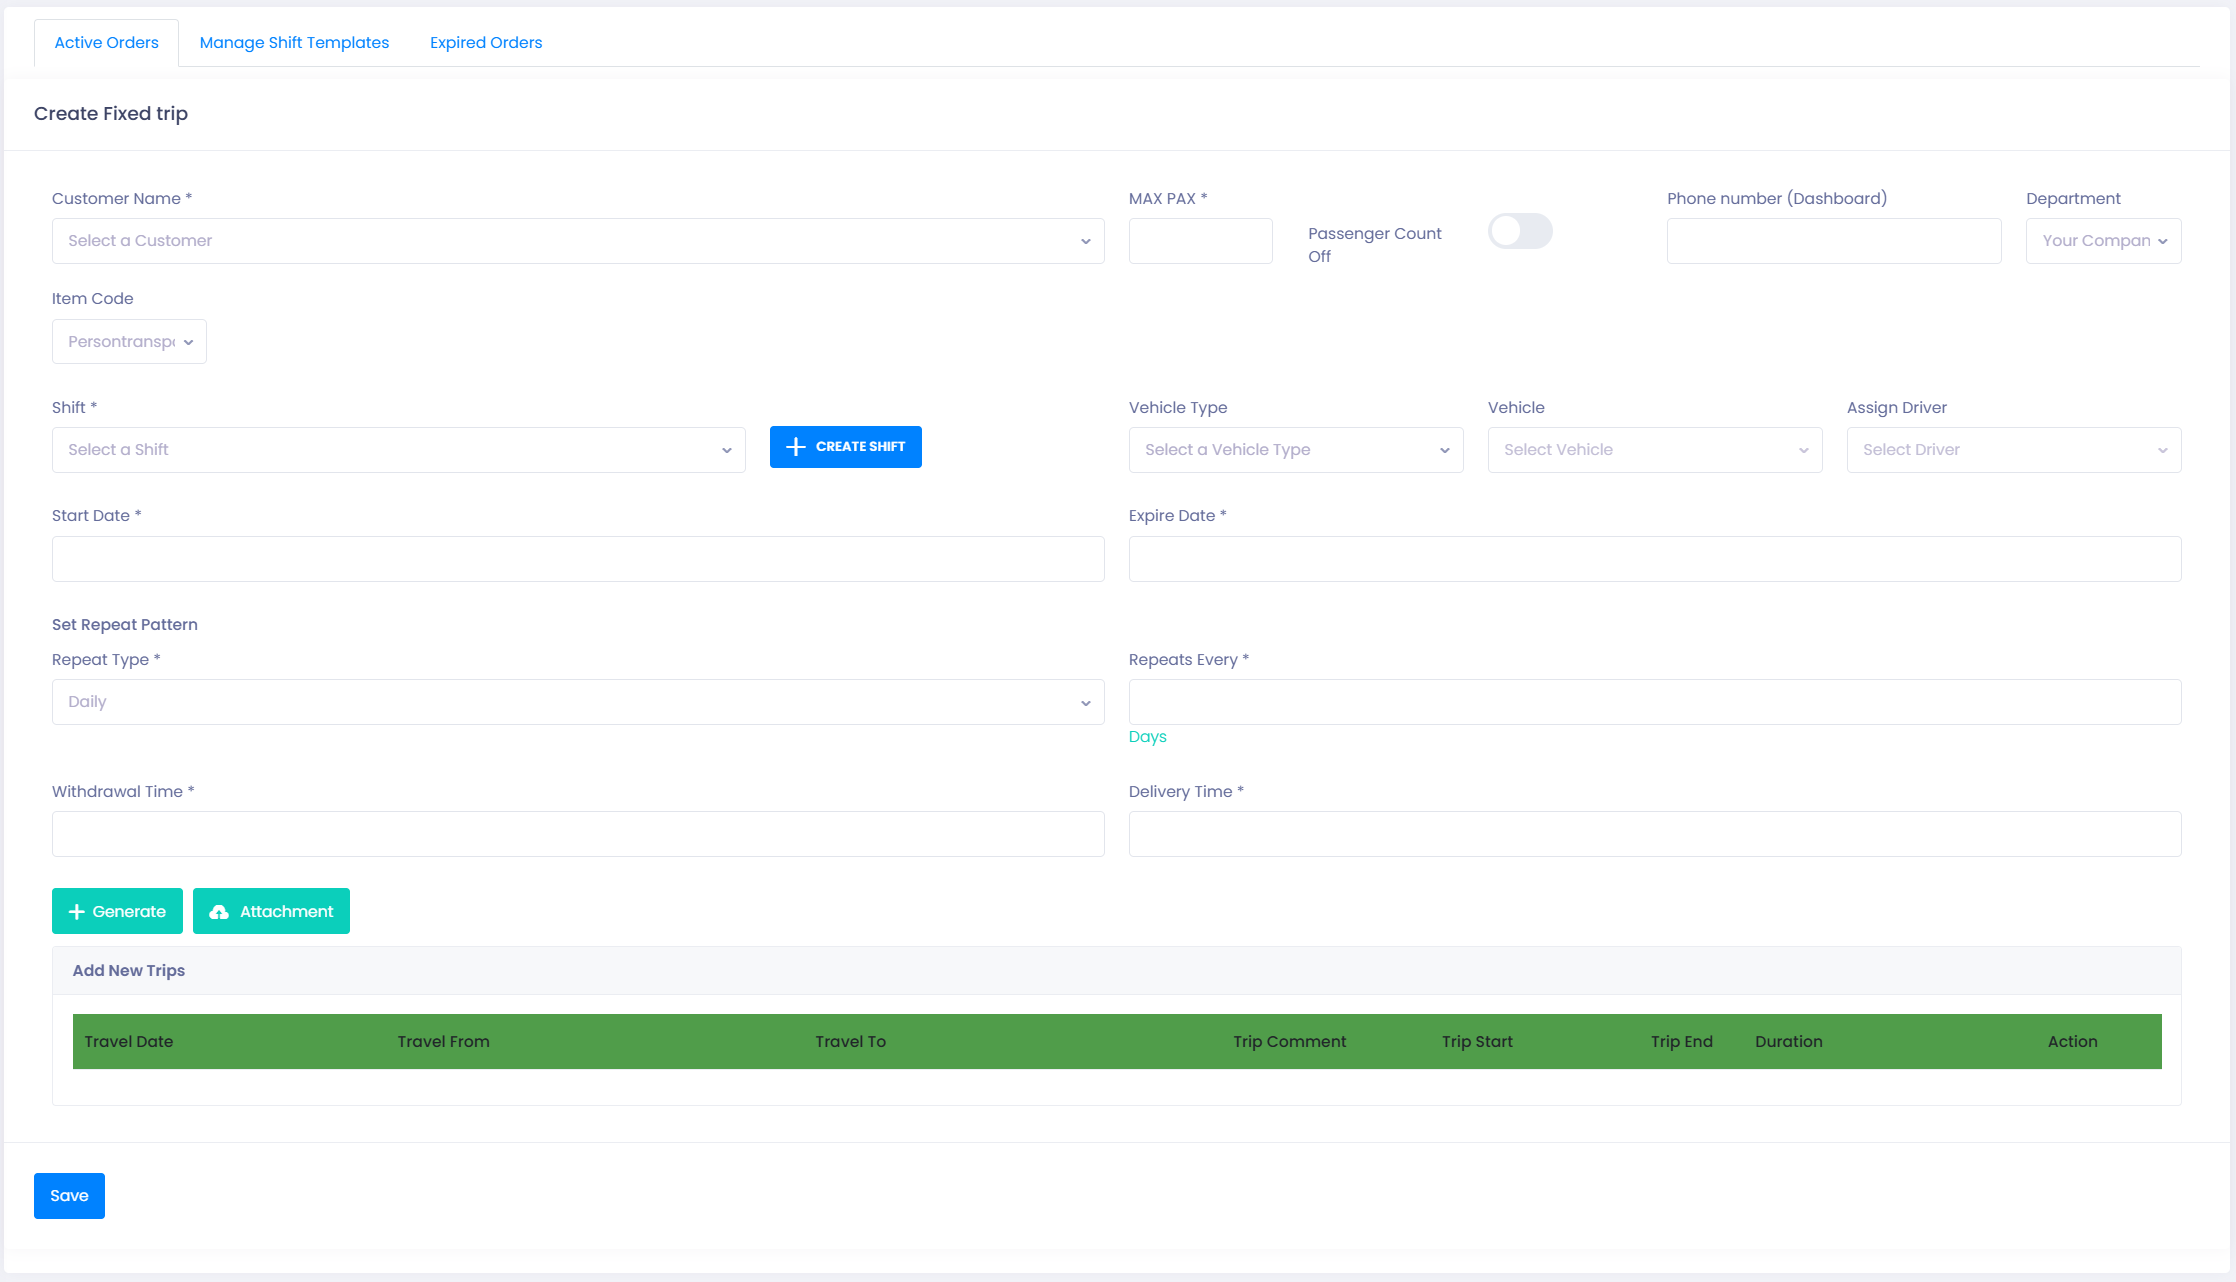
The first required field to create an Fixed Trip Order is to choose the customer for the order, this is done in the drop-down box Customer Name. Next you need to set a maximum number of passengers that will be present on this on trips in the order, this information will be used by the system to determine the type of vehicle that is required to plan on the trips.
There is also a function in the system that allows the driver to count the number of passengers that is present in the vehicle for the different parts (Sub-Trips) of each trip in the order. By default this functionality is turned On but you can deactivate this function for each separate order.
The field Phone Number (Dashboard) allows you to specify a phone-number that will be visible on the dashboard for the operations-personnel.
You can also provide which Department this order will be connected to.
The field Item Code allows you to choose which Item Code will be used for invoicing of this order.
The next section of the screen allows you choose which Shift Template should be used for this order, as described above the Shift Template is what describes the actual trips to be performed at a regular basis. You also have the option to create a new shift directly from this screen.
For each Fixed Trip Order you have the option to specify the type of vehicle should be used to perform this order. You can either specify a Vehicle Type or even a specific Vehicle that will always be used. If a specific vehicle is chosen, trips in this order will be automatically planned for this vehicle.
You also have the option to choose a designated Driver for this order. If a driver is chosen all trips in this order will be automatically planned to the driver.
The next part of the screen allows you to specify the schedule and regularity of the order.
First you need to specify the Start and End Date of the order. Then you need to specify the Repeat Pattern that is used to generate the required trips. There are two Repeat Types to choose from from:
Daily specifies that the Shift Template should be repeated every x number of days within the period between Start Date and End Date. The x specifies the regularity and is given in the field Repeats Every. So a value of 2 would indicate the Shift Template is repeated every other day, a value of 3 would indicate every third day and so forth.
Weekly specifies that the Shift Template should be repeated on a weekly basis. Again the field Repeats Every specifies if the Shift Template should repeat every week (1), every other week (2) and so forth. When the Repeat Type is set to weekly you can also specify which days of the week the Shift Template should be executed within the weeks. This choice is mandatory when Weekly is chosen.
The last part of the screen allows you to specify the Withdrawal Time and Delivery Time of the vehicle used for the trips. These values are by default populated form the Shift Template, but can be overridden for each specific order.
Once you have set up the required fields for the order, you can press the Generate button to generate all the required trips based on the Shift Template and specified regularity.
You also have the option to upload an attachment to the order, this can be any file that is relevant to the order.
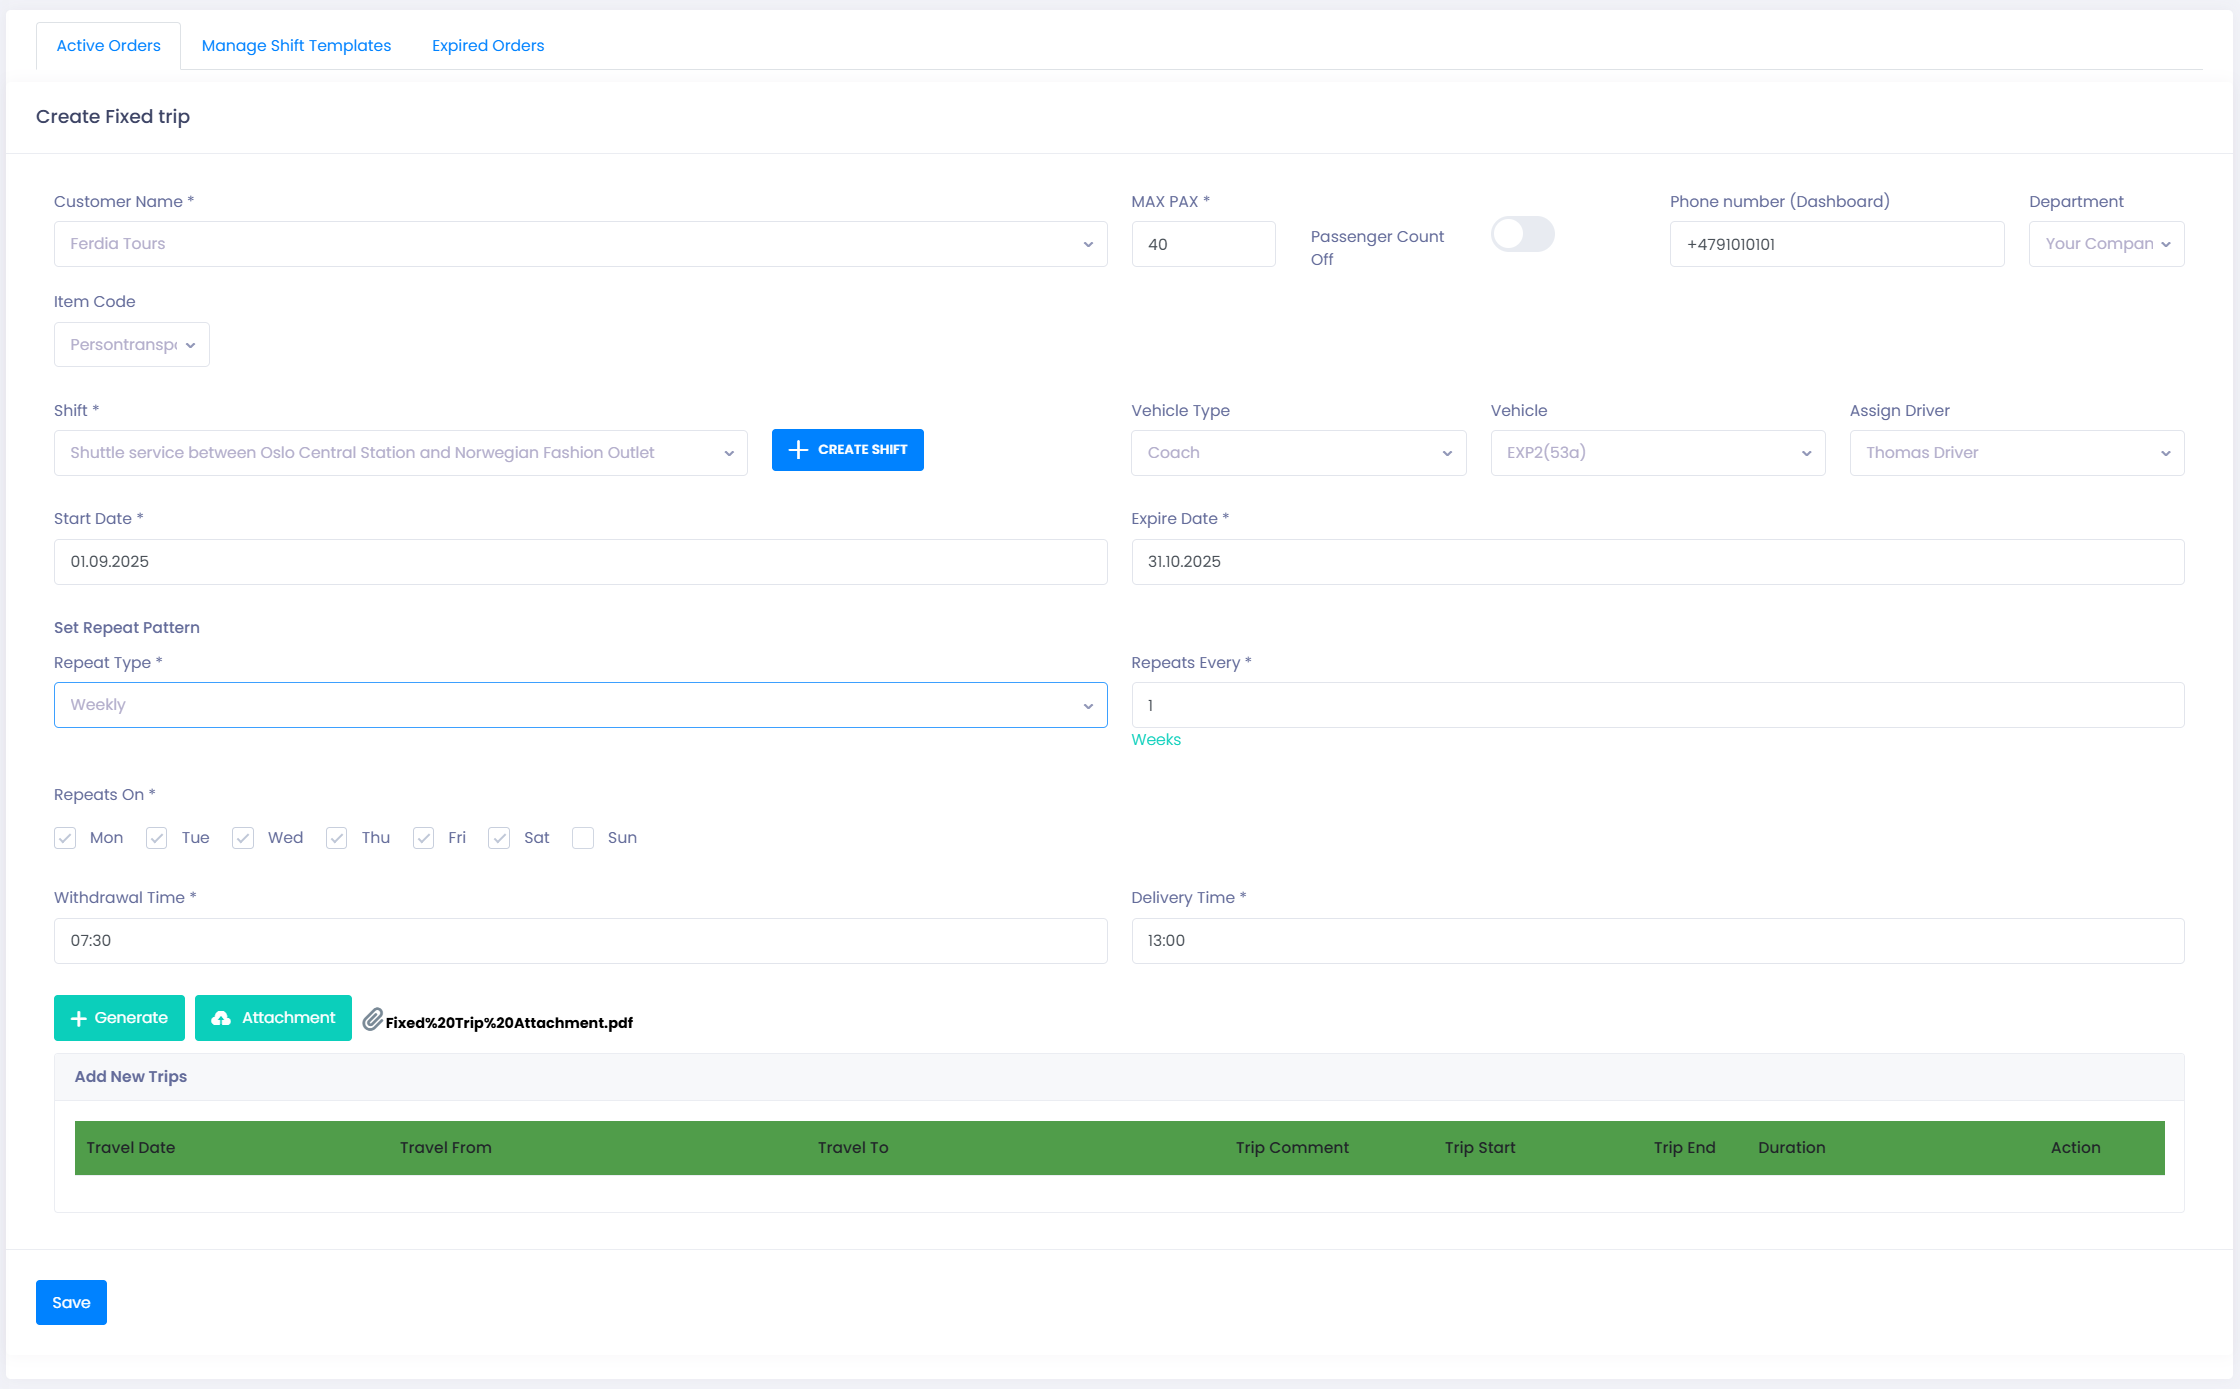
Once the trips are generated you can see a list of all the trips in the table at the bottom of the order.

You are now able to delete each separate trip if there are some of them that should not be performed based on the ordinary regularity of the order. You delete separate trips by pressing the trashcan-icon to the right of the trip.
This feature can be useful for example to remove planned trips in school-vacations or holidays.
You can also see more specifications of each trip by pression the info-icon.
To save the order press the Save-button at the bottom of the page.
Changing an Fixed Trip Order
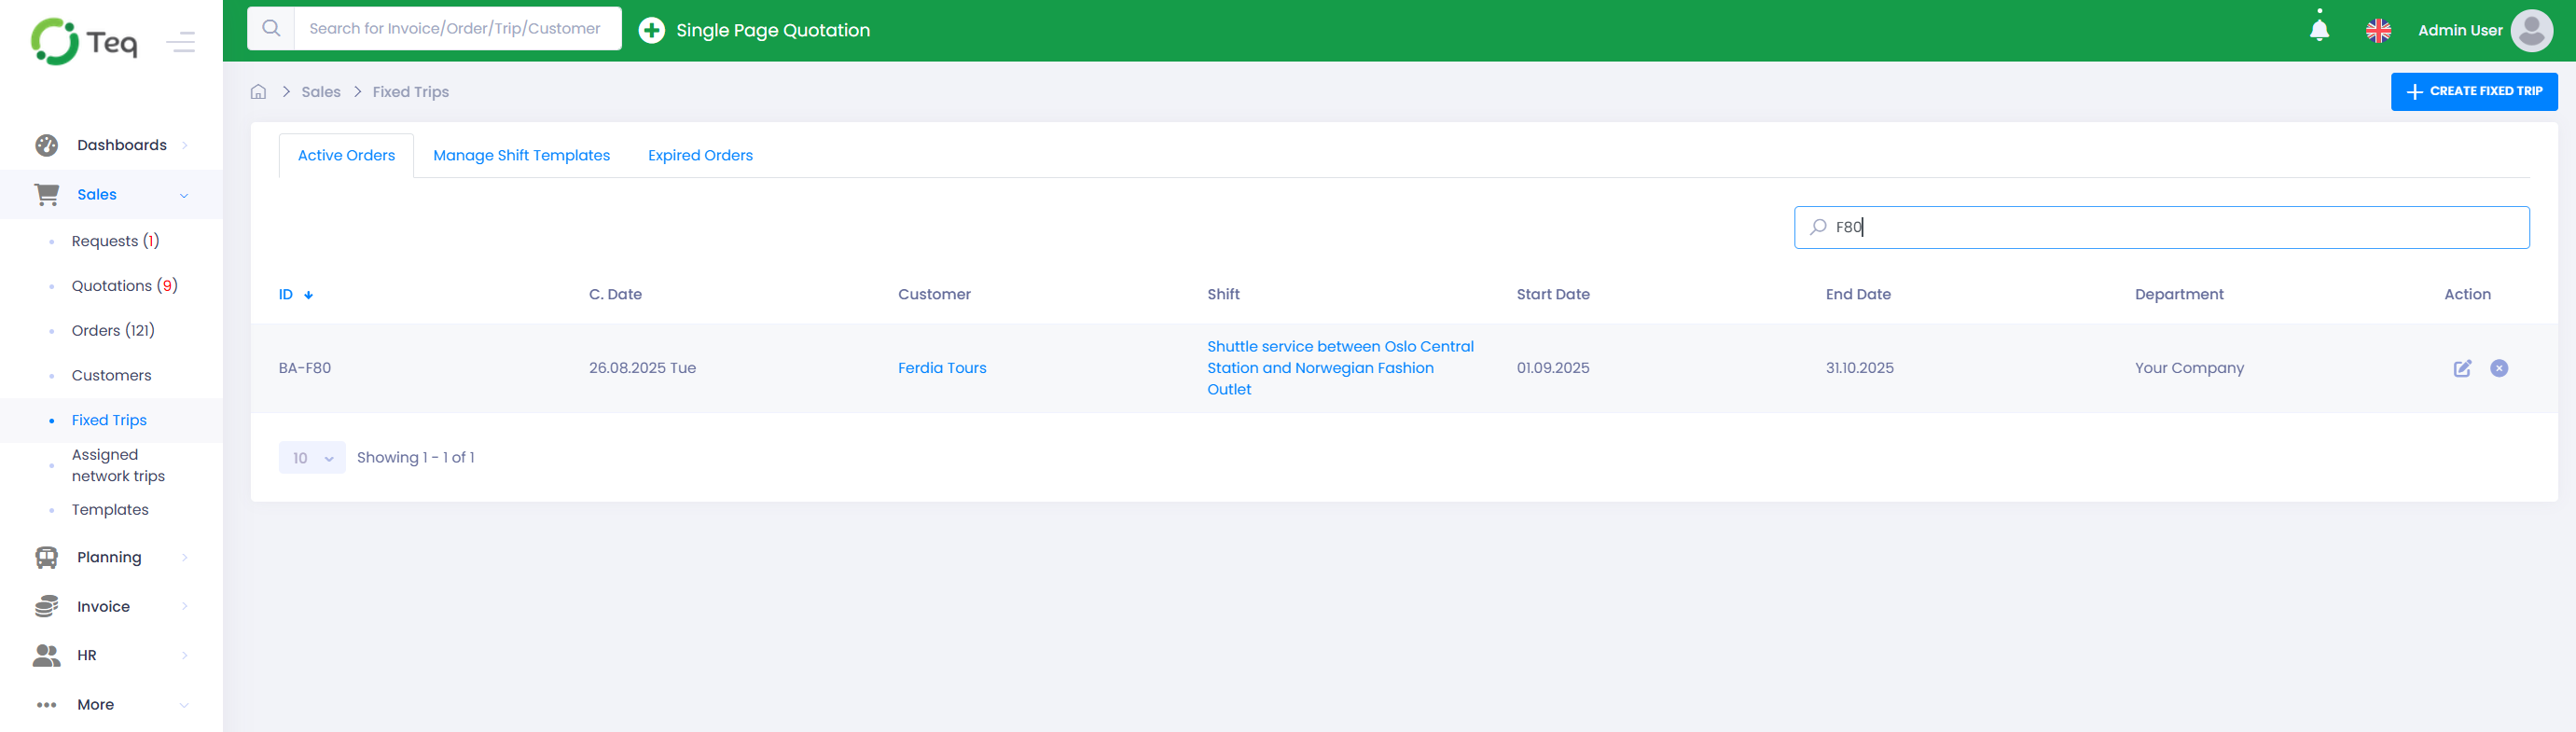
After an order has been saved and all trips have been generated you might want to make changes to the order or specific trips inside the order. To find existing orders you navigate to Sales -> Fixed Trips and choose the tab Active orders. Here a list will show all the Fixed Trip Orders that are currently active.
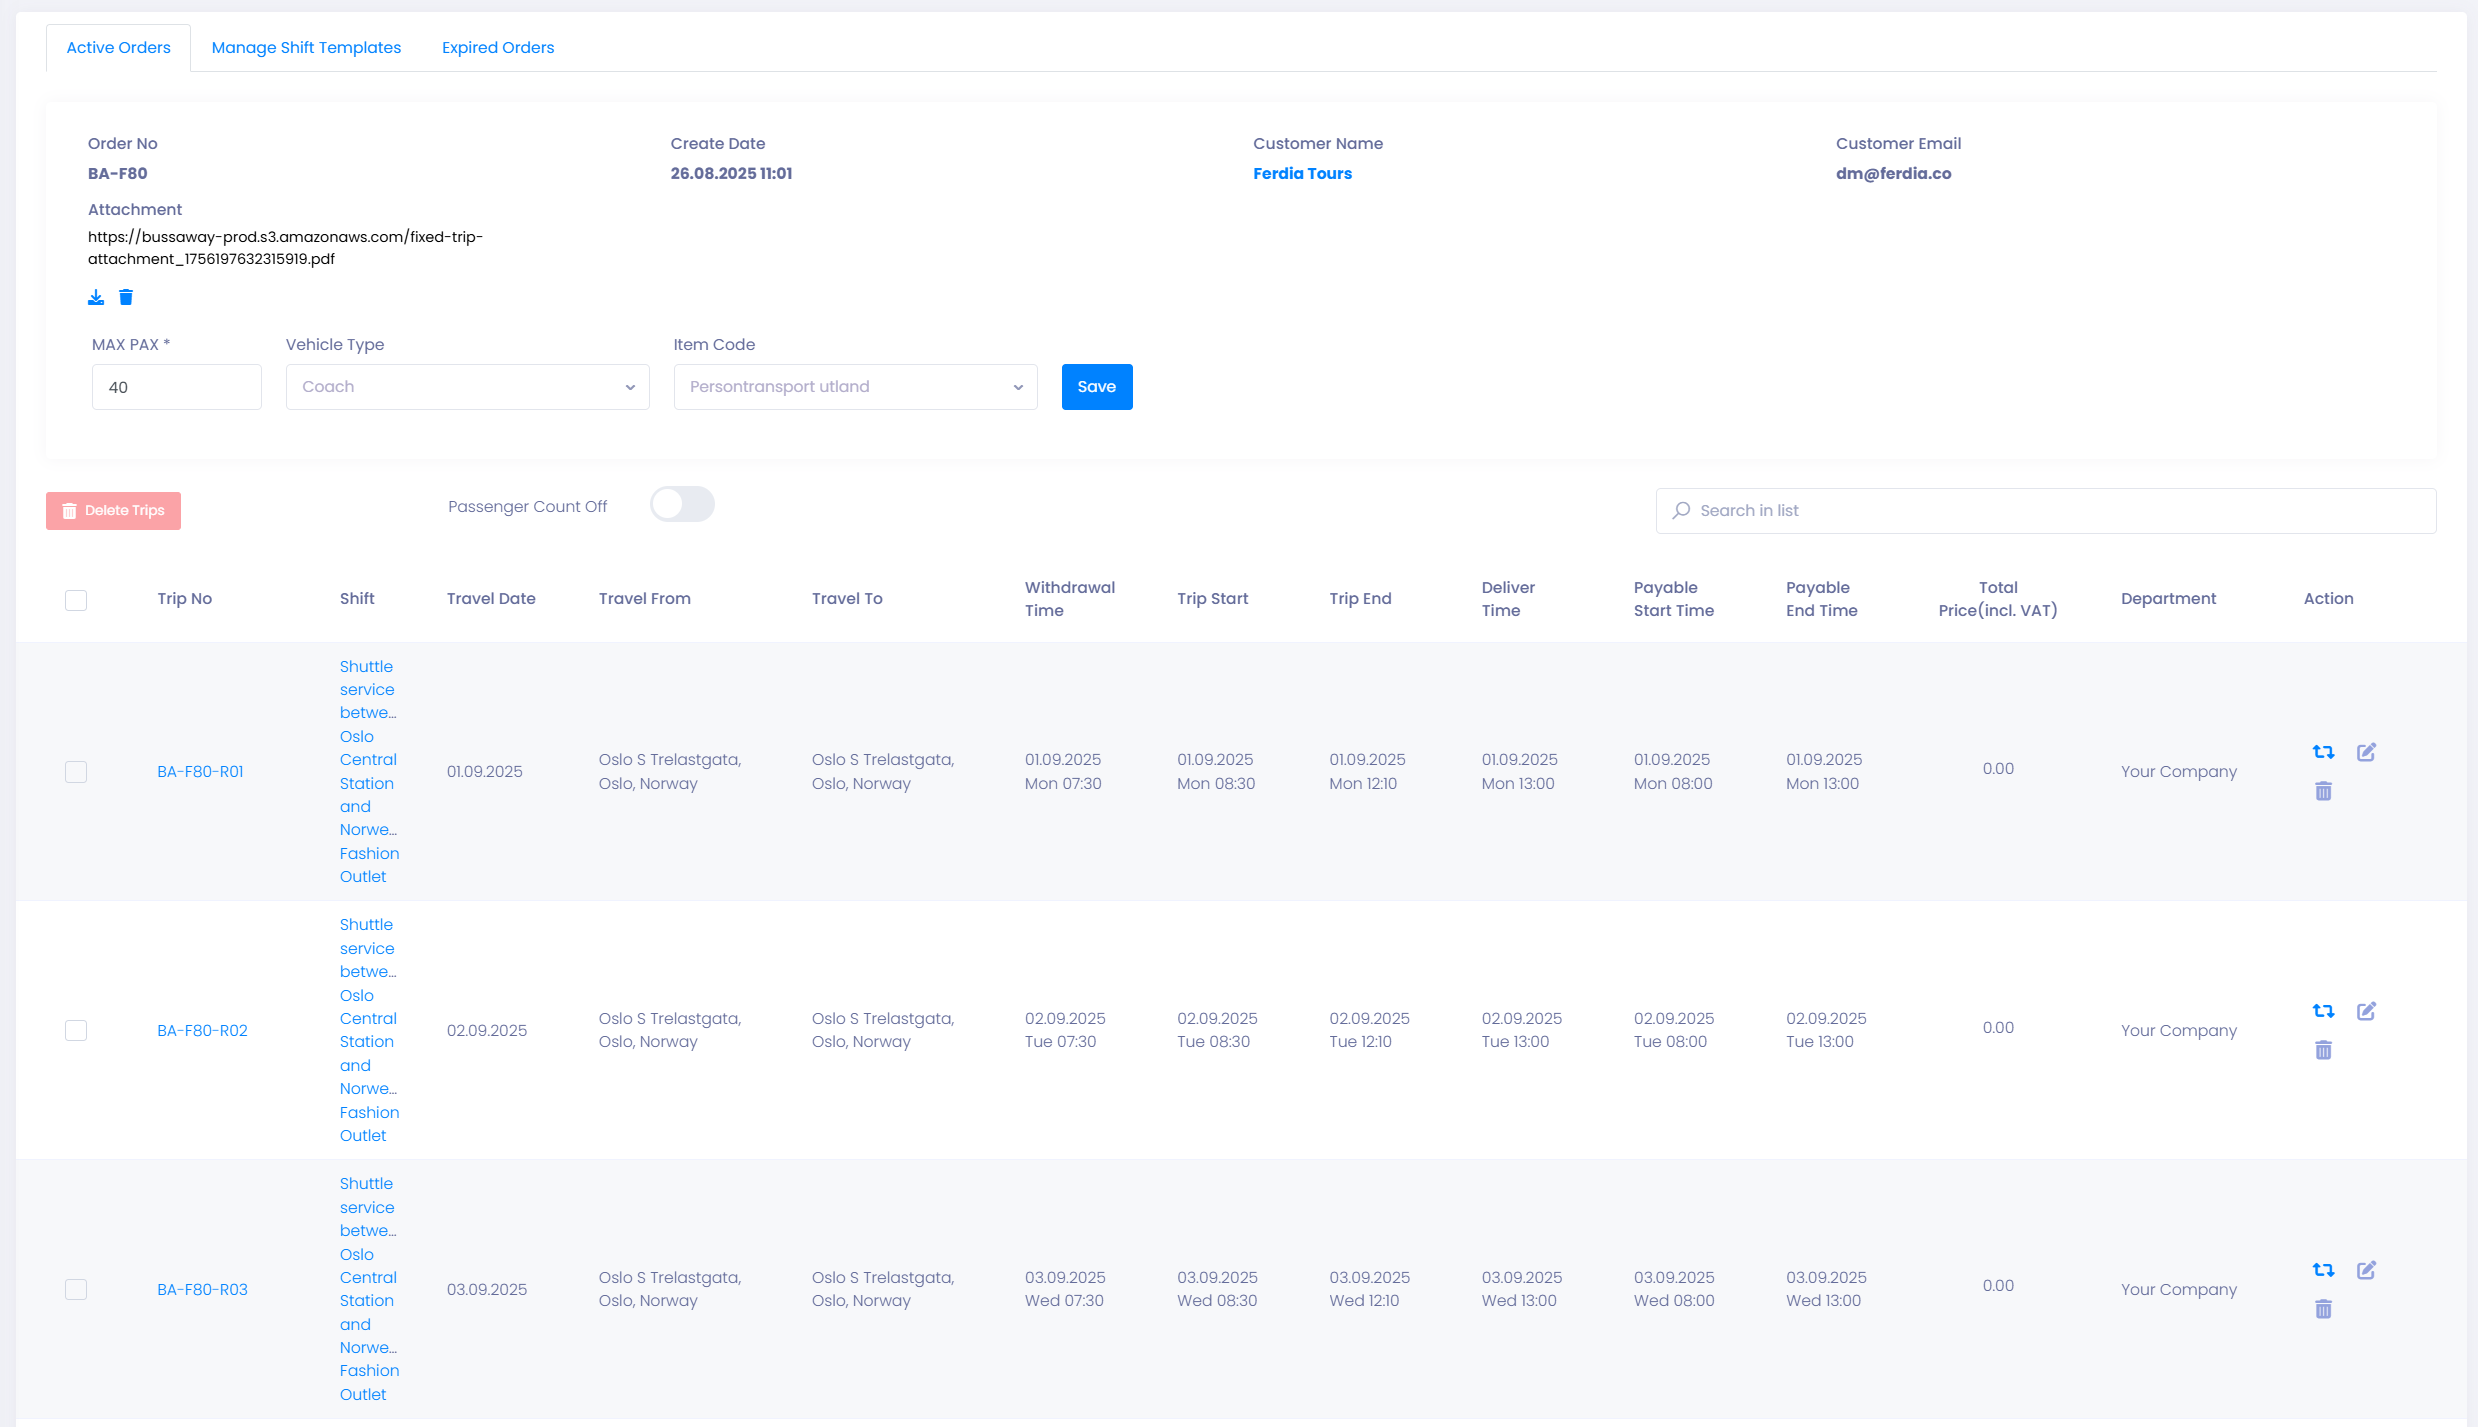
To edit an existing order press the pencil-icon to the right.
This will open the order and show a list of all the trips related to that order.
Deleting trips from the order
Some times you might need to delete planned trips from the Fixed Trip Order, there are two ways of doing this in the screen.
1: To delete a specific trip, you can press the trashcan-icon at the right hand side of the table.
2: To delete multiple trips, you can select the trips to be deleted by marking them in the check-box on the left-hand side of the table and pressing the button Delete Trips.
Changing the department assigned to a trip
The change the department responsible for a specific trip in the order, press the arrow-icon on the right hand side of the table for the trip to reassign. You will then be presented with a dialog-box showing the your available departments.
Making changes to the sub-trips within a trip/shift
Some times you want to make changes to a specific trip/shift. This can be if you want to remove sub-trips/stops on this particular day or change the times for given sub-trips inside the shift. To change a specific trip/shift, press the pencil-icon on the right hand side of the table for the trip to be modified.
You will then be presented with a dialog containing all the specifications and sub-trips for this particular trip/shift.
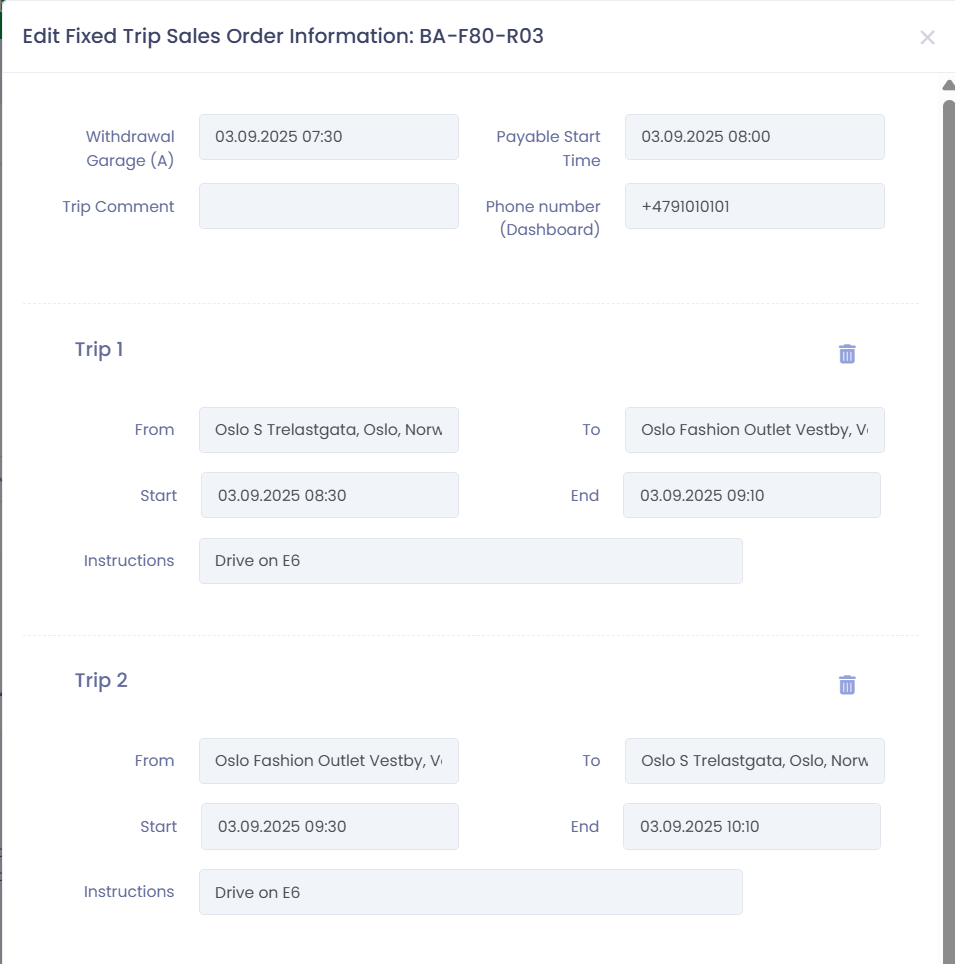
In this dialog all the field are editable. You can remove a specific sub trip-by pressing the trash can-icon associated with the particular trip. You can also change the From and To locations and the Start and End times. Lastly you can also edit the instructions for each sub-trip.
To save your changes press the Update Shift button at the bottom of the dialog.