
How to use Ferdia driver?
General information about the app
1. Main features of the app
- Sending driver assignments that are digital and always updated with the latest information
- Give the customer updates before, during and after the trip
- Manage hours for the driver
Why do we have an app?
We use the app to:
- Give the customer a better experience
- Plan better
- Gain good control over costs and hours
In the app, you can accept a mission and run the mission by activating a number of checkpoints along the way.
Providing a positive customer experience and ensuring efficient collection of the customer are paramount. This also enables planners in your company to better prepare for the next trip by analyzing which parts of the journey took longer or shorter than anticipated, or which routes were most effective. Overall, this attention to detail leads to smoother operations and increased customer satisfaction.
When you have the app installed on your phone, you can take the first step:
2. Open the Ferdia Driver app
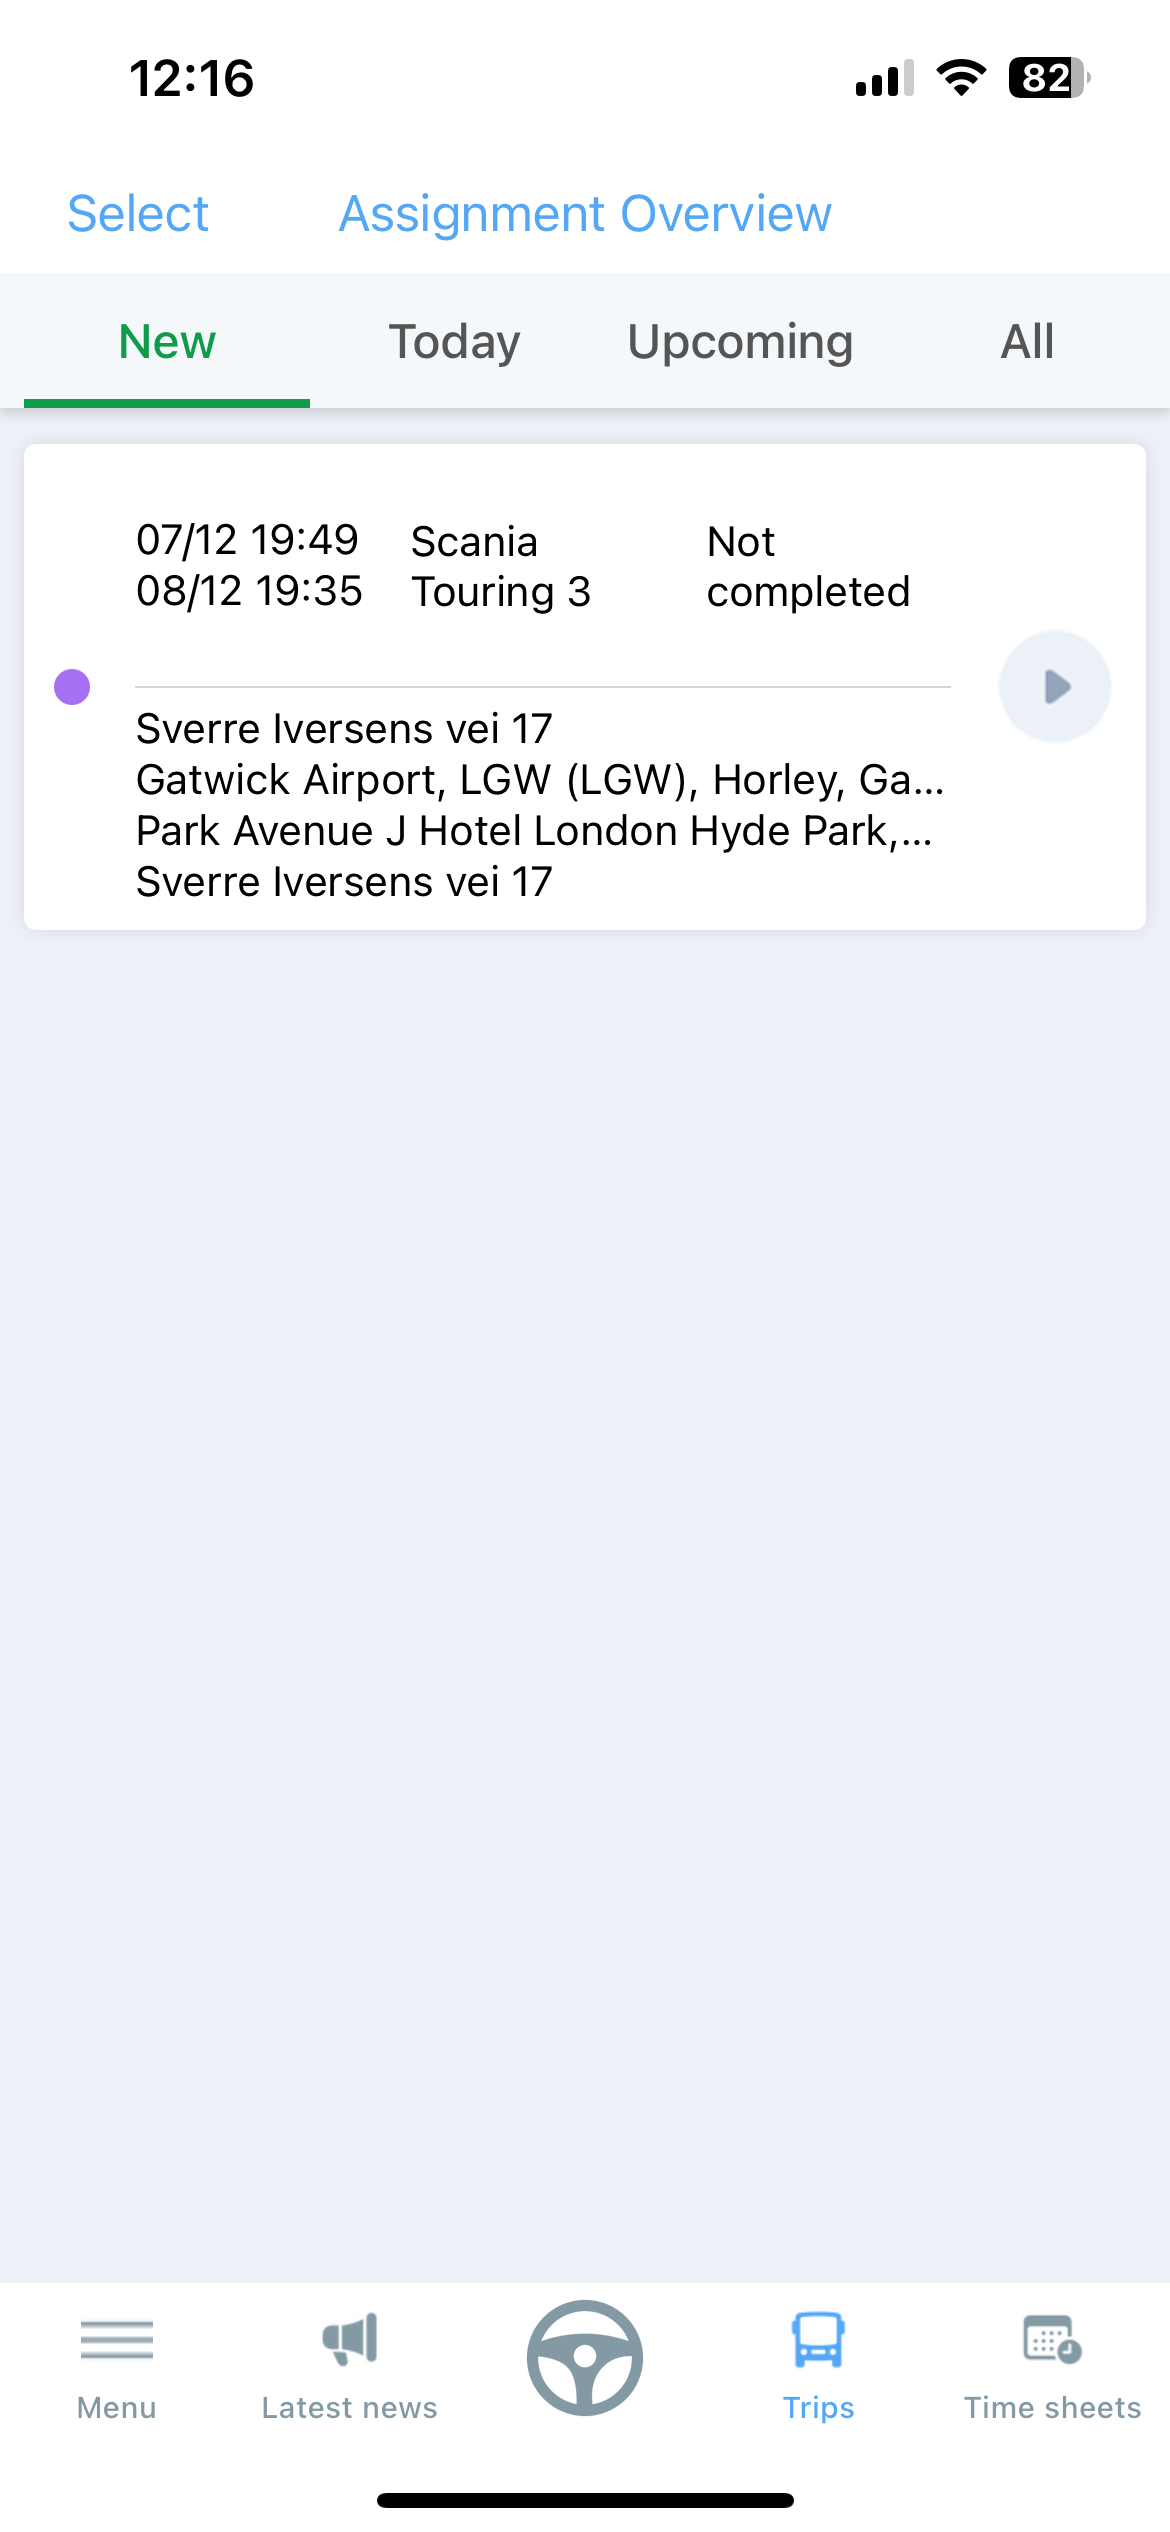
2.1 Assignment overview
On the "Assignment Overview" page, you get an overview of all your driver assignments.
- Under "New" are assignments that have not yet been accepted.
- Under "Today" is today's mission.
- Under "Upcoming" are assignments you have accepted that are coming
- Under "All" are all assignments.
In this case, there is a new trip
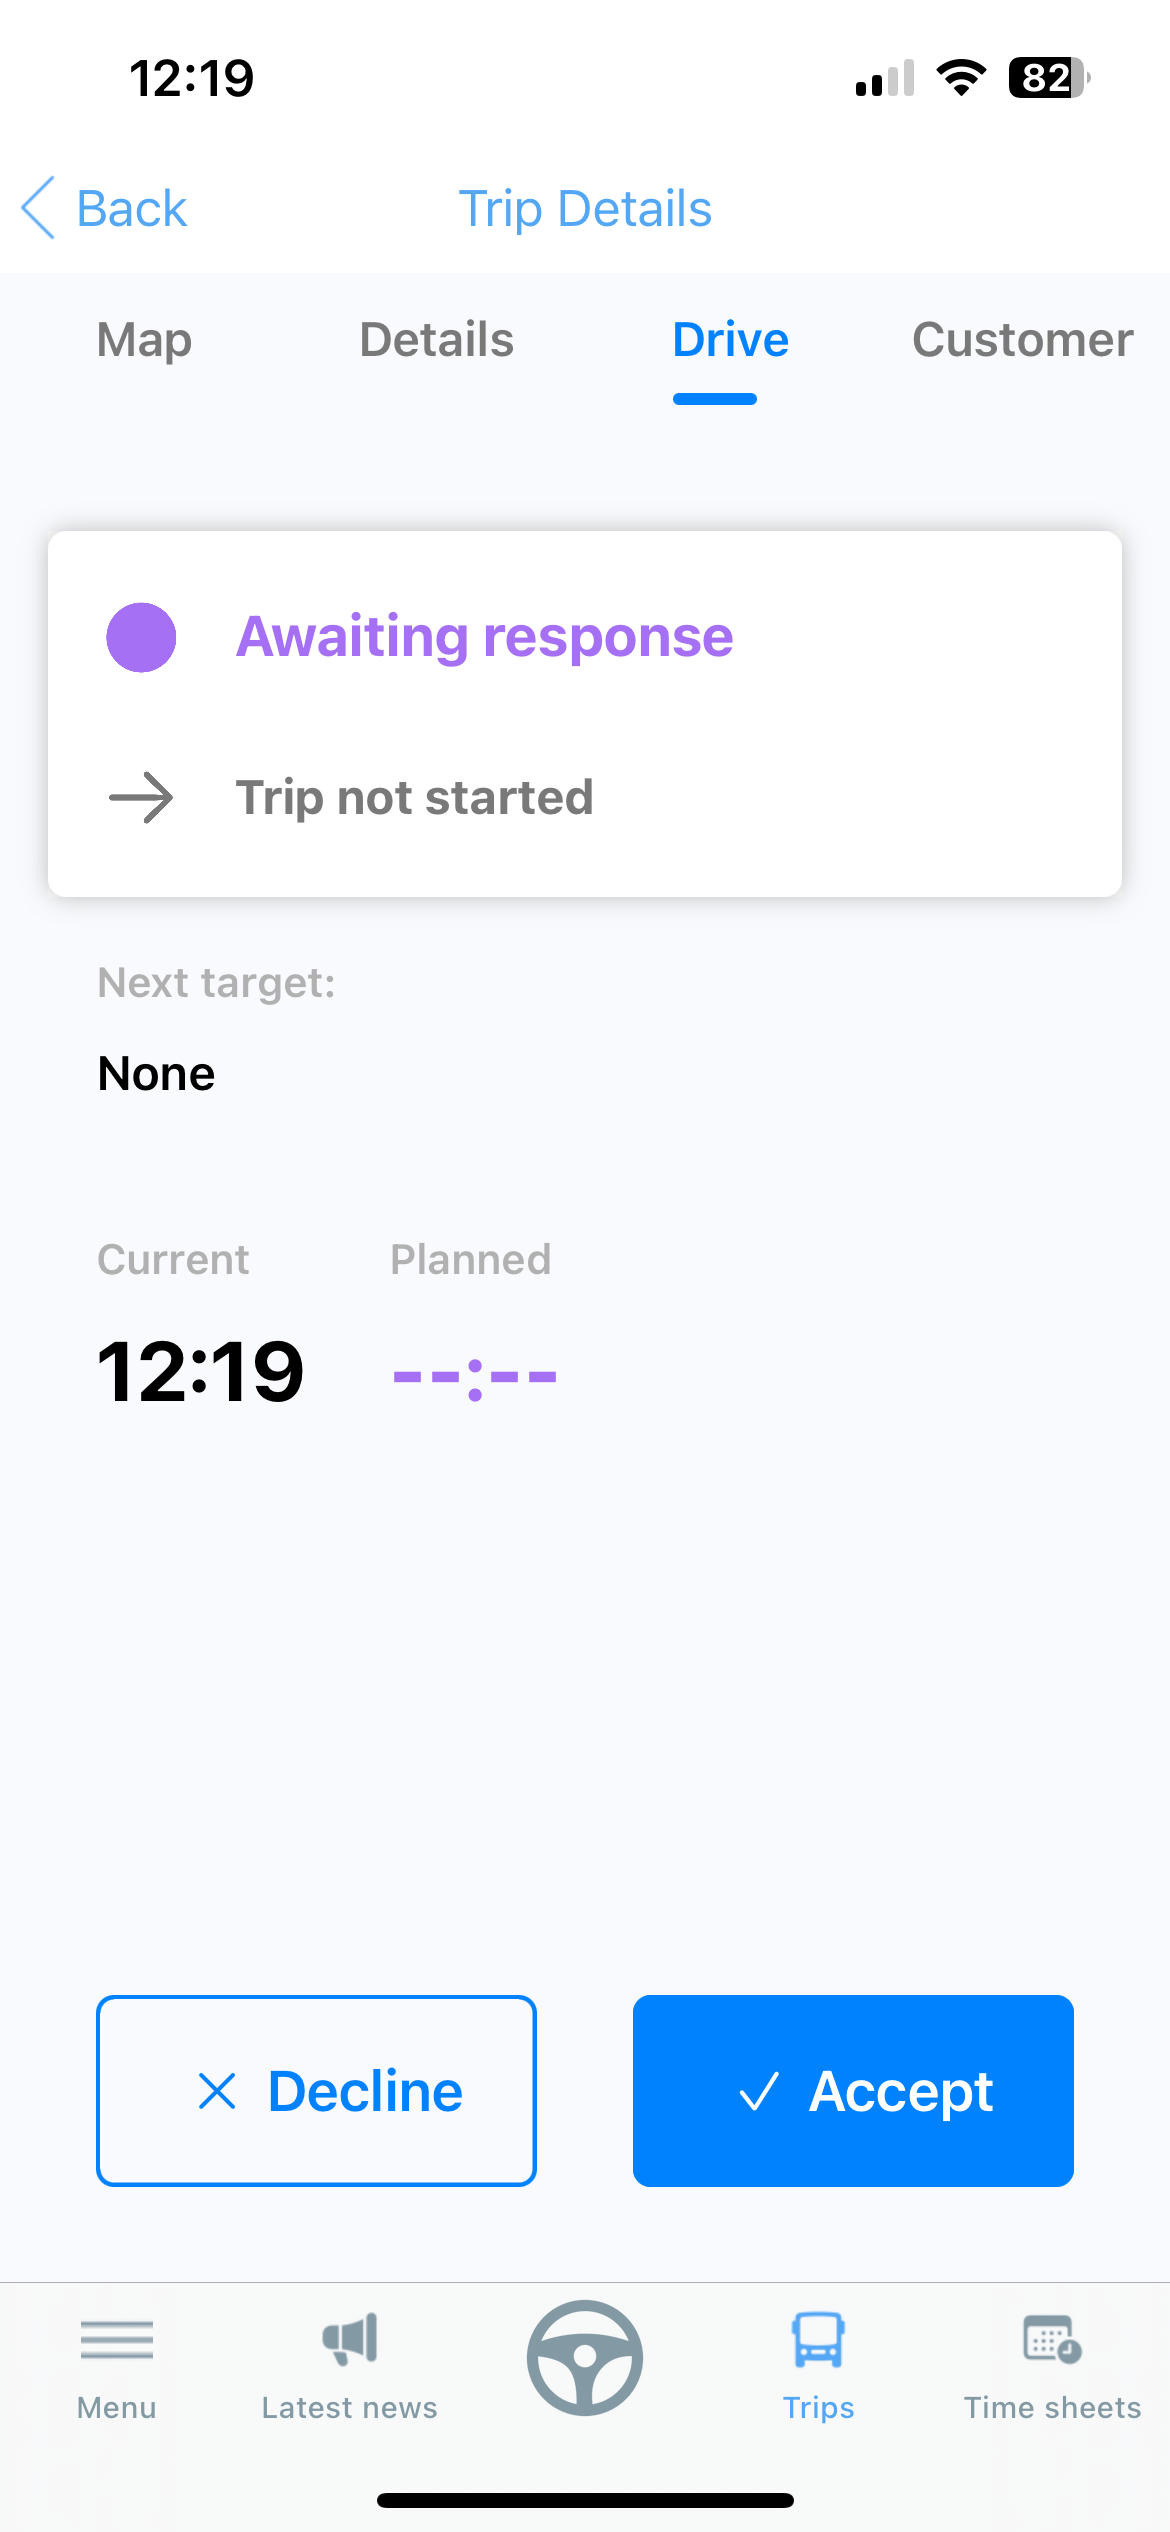
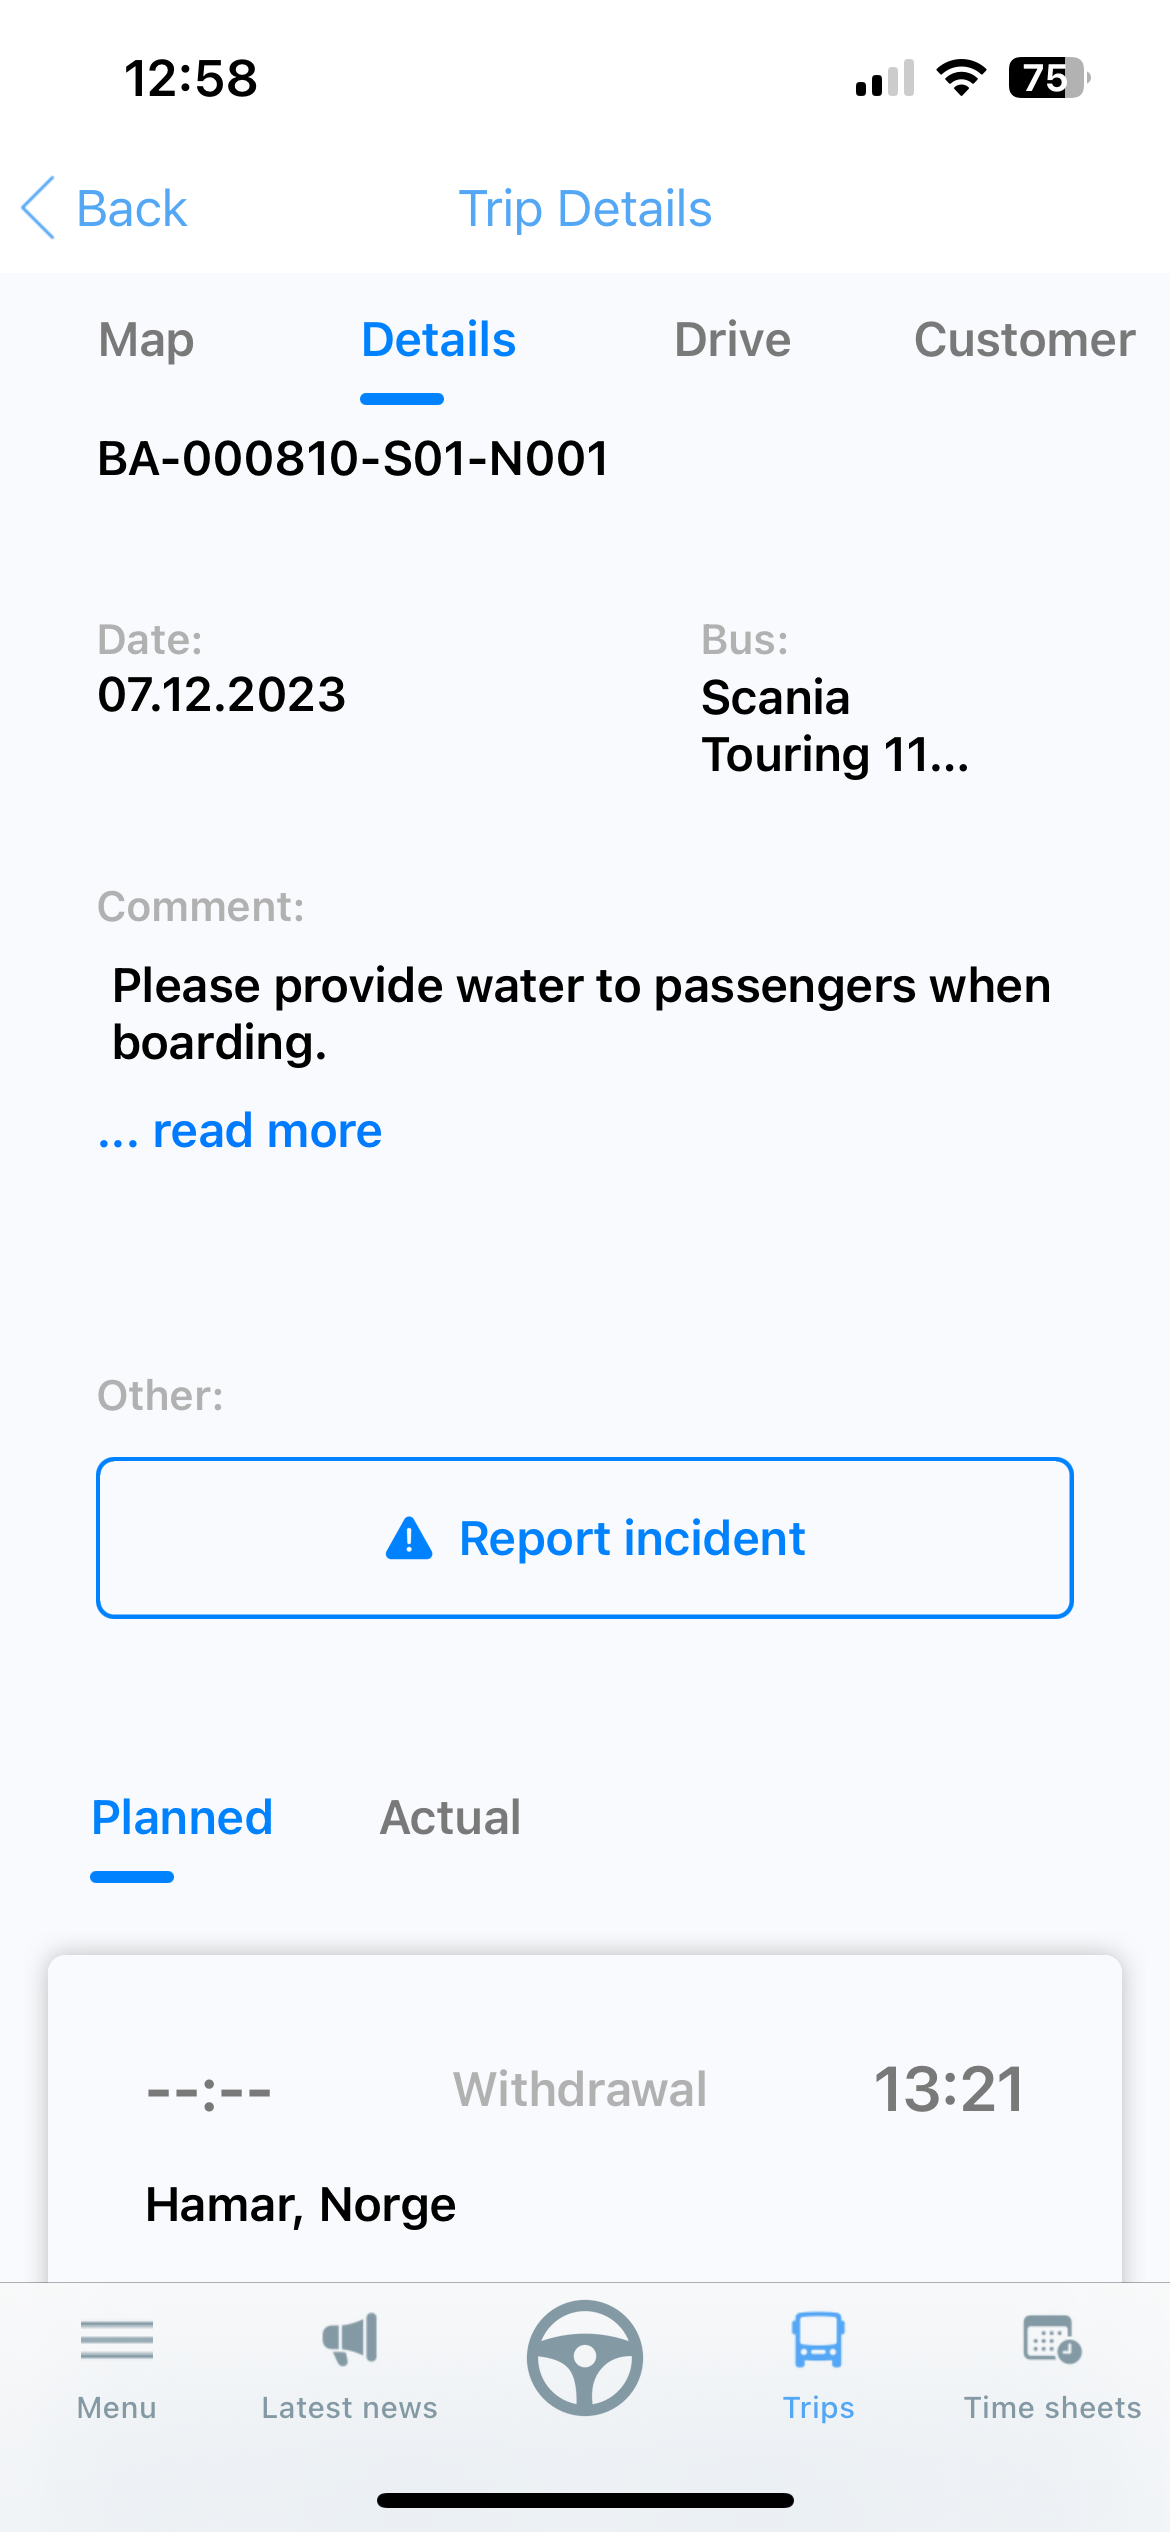
2.2 Trip details
When you click on the trip you can see all the details.
It's a detailed page so you have to tab on each section to see all the information;
- Accept the trip
- Decline trip
- See customer information
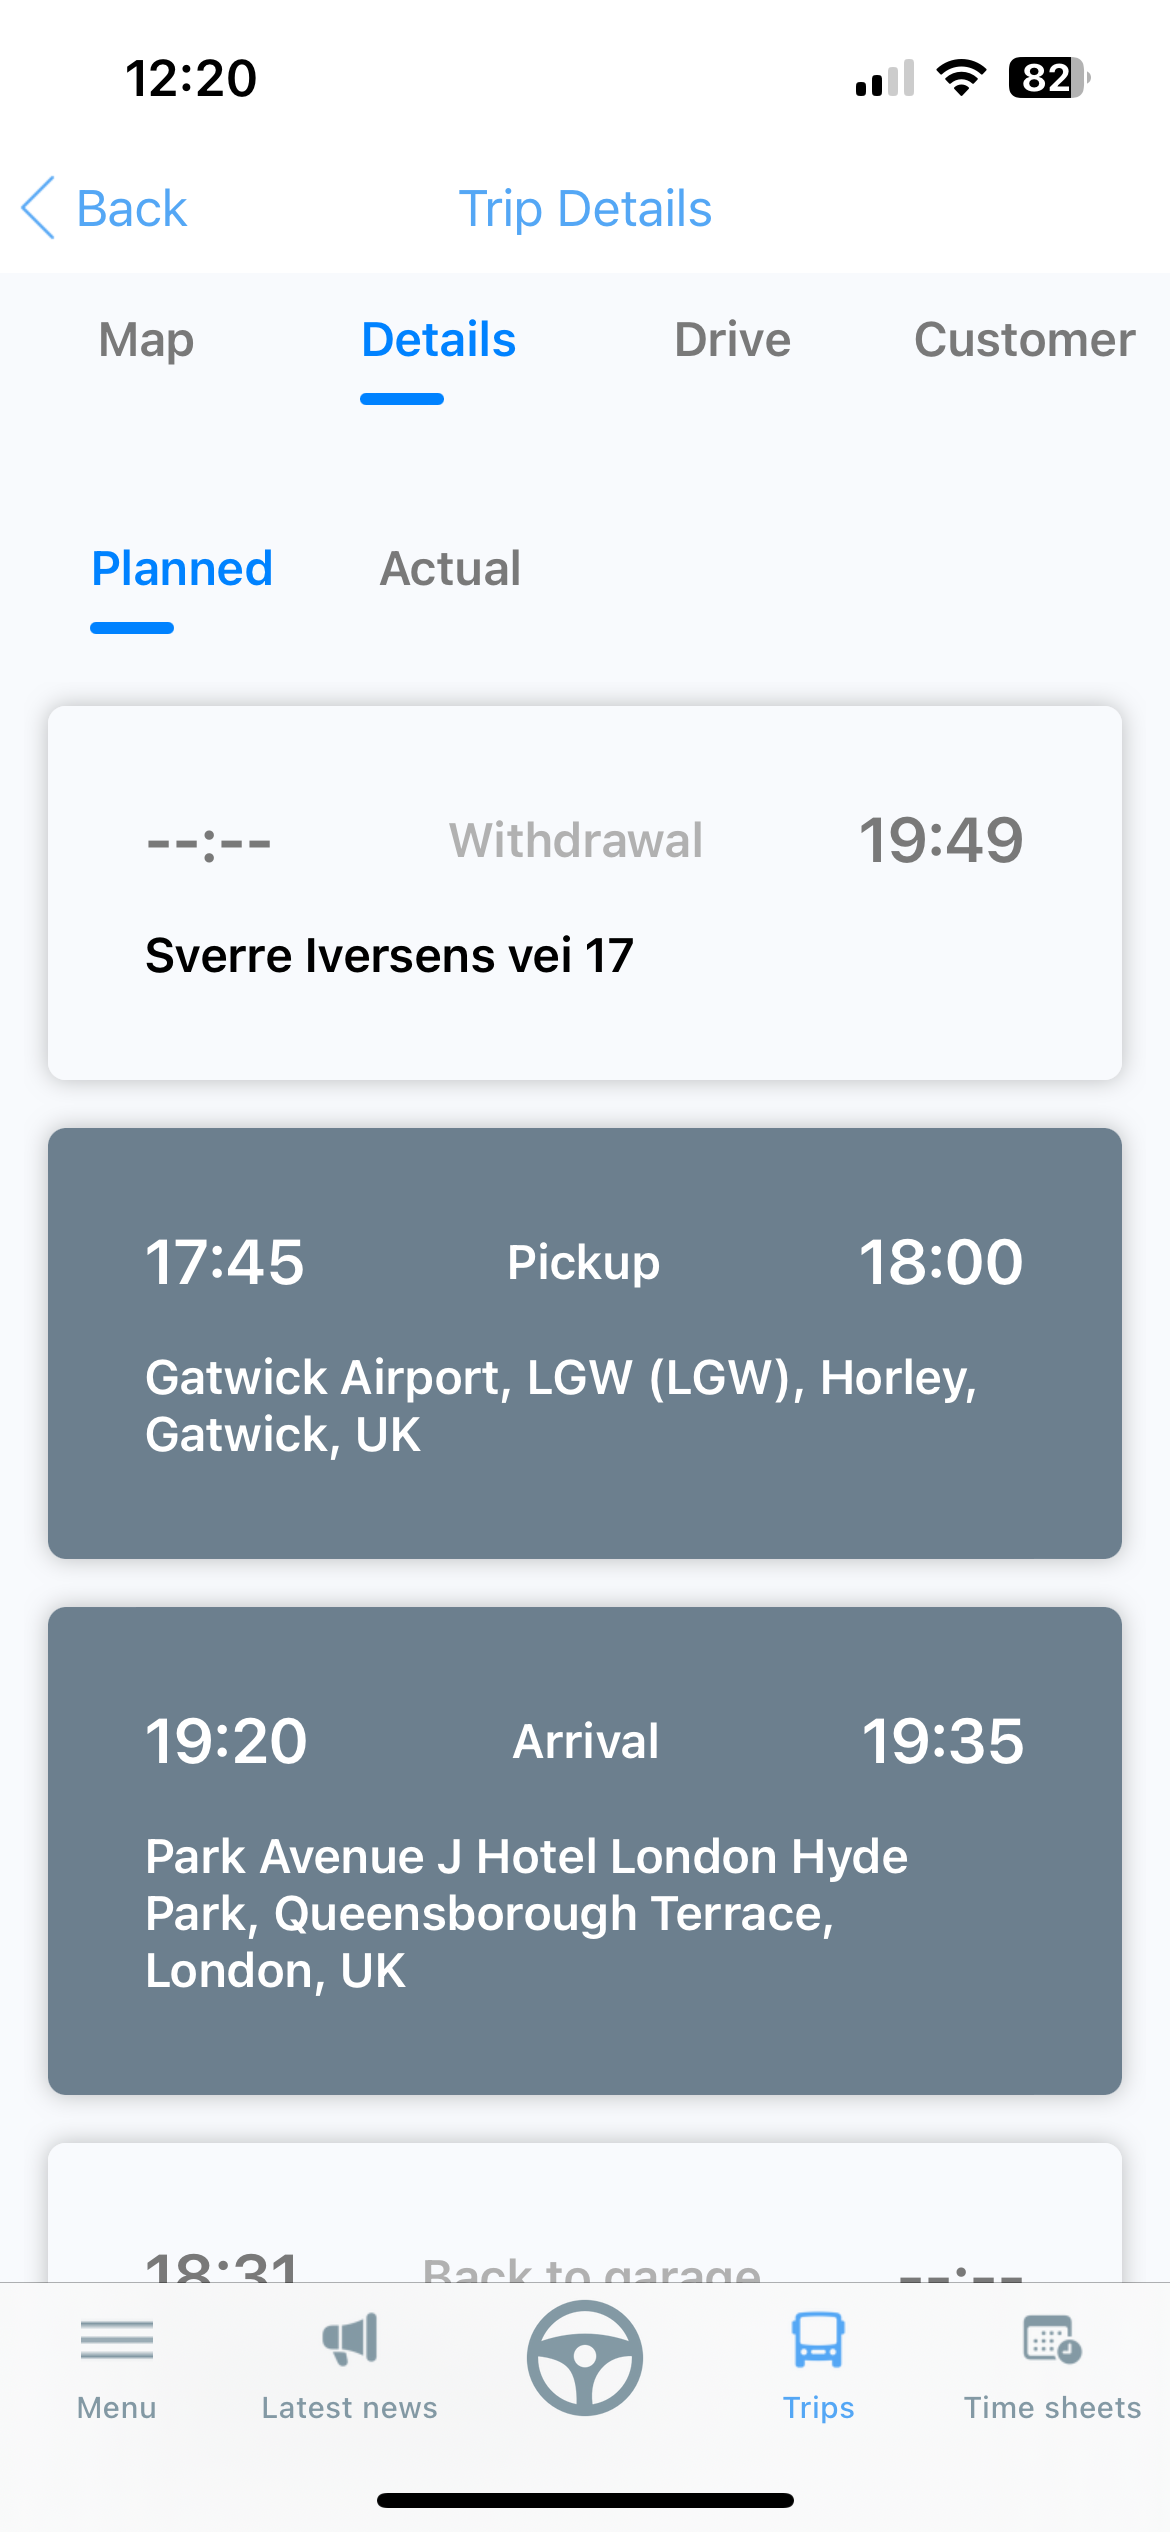
- See withdrawal times
- See the route on the map
- Open the route in Google Maps.
At the bottom of the page there are two sections for planned and actual times.
When the trip has been completed, you can see which times were actually recorded.
3. Accept trip
If you want to accept the trip, click on "Accept trip" and the button will then change the text to "Start trip"
4. Carry out the trip
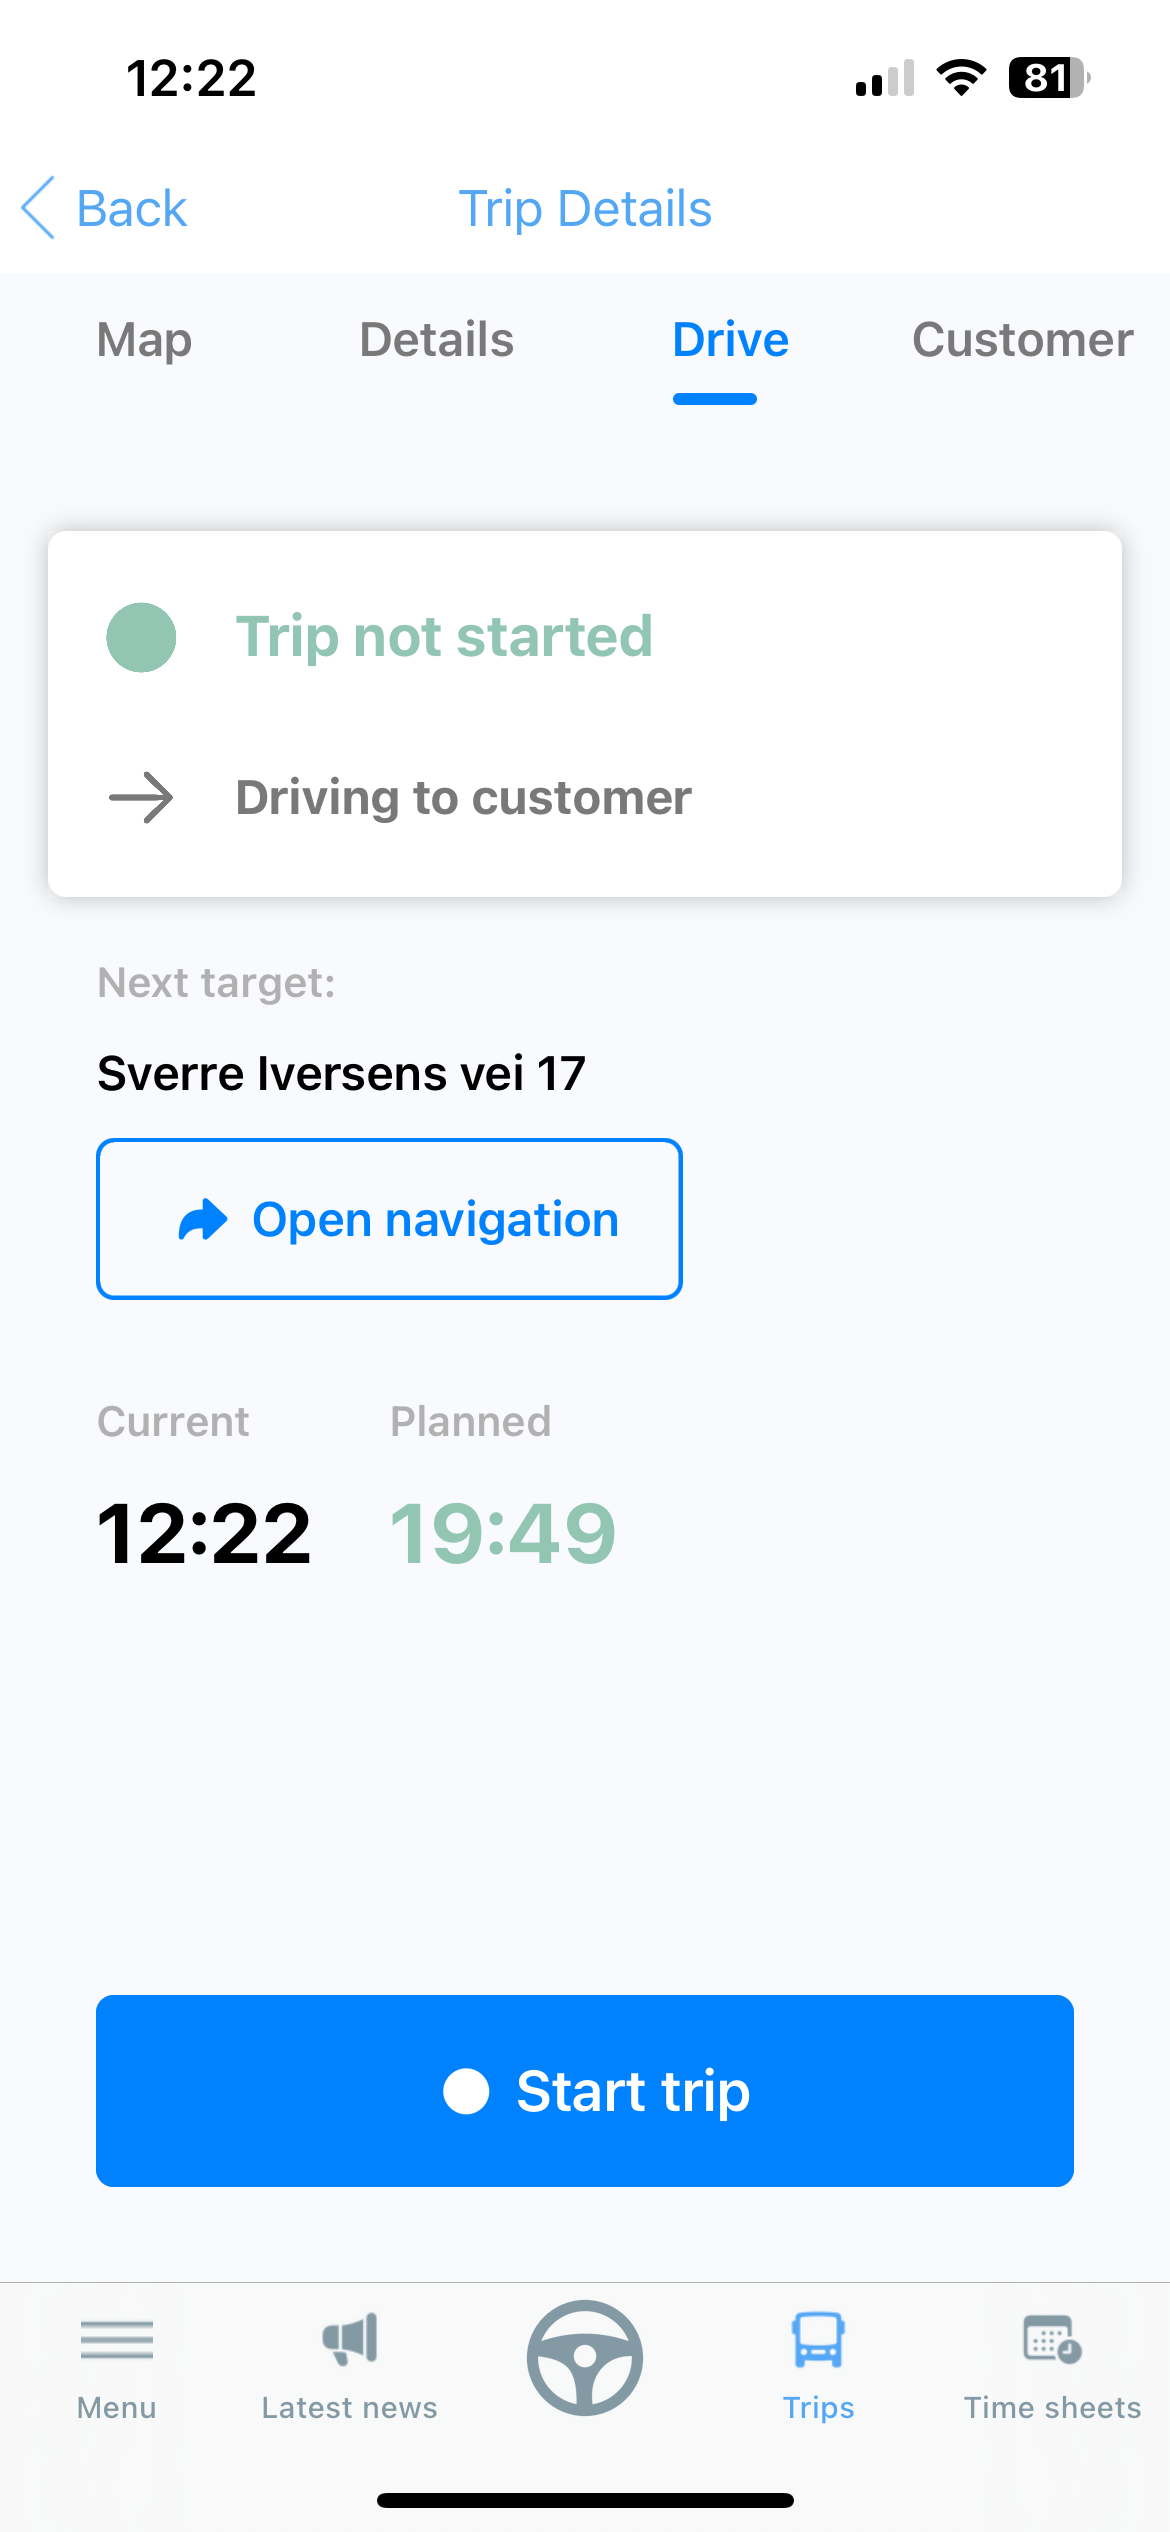
4.1 Start trip
To start the trip, there must be less than 15 minutes until withdrawal time.
Press "Start trip" to start the trip.
The action button changes its name to "Arrived to customer" and it's time to drive
4.2 See navigation
If you are unsure of the fastest and best route, you can open navigation for the trip by pressing the "Navigation" button.
The route will open in Google Maps and you start the navigation by clicking on "Start"
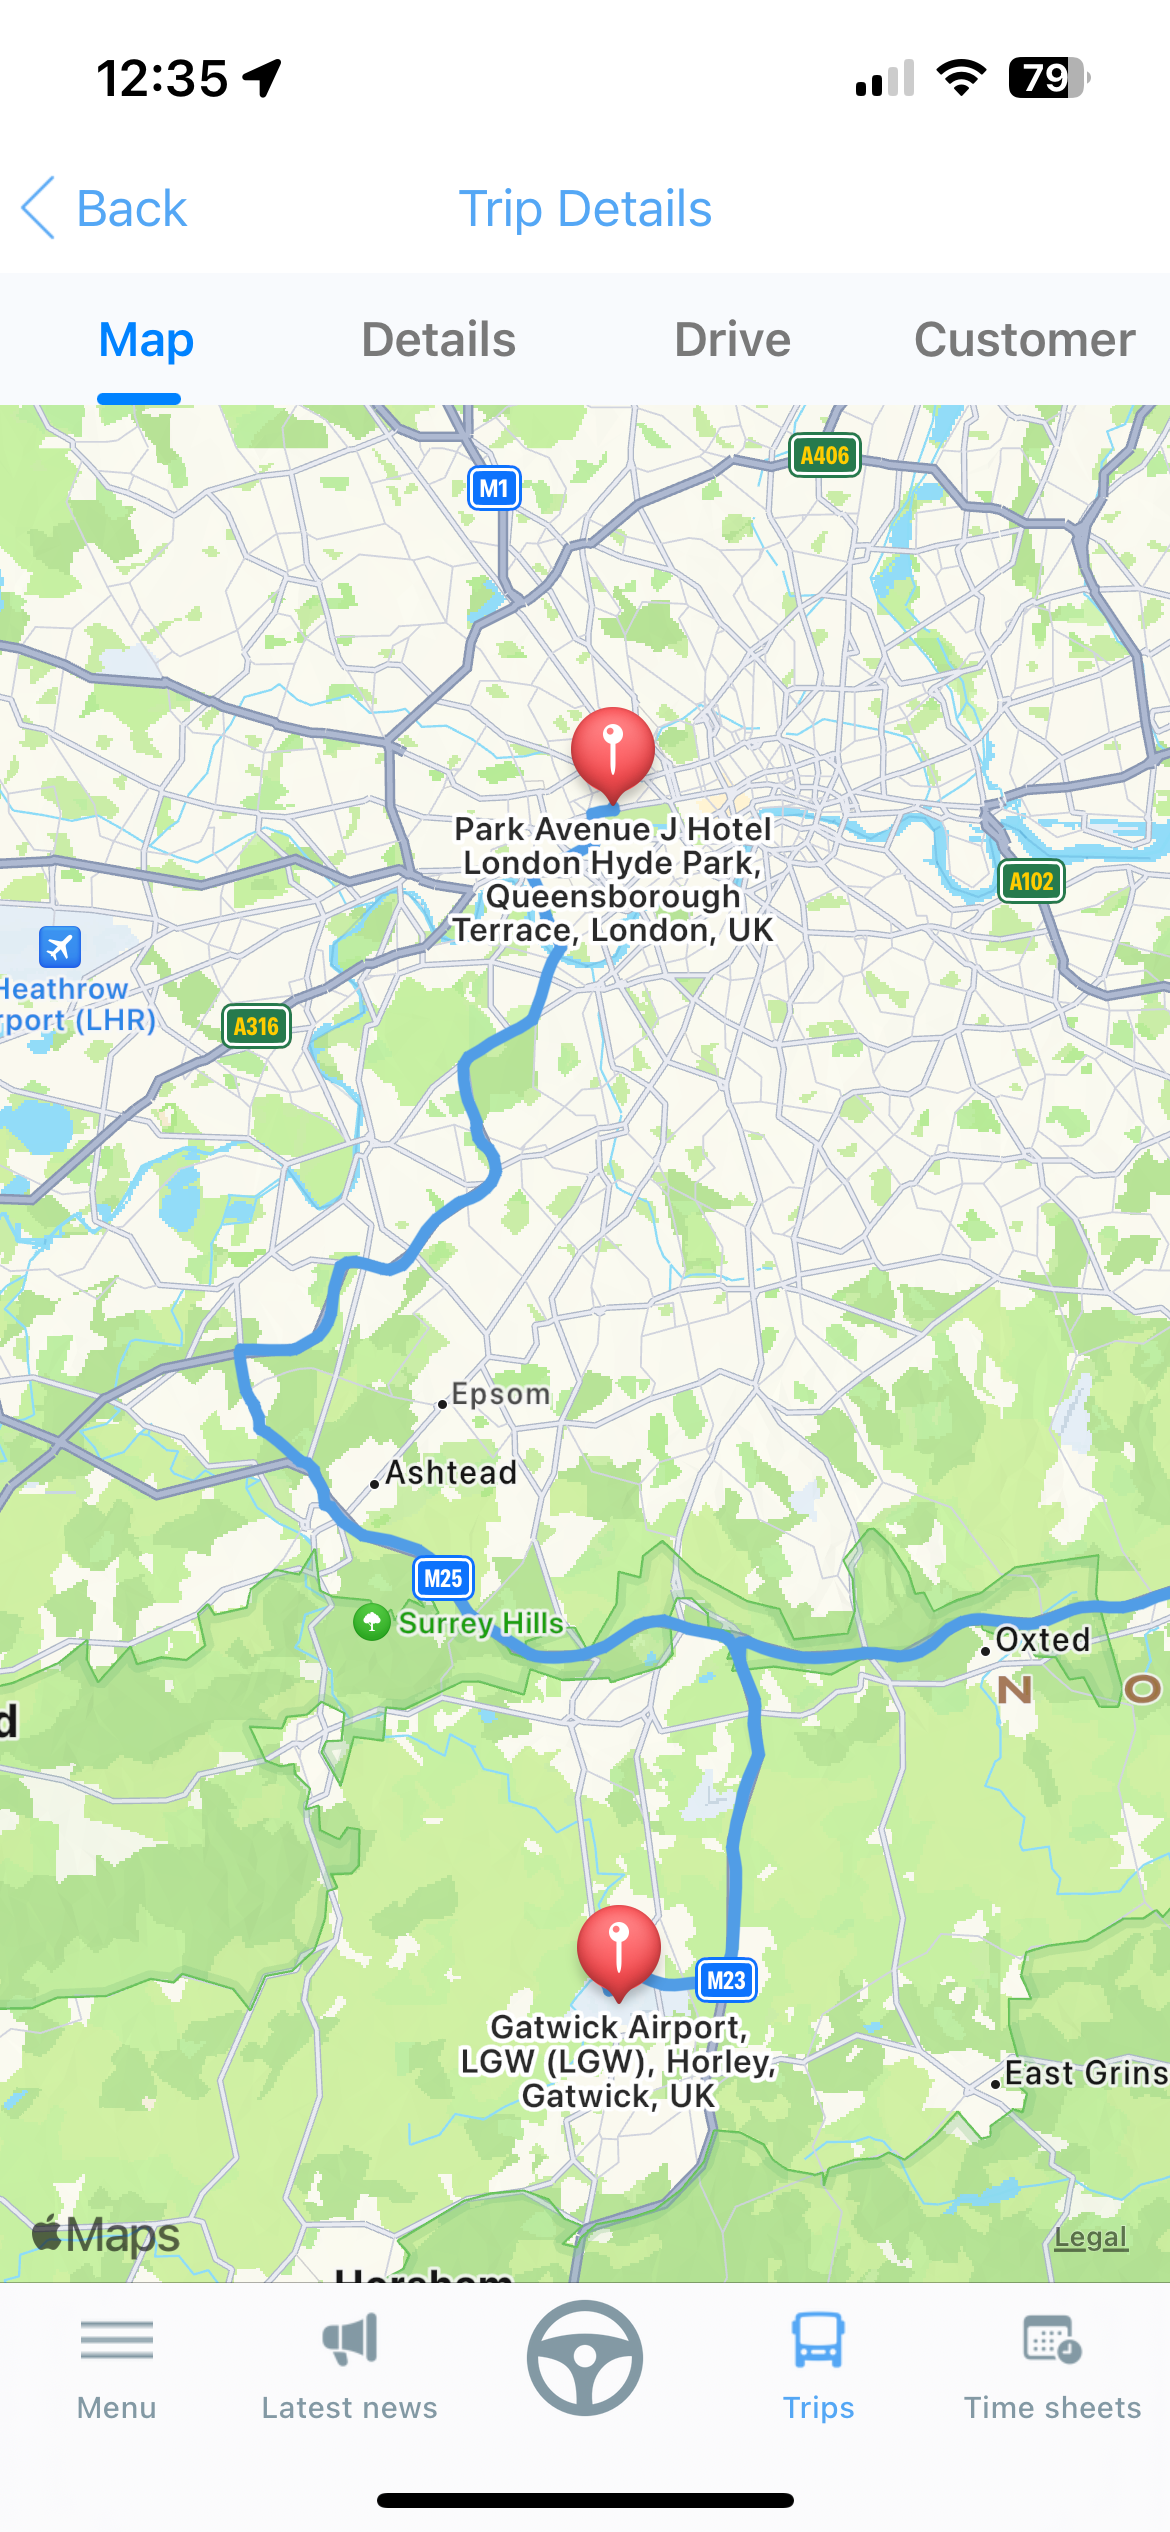
You can also go to the Map section directly in the app and follow your route there.
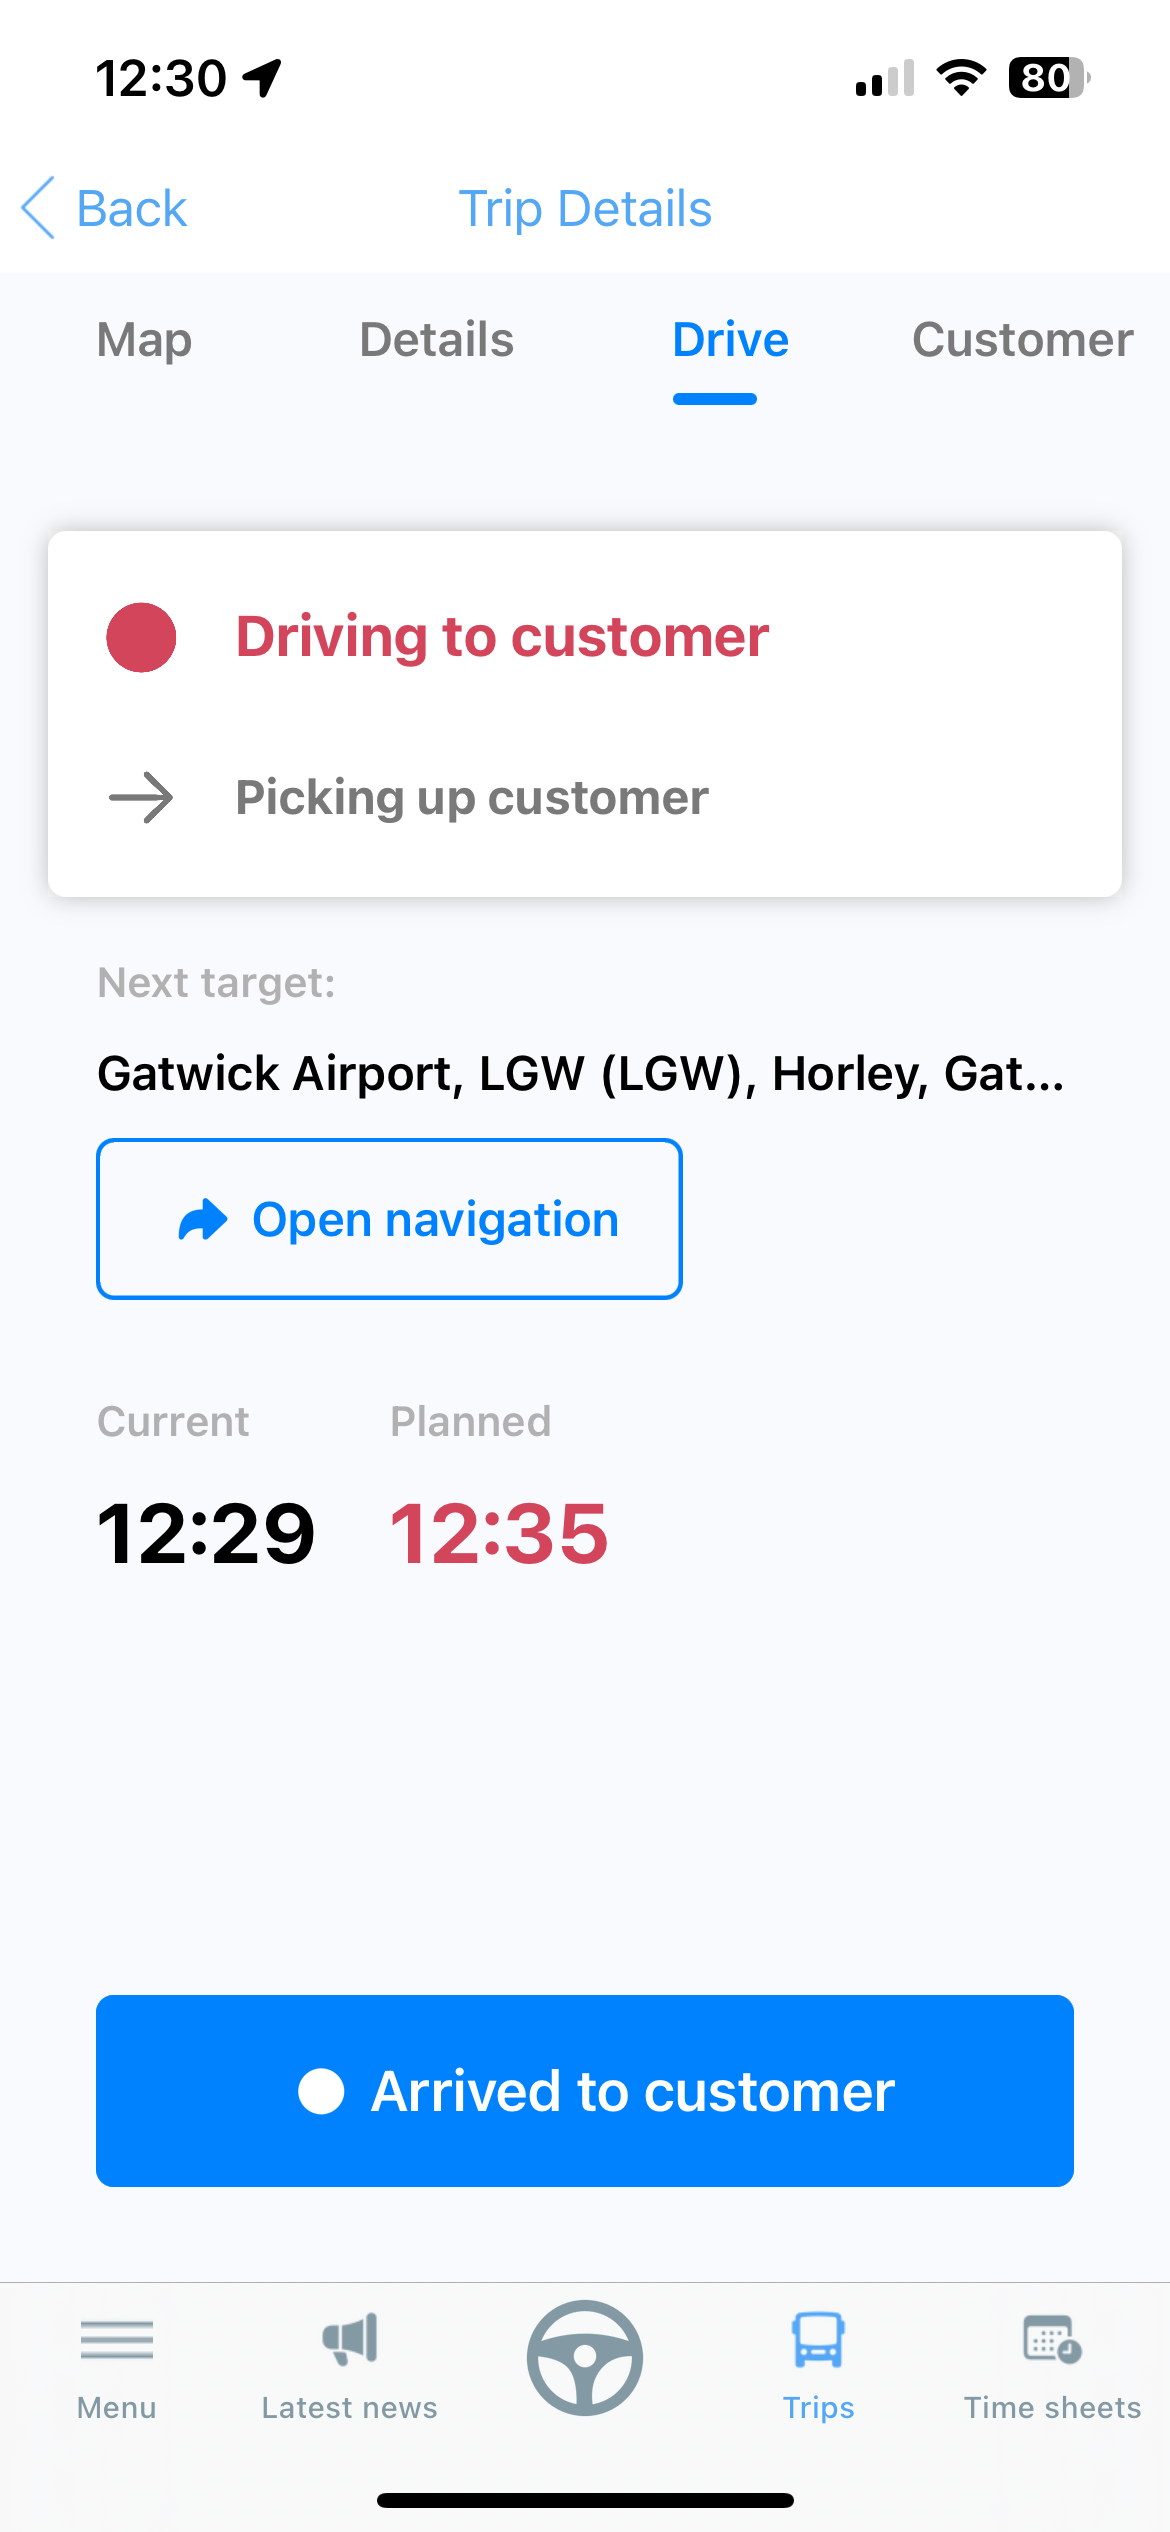
4.3 Arrived at customer
When you have arrived at the place where you are going to pick up the customer, you navigate back to the "Drive" tab and click "Arrived at customer"
4.4 Picked up customer
When you have picked up the customer and got all the luggage in place, it is time to drive towards the destination. The first thing you have to do is press "Picked up customer". Then the action button will change its name to "Arrived at destination" and you can once again open the navigation or go to the Map section.
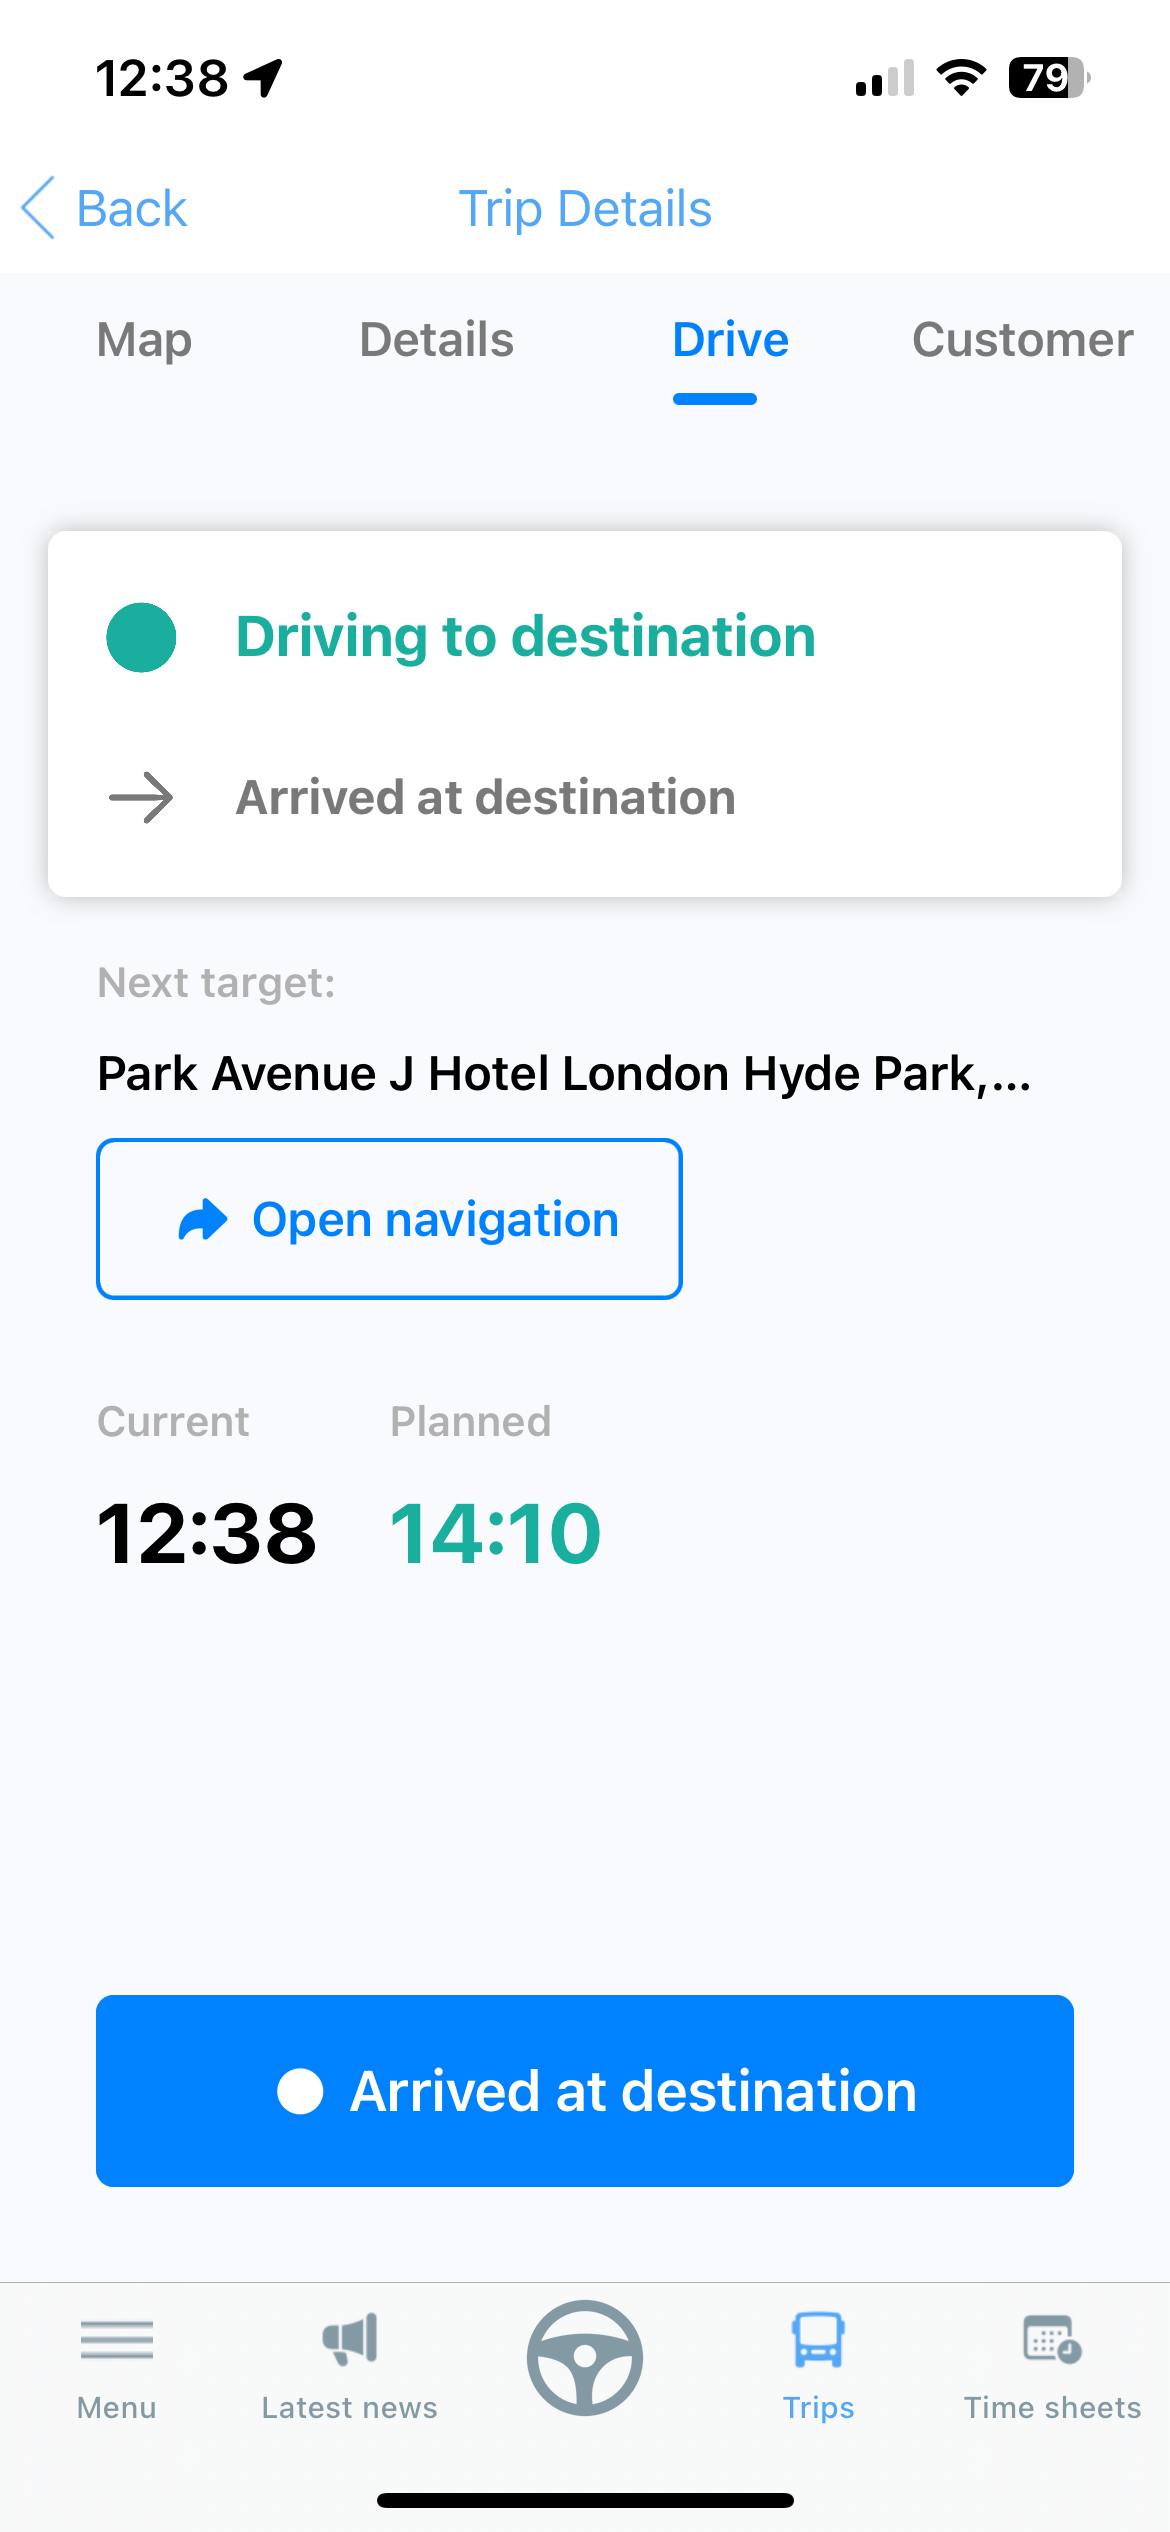
4.5 Arrived at destination
When you have arrived at your destination, you must again switch back to the "drive" tab and click "Arrived at destination". The action button will then change its name to "Return".
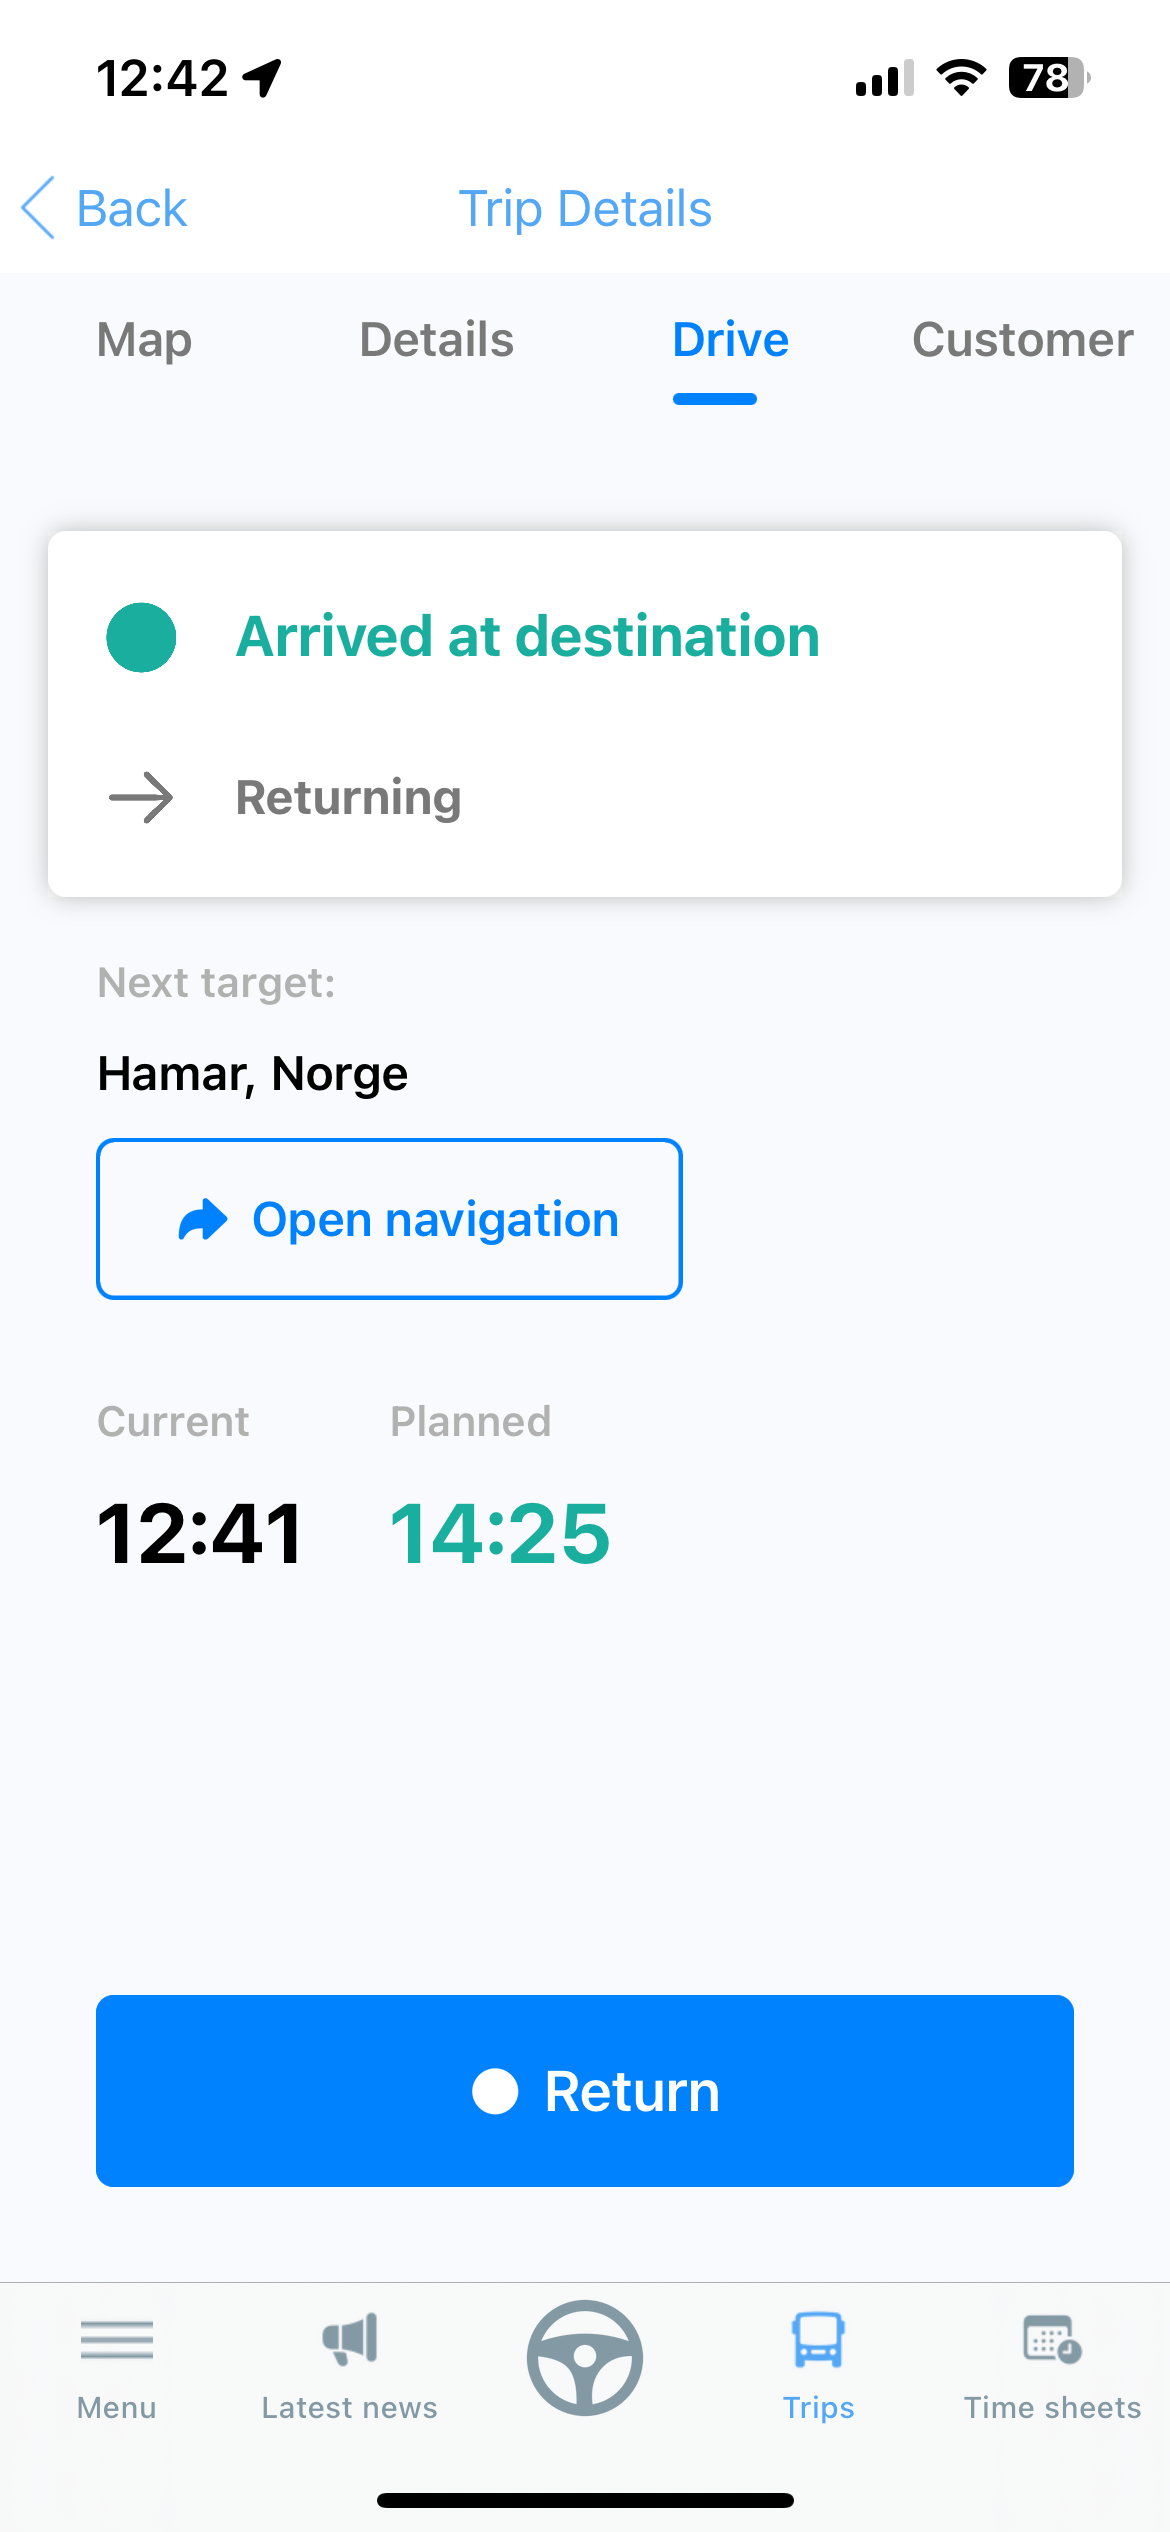
4.6 Return to garage
When the customer has been delivered at their destination, it is time to return to the start.
You start the next stage by clicking "Return"
Note: If you are not going back to the garage, but want to leave the bus at your destination or somewhere other than where you started, you must also click on "Return". This action button activates the return leg up to where the bus is to be parked. If you are going straight on to another mission, click through until the trip is completed before starting the next trip.
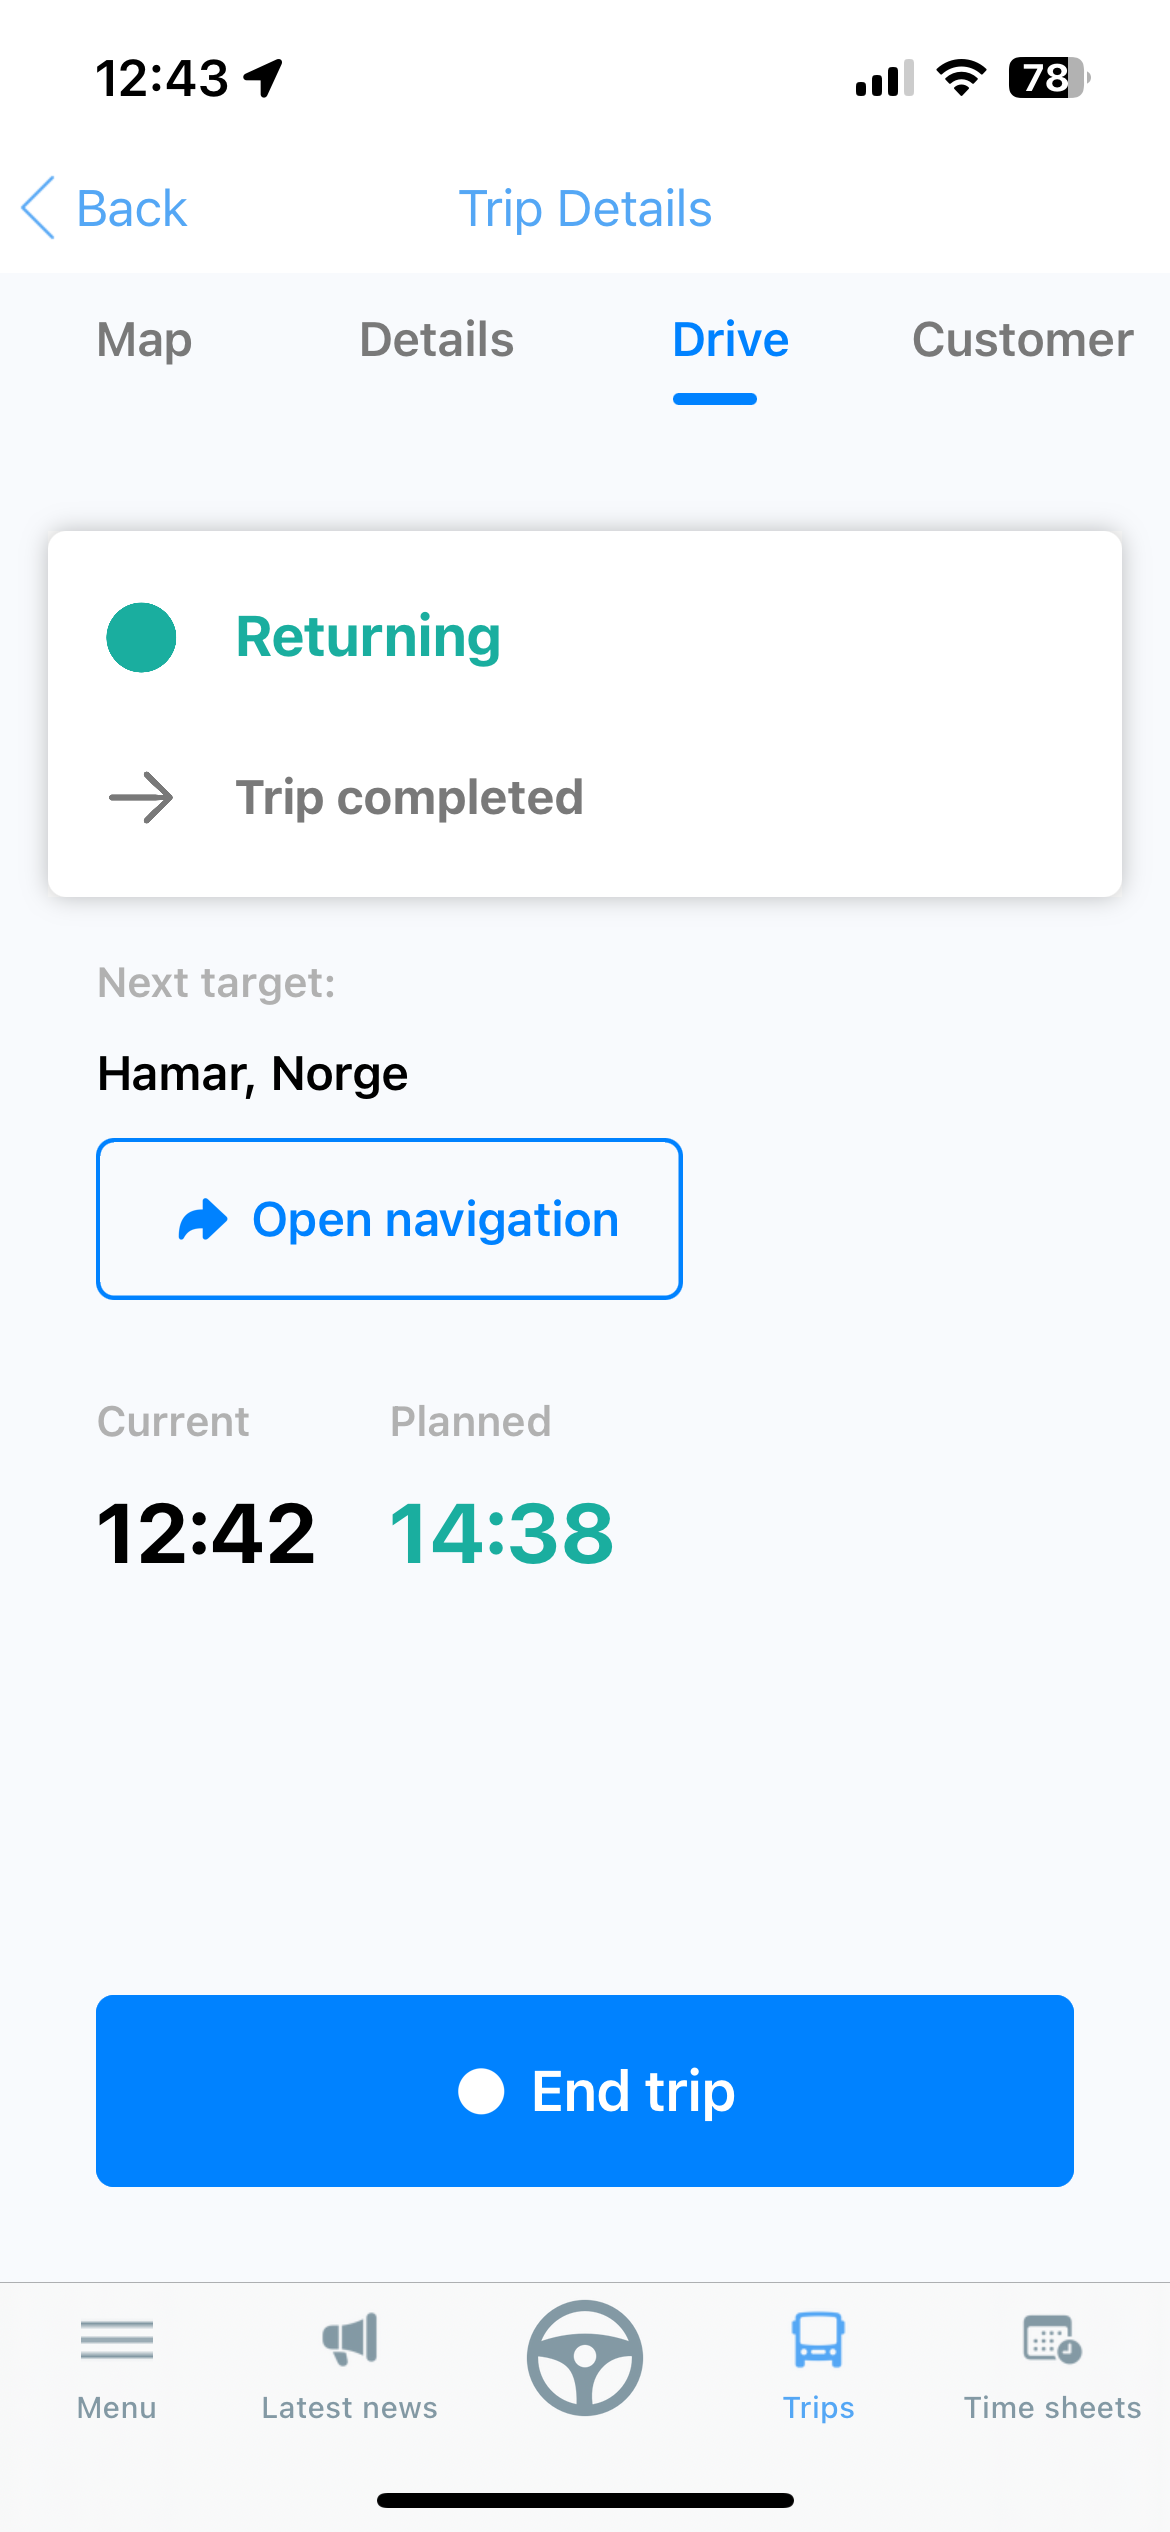
4.7 End trip
When you have arrived at the place where the bus is to be parked, click on "End trip".
5. Time management
5.1 Time deviation
When the trip is completed, the app automatically jumps to the page "Time sheets". If it does not, you can go to this page by clicking "Time sheets" at the bottom of the menu bar.
Here you get an overview of your completed assignments. Each mission has a status icon next to it. All green statuses mean that the hours have been recorded and that the mission went as planned.

If there is a red warning triangle next to an assignment, it means that the hours spent on the assignment deviate to a greater extent from what was planned. It is important to correct this. If this is the case with you, you must click on the red warning triangle
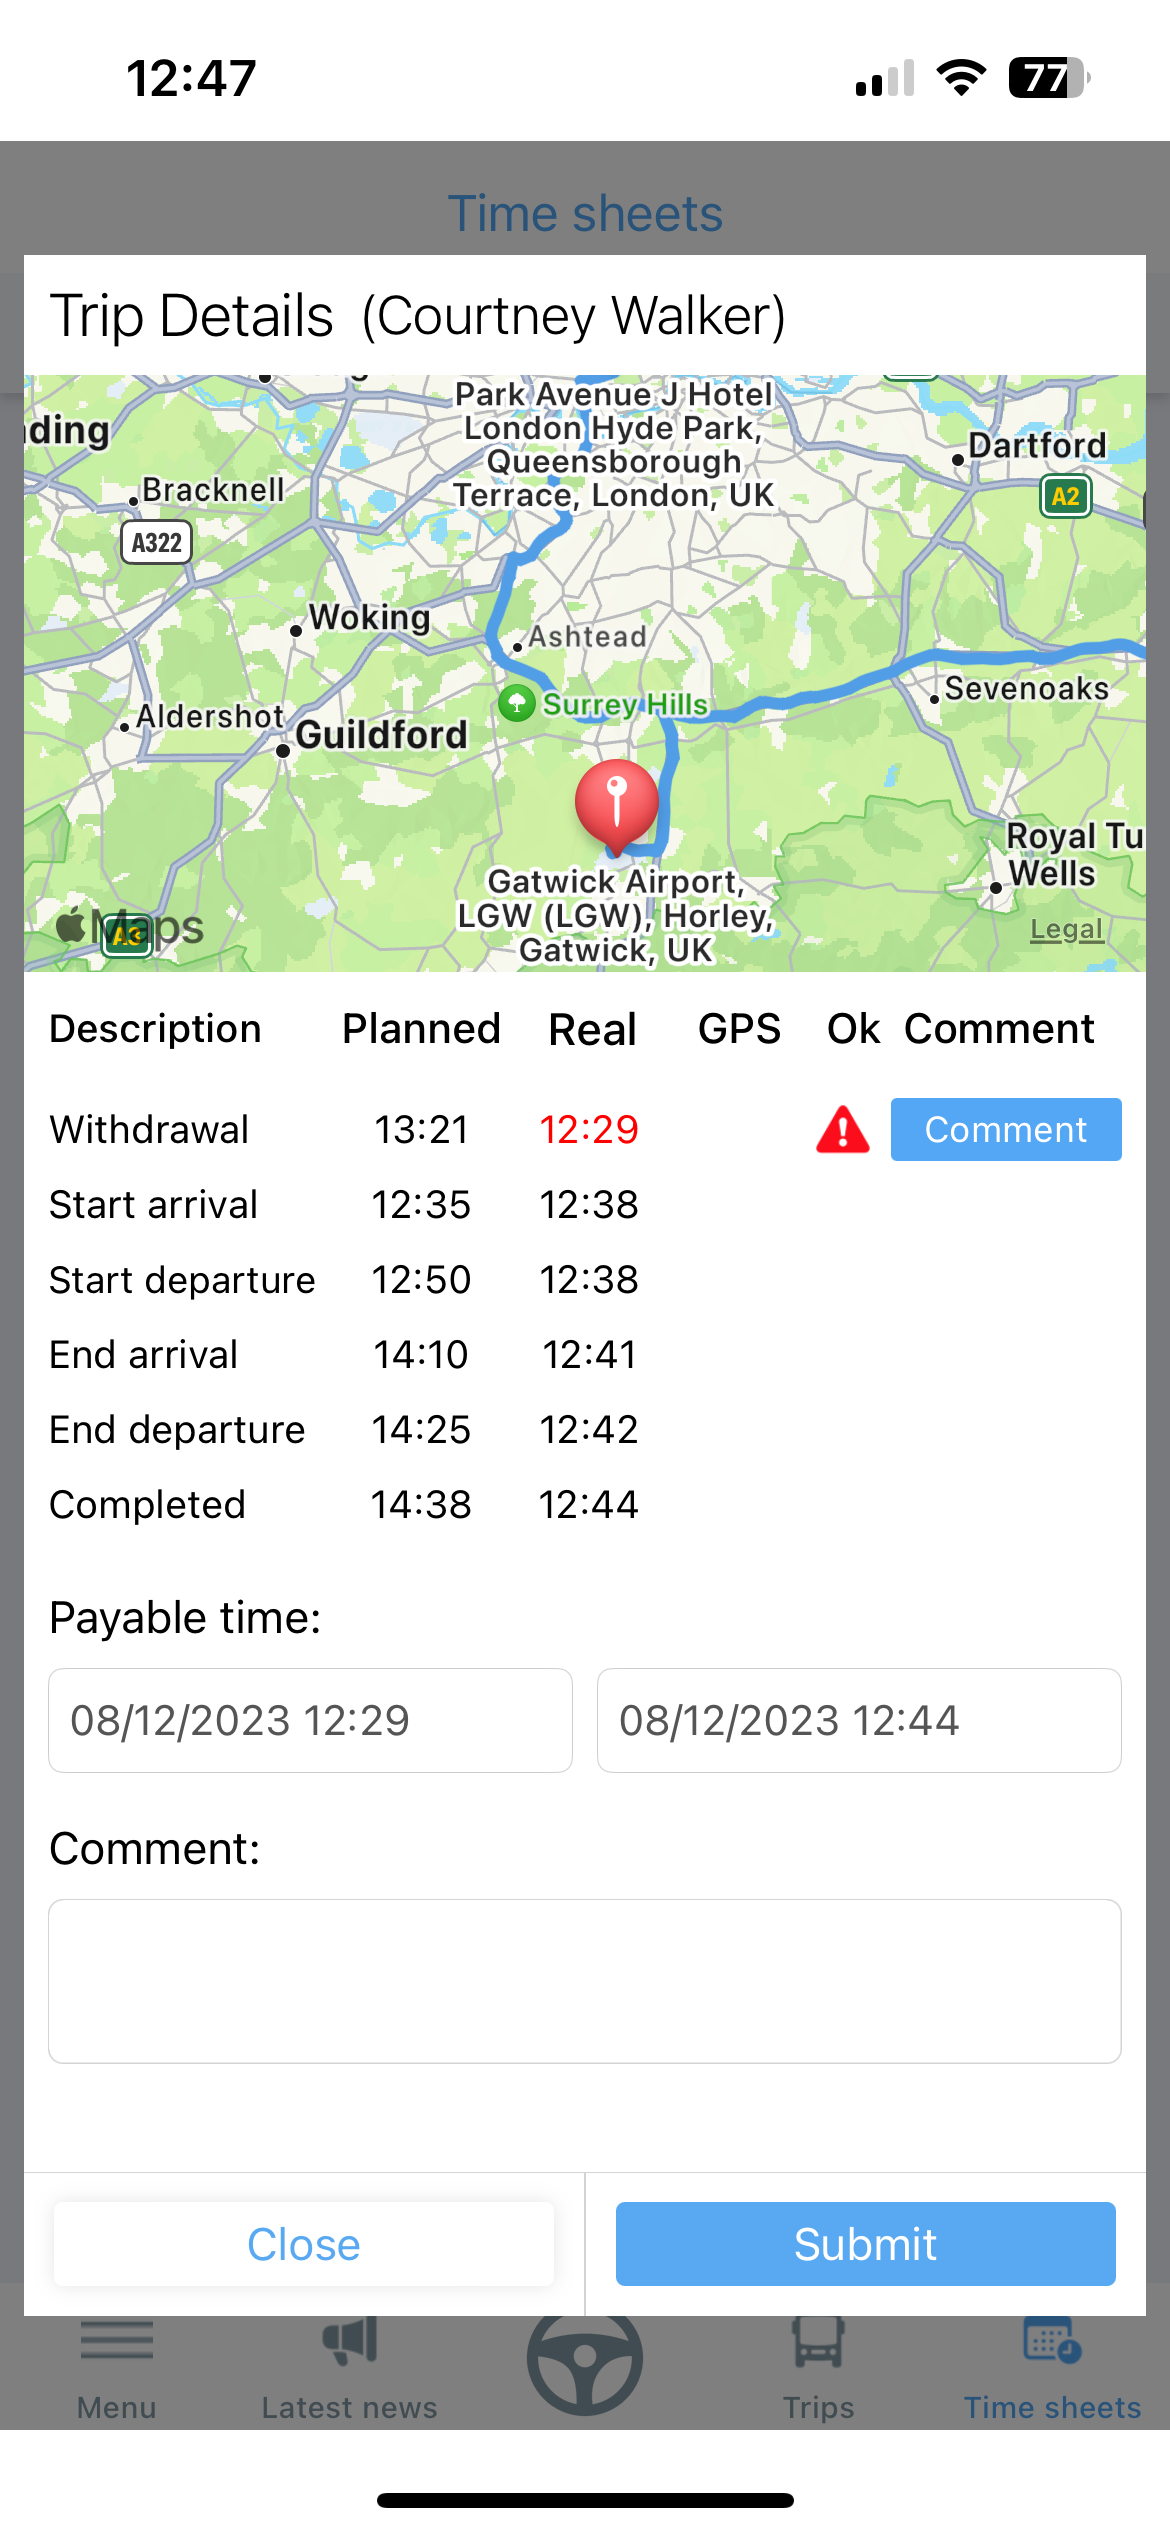
5.2 Submit the reason for the time deviation
You will get a window showing all checkpoints during the relevant mission.
The times that deviate from the planned time will have a red warning triangle. In the cases that apply, it is important that you enter a comment by clicking on the blue button next to the checkpoint in question.
You will then get a window where you can choose a reason for the time difference.
- Traffic - If traffic was the cause of the deviation
- Customer fault - If an error by the customer was the cause of the time difference
- Bad planning - If, for example, it was planned for a short time before or after a checkpoint
- Other - If there are other reasons
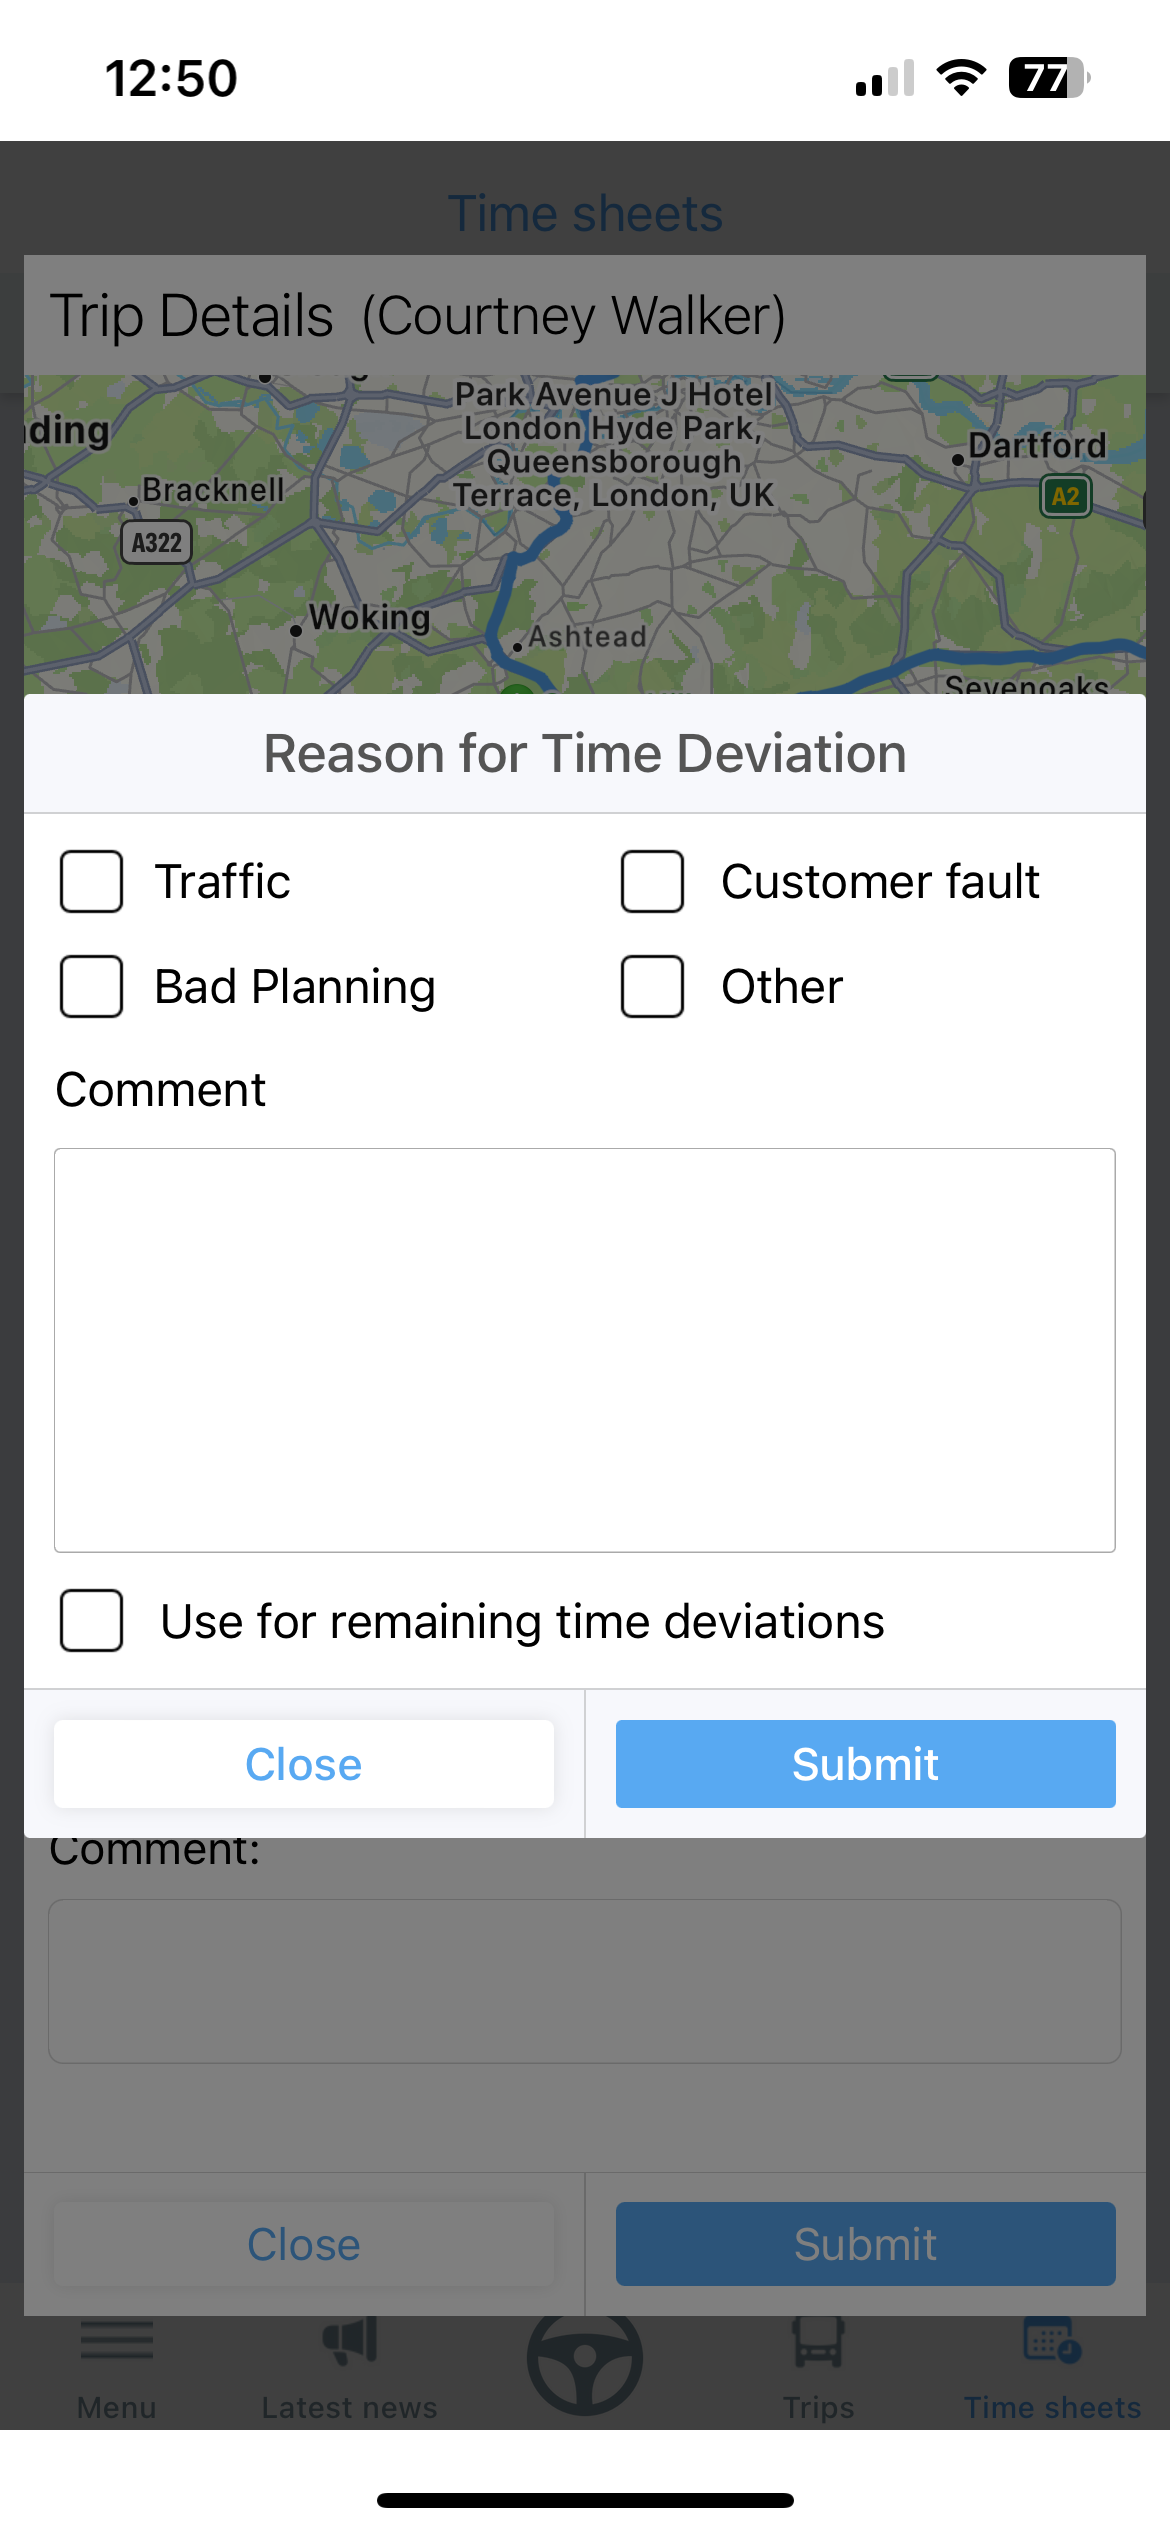
When you have chosen a reason, you must enter a short comment by clicking on the comment field.
If there are several deviations with the same reason, you can also tick the box for "Use for remaining time deviations"
Submit your reason and comment by clicking the "Submit" button in the bottom right corner.
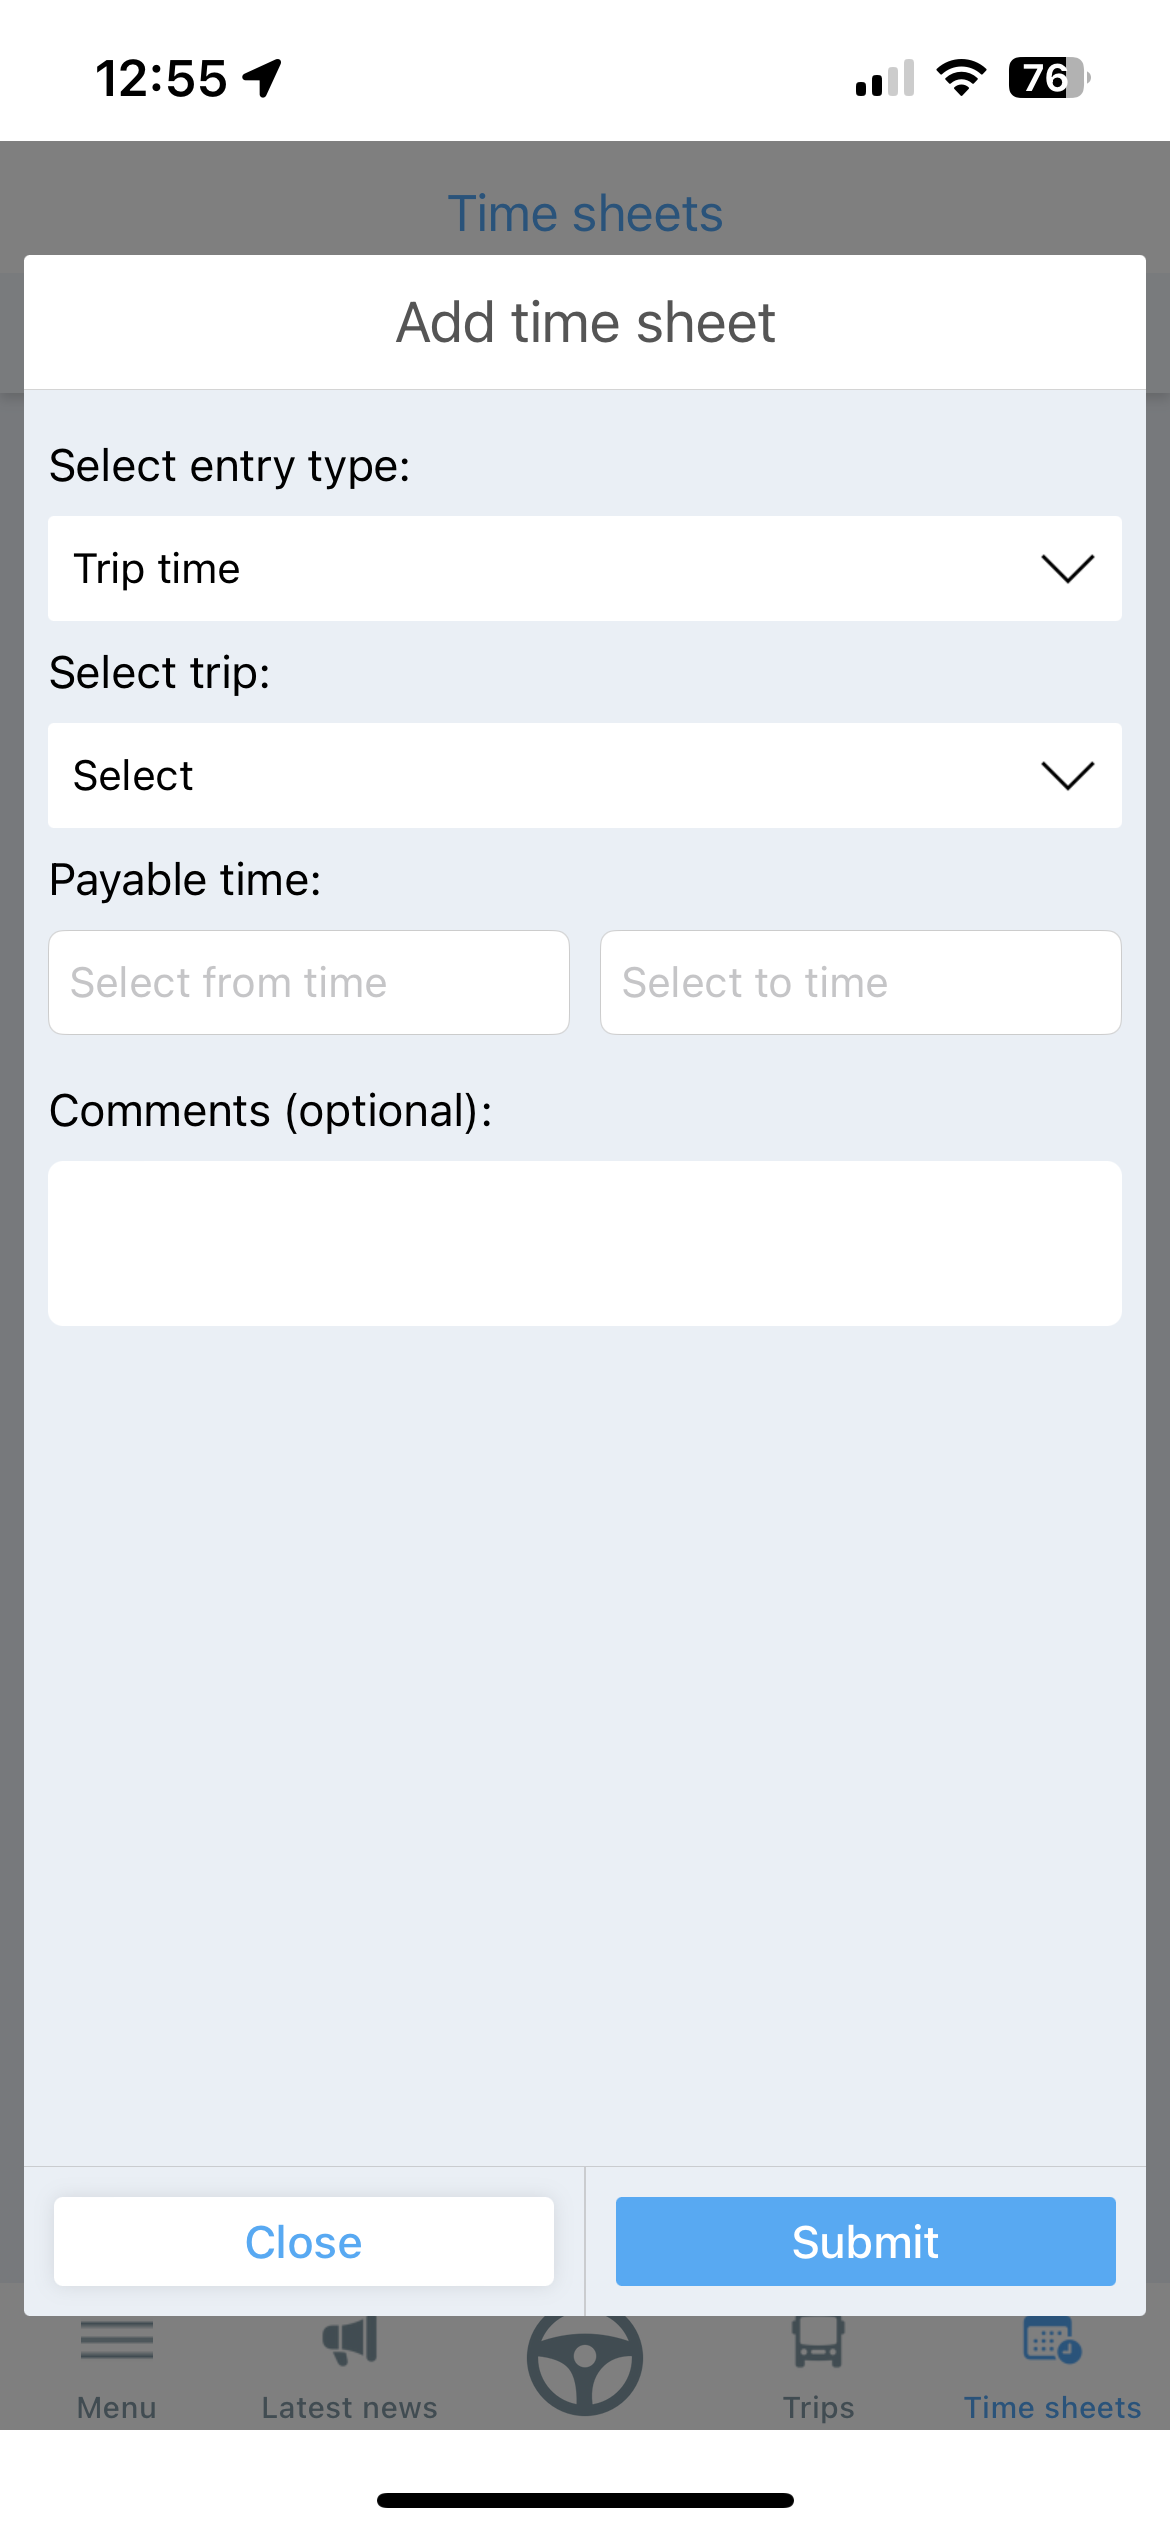
5.3 Register extra hours
If some hours are missing from an assignment, or you have done some other work, you can click on "Create new" to register hours

You will get a window where you can choose the type of work, duration and date. Press "Submit" to register the hours.
Note: You will receive an error message if some of your trips overlap. If, for example, you have completed a trip and are then going to do maintenance work, you must add at least one minute in between.
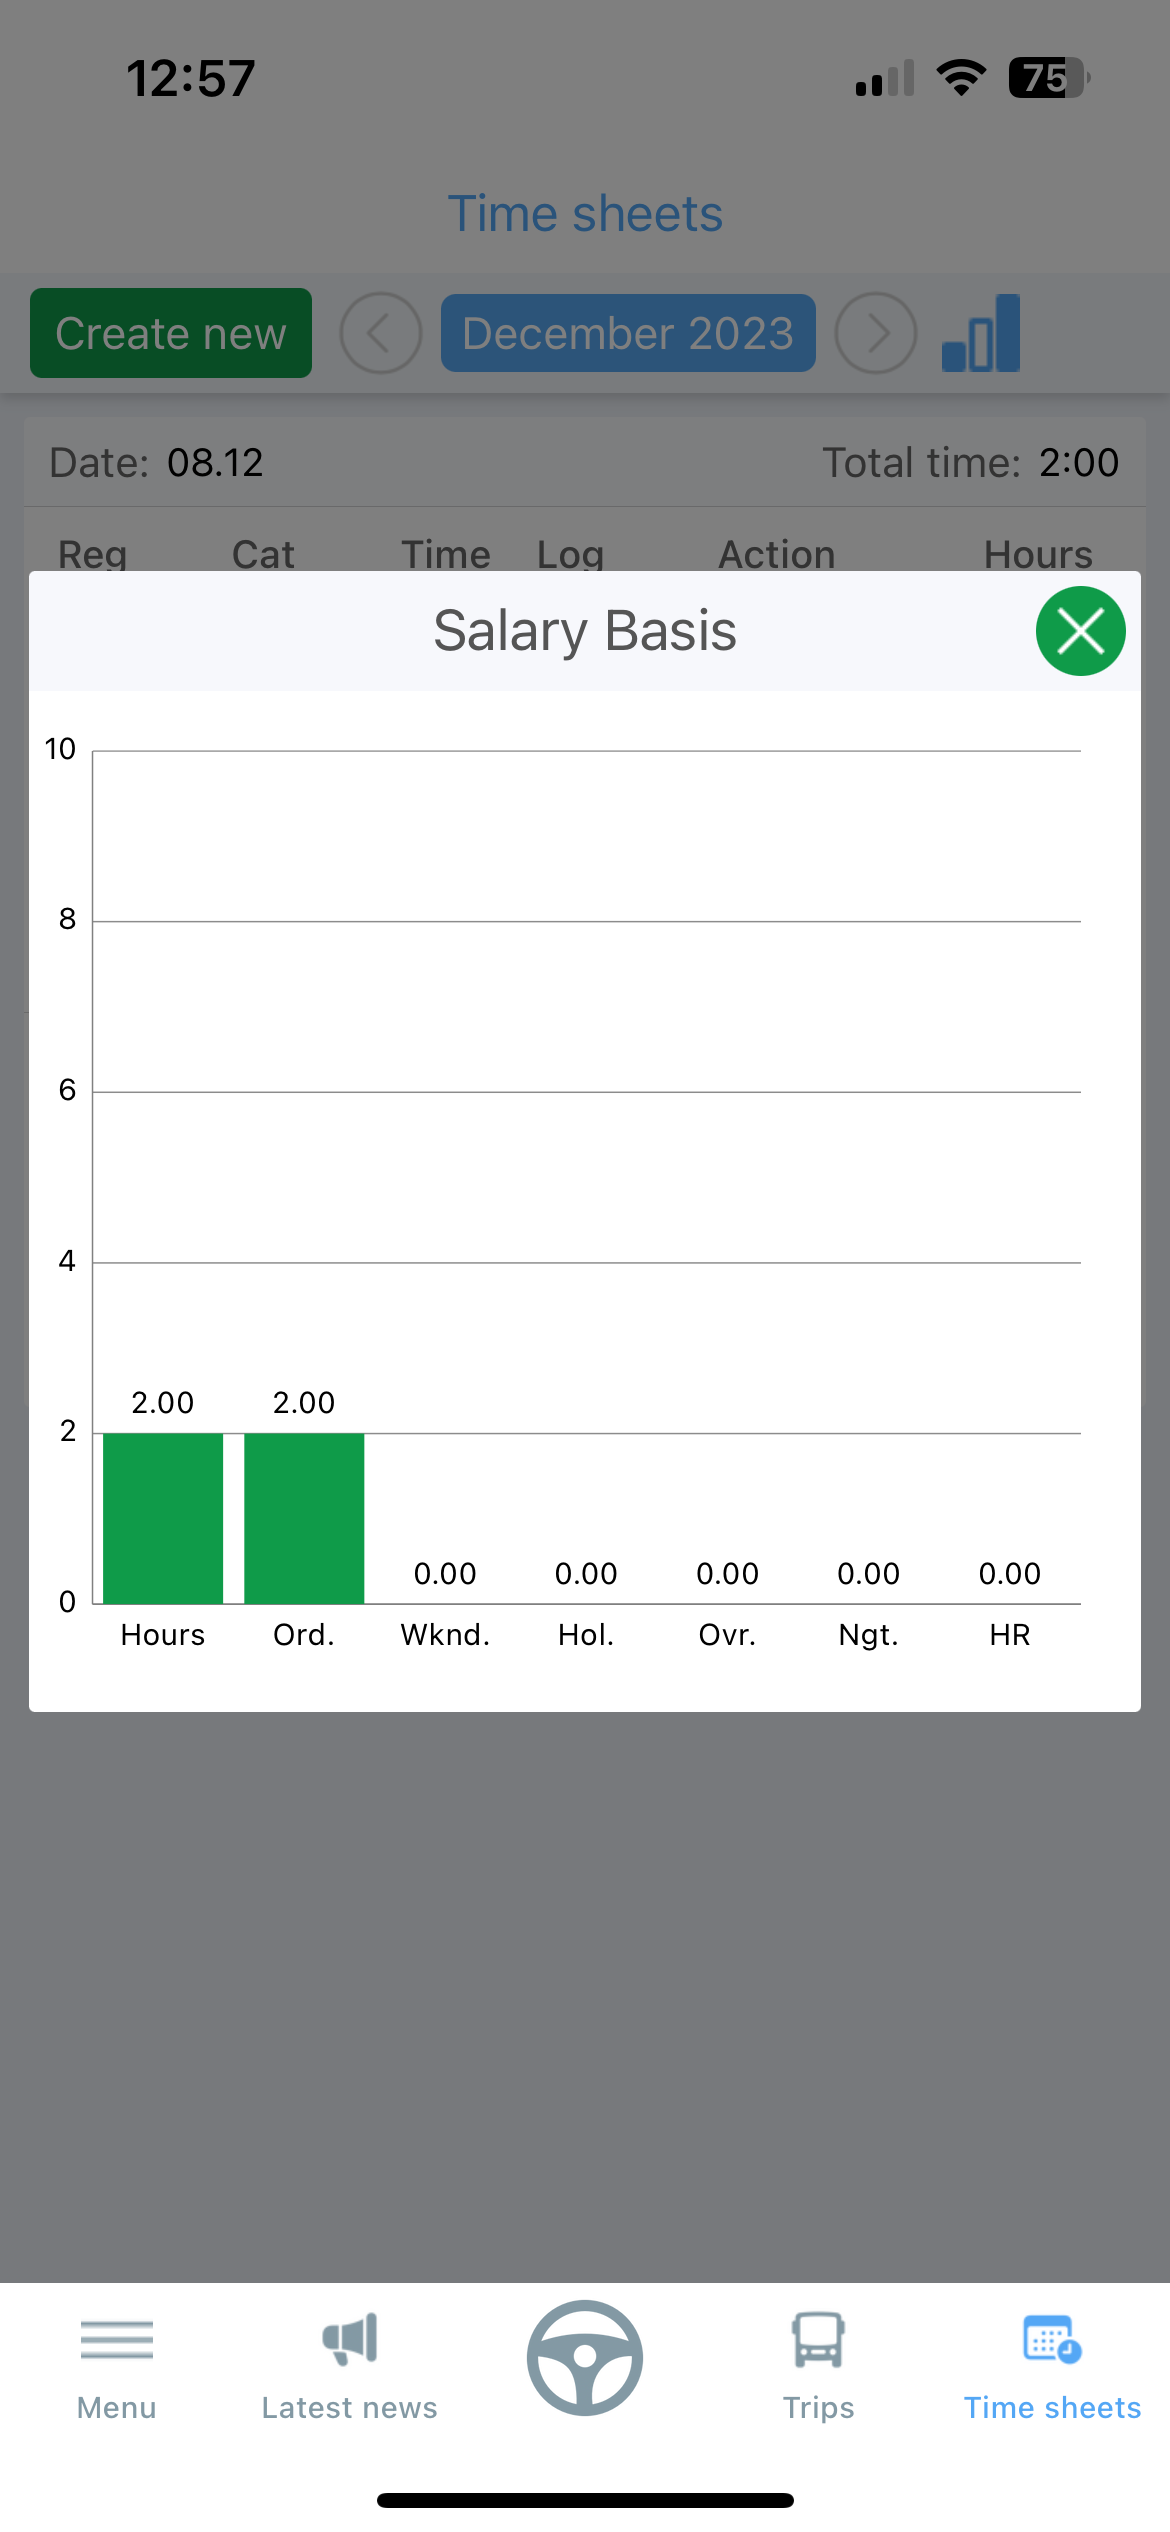
5.4 See timetable
You can view your recorded hours at any time by clicking on the "graph icon" at the top right
The column on the left shows total registered hours in the period, while the remaining columns show the types of hours registered.
6. Deviations / Undesirable events
It is very important that deviations are recorded. A deviation can be anything from poor cleaning to serious errors or unwanted incidents. In all assignments there is a button called "Report incident"
You must choose a category for the deviation and write a description. The trip ID and date are entered automatically when you register a deviation from the assignment page.
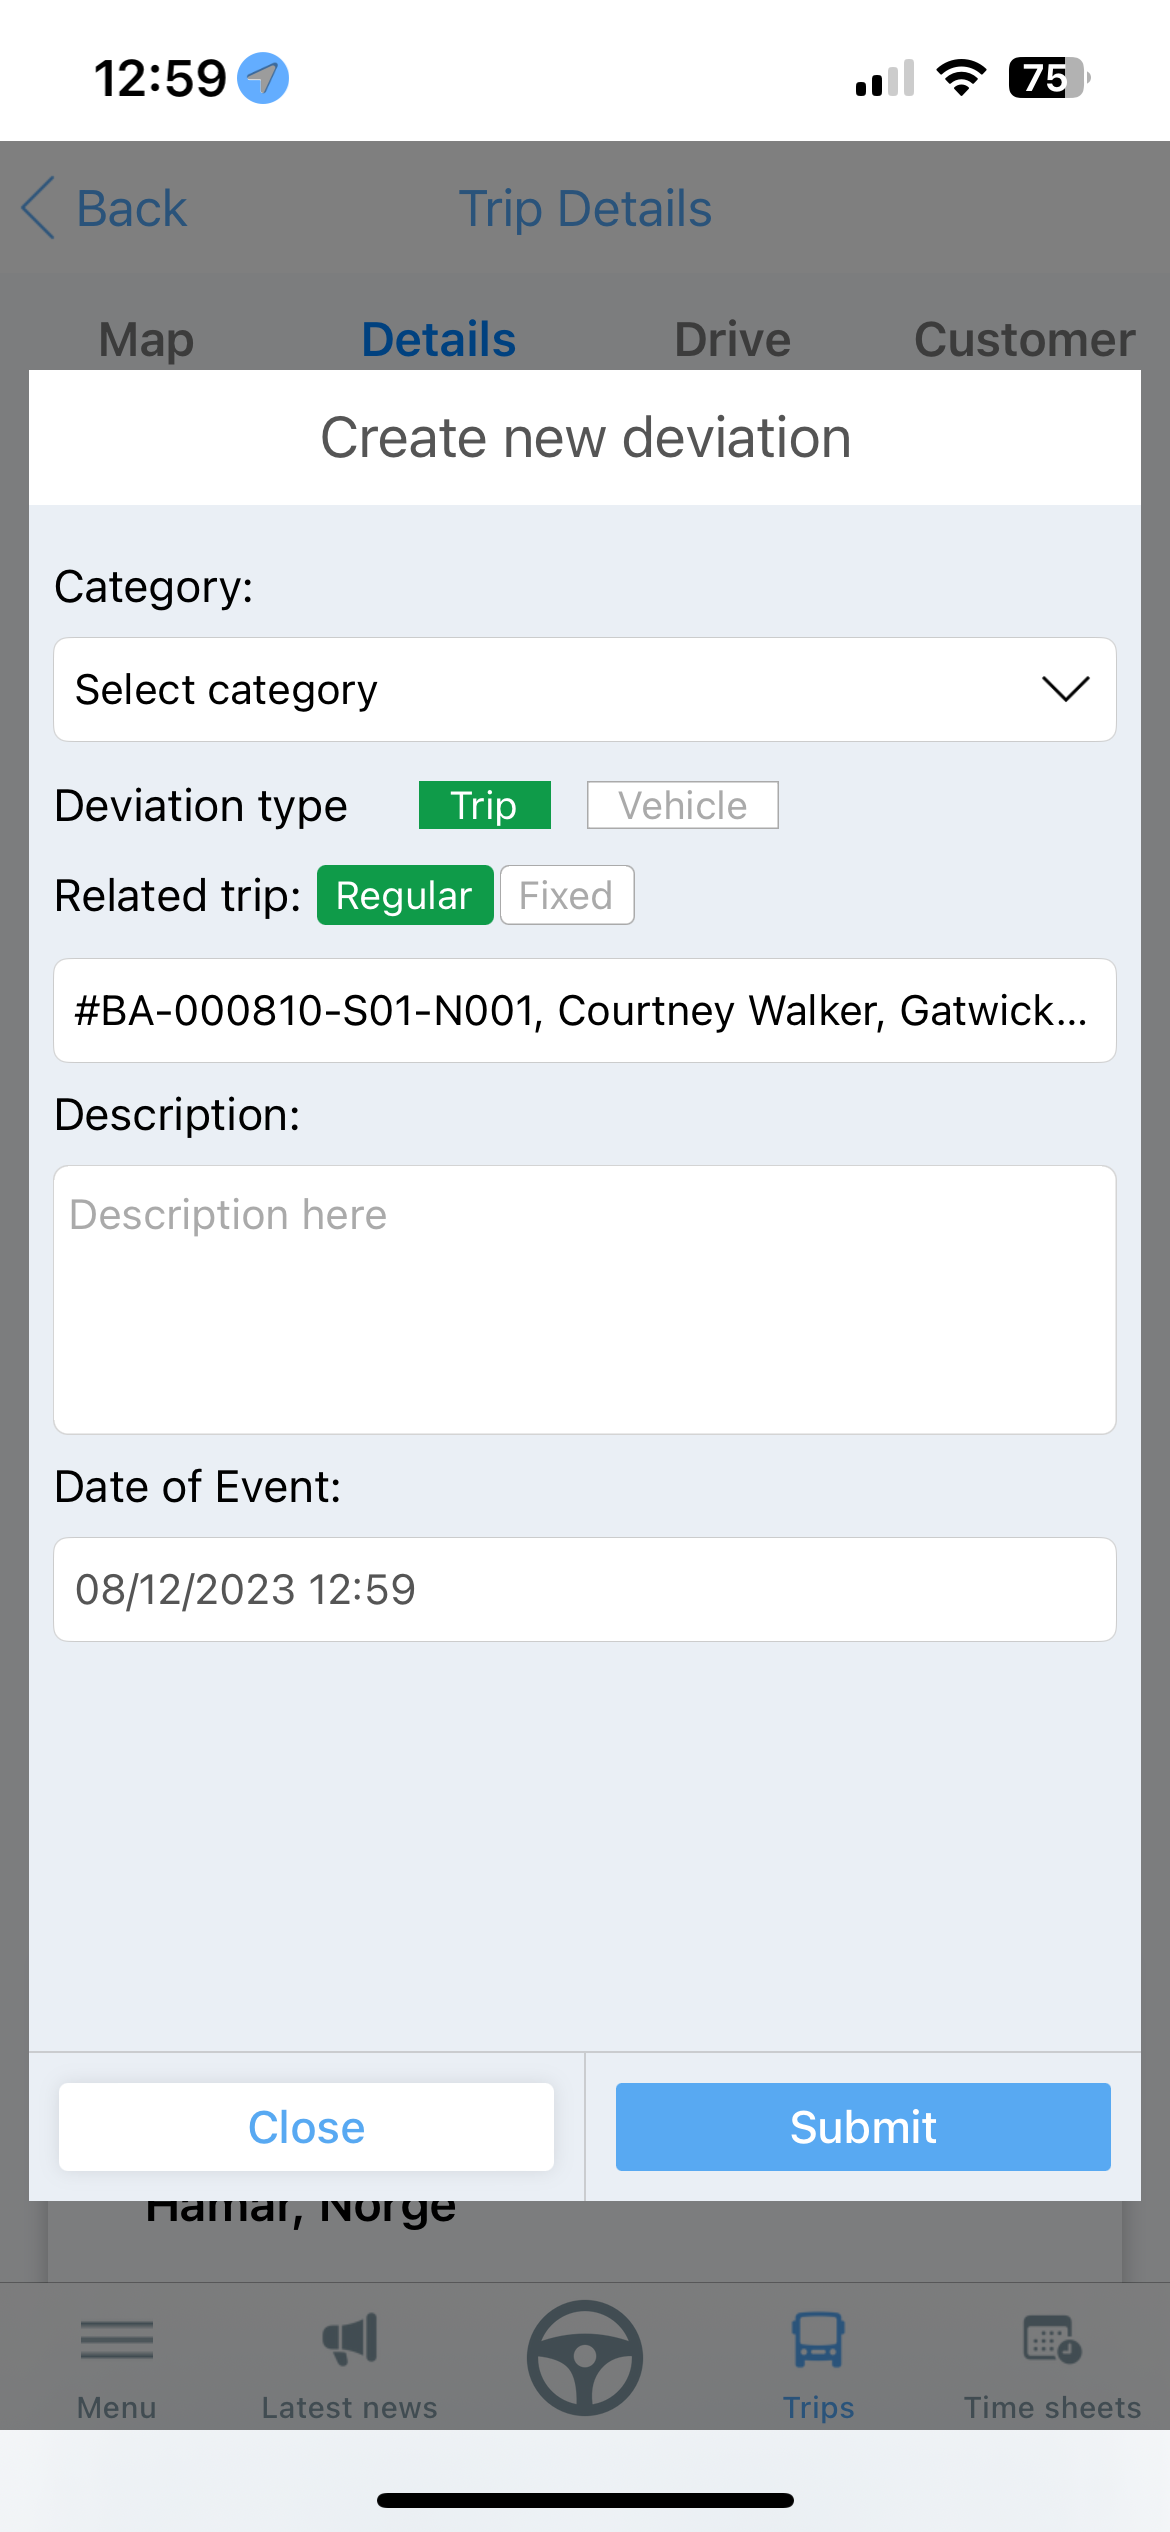
When you have entered information that is comprehensive; press "Submit" to register the deviation.
You can enter as many deviations as you want